Twenty-one days. That is all it takes to turn a fertile egg into a cheeping chick - provided the temperature, humidity, and turning schedule stay on track every single day. Get any one of those three badly wrong and the hatch fails. Get all three right and a healthy clutch is almost inevitable. This guide walks you through every phase of the process, day by day, with the numbers you need and the mistakes most beginners make at each stage.
If you are still deciding whether to use a broody hen or an incubator, that decision is the starting point of raising chicks from hatch to feathering. This article covers the incubator route from egg selection all the way to a dry, fluffy chick ready for the brooder.
Before you set eggs: incubator setup and egg selection
Run your incubator empty for at least 24 hours before the eggs go in. That gives you time to stabilize temperature and fix any hot or cold spots before anything is at stake.
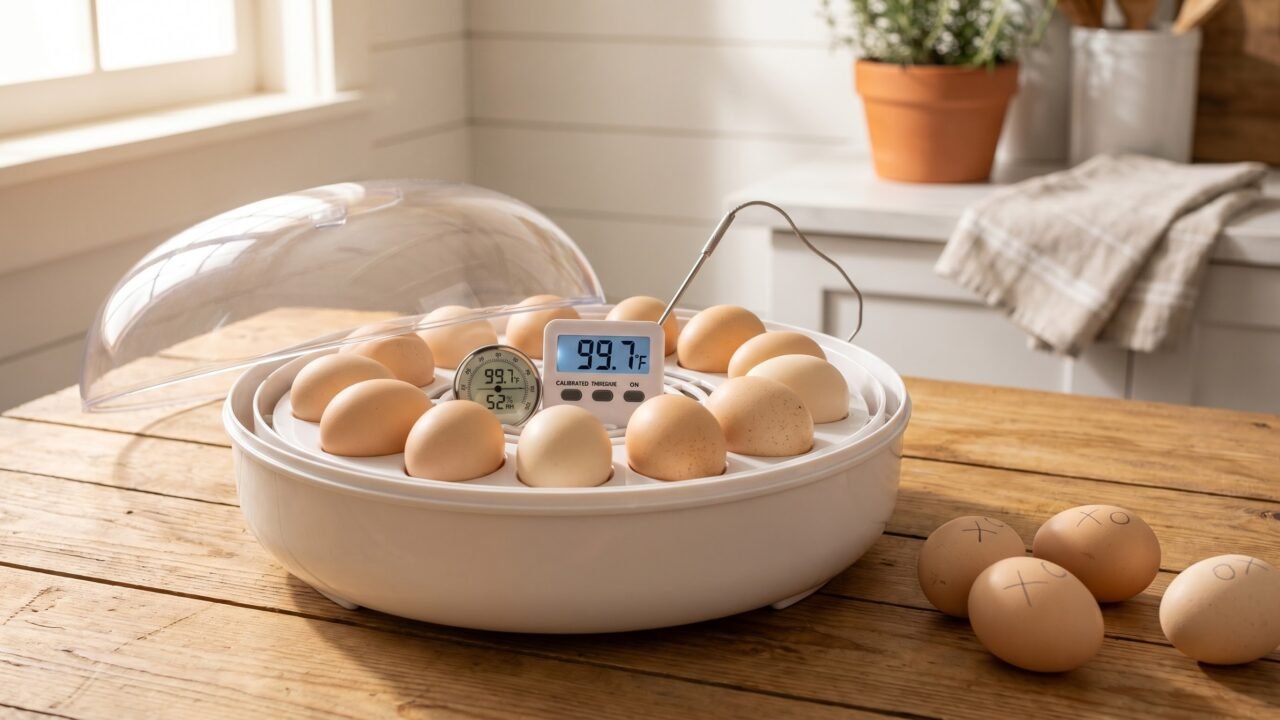
Temperature targets differ by incubator type. Mississippi State University Extension is clear on this: a forced-air incubator (with a fan) should run at 99-100°F, while a still-air incubator (no fan) should read 102°F measured at the top of the eggs. The difference exists because circulating air warms all points around the egg shell evenly, while still air is hotter at the top and cooler at the bottom. The 102°F setting compensates for that gradient so the average across the egg stays right. Do not place your thermometer at the wrong height in a still-air unit or you will be reading the wrong zone entirely.
Overheating is the fastest way to lose a hatch. According to Mississippi State Extension, temperatures only one or two degrees above the recommended level can kill developing chicks within 15-30 minutes, depending on the stage of development. A degree or two too low for a few hours is survivable; that same margin too high is not.
Humidity during the setting phase (days 1-18) is one area where university sources differ slightly. Mississippi State Extension lists 58-60% relative humidity as the target, while University of Connecticut Extension recommends 60-65%. Both are grounded in the same underlying principle: you want the egg to lose about 12-13% of its original weight in water vapor by day 18, which grows the air cell to the right size for the chick to pip into. The humidity-disagreement section later in this article explains what is behind that range and how to calibrate for your setup. If your incubator runs drier than your area's target, add a small sponge or widen the water tray. If it consistently reads wetter, reduce the water surface area.
Egg selection matters before anything else. Only set clean, uncracked eggs with a normal shape. Misshapen eggs, thin shells, or eggs with cracks rarely hatch and can contaminate the entire clutch if they explode. Store fertile hatching eggs at 55-60°F and 70% humidity for no more than seven days before setting - University of Illinois Extension recommends this maximum, and Mississippi State Extension agrees that storage beyond one week increases hatching failures. If eggs have been refrigerated, they are generally not viable for hatching.
Place eggs in the incubator with the large end slightly elevated or pointing straight up - large end up, never the small end (Mississippi State Extension). The air cell sits at the large end, and the chick needs that orientation to pip correctly on day 20-21.
Days 1-17: turning, temperature, and the first candle
The first 17 days follow a steady routine: maintain heat, maintain humidity, and turn eggs regularly.
Turning prevents the embryo from sticking to the inner shell membrane. University of Illinois Extension states that if eggs are never turned, the embryo dies around day 11. Mississippi State Extension recommends turning at least 4-6 times per day. The key rule: always turn an odd number of times daily (3, 5, or 7) so the egg does not rest on the same side two nights in a row. Mark a pencil X on one side and O on the other so you can see at a glance whether every egg has been flipped. Stop turning three days before the expected hatch - that means day 18 for chickens. Automatic egg turners handle this for you and are worth the investment if you plan to hatch regularly.
Keep the ventilation holes open gradually wider as incubation progresses. The growing embryo needs increasing oxygen, and partially blocked vents are a common oversight that hurts late-stage development.
Candling on day 7
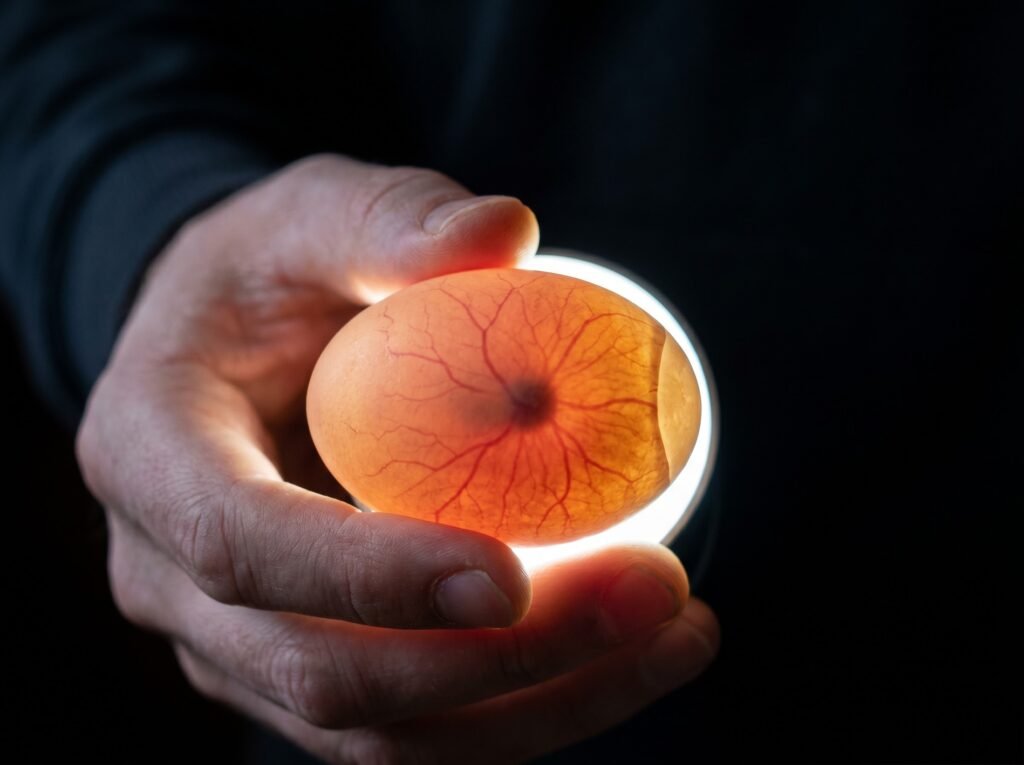
Candling lets you see inside the egg by shining a bright light through the shell in a dark room. University of Illinois Extension says you can candle any time from about day 5 onward, but day 7 is the most useful first check - development is visible enough to read reliably without being so advanced that an infertile egg could be confused for a late developer.
On day 7, a developing egg shows a dark spider-web of blood vessels radiating from a central dark spot (the embryo). An infertile egg looks clear inside. An egg where the embryo died early shows a faint "blood ring" - a circular red mark with no radiating vessels. Pull any clear or blood-ring eggs immediately; a rotting egg can explode and contaminate everything around it.
Keep sessions short. University of Illinois Extension recommends no more than 5-7 eggs per candle session, and no more than 5-10 minutes total time outside the incubator. On dark-shelled eggs (Marans, Welsummers), use a bright LED candler held flush to the shell and look for the dark mass and air cell contrast rather than vessel detail.
Candling on day 14
The day 14 candle is a progress check and a second cull. By this point a developing embryo nearly fills the egg - you will see a large dark mass with a clear air cell at the large end. According to embryology data from the extension.org poultry network, day 14 is also when the embryo's eyes close and it begins to turn its head toward the air cell in preparation for pipping. Eggs that still look completely clear on day 14 can be discarded. If you see a dark mass but are unsure, wait until day 17 for a final candle before lockdown rather than discarding a viable egg.
Reading what you see at each stage - clear eggs, blood rings, viable embryos at days 7 and 14 - is covered with reference photos in the candling guide.
Day 18: lockdown

Day 18 is the most important transition in the whole process. Three things change at once:
- Stop turning. The chick is now orienting its head toward the air cell to pip. Continued turning disrupts that positioning.
- Raise humidity. Mississippi State Extension recommends 65% or higher for the final three days. University of Connecticut Extension targets 70%. Aim for the higher end if your hygrometer is accurate. Add a wet sponge or expand your water tray to bring humidity up quickly.
- Close the incubator and leave it closed. Every time you open the lid during lockdown, humidity drops rapidly. A dry membrane can tighten around the chick inside an unhatched egg - a condition sometimes called shrink-wrapping - and prevent it from completing the hatch. Do not open or move the incubator at all during the last 3 days. (University of Connecticut Extension)
If you have an automatic turner, remove it on day 18 and lay the eggs on their sides on the mesh floor. Make sure they cannot roll into each other. Open the air vents to near-fully open - the chicks will need maximum oxygen as they pip and hatch.
Temperature and humidity calibration for each phase of the hatch is covered next in the hatching temperature and humidity guide.
Days 19-21: the hatch
Hatching is not an instant event. It unfolds over roughly 24-48 hours from the first pip to the last chick drying out.
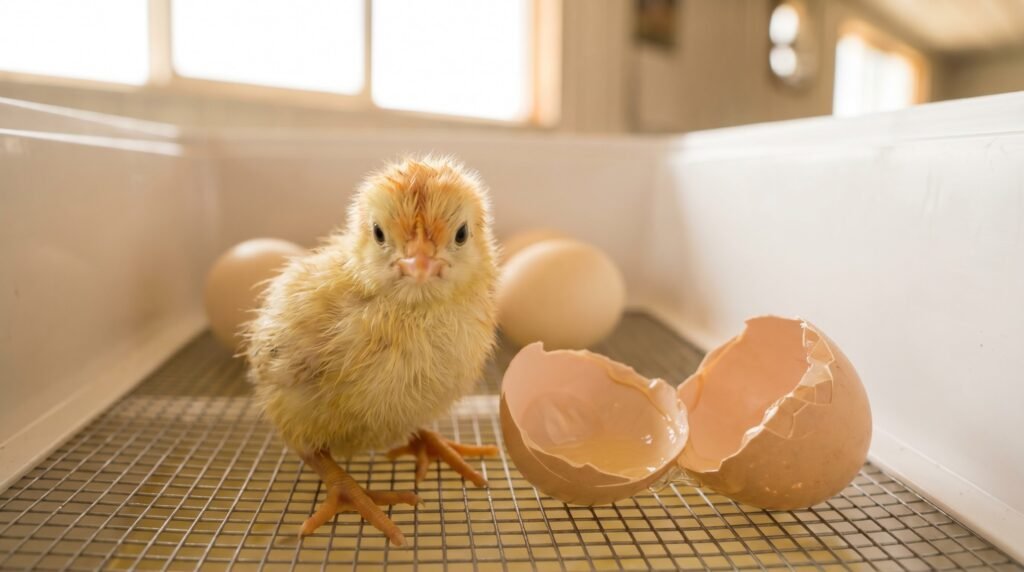
Around day 20, most chicks complete the internal pip: they break through the inner membrane into the air cell and begin breathing air for the first time. You may hear faint chirping from inside the eggs before you see any crack. On day 21, the external pip appears - a small star-shaped crack or hole, usually at the large end of the egg. University of Connecticut Extension notes that from external pip, the hatch usually takes 10-20 hours as the chick zips around the shell and pushes free.
Do not help a chick hatch. A chick that takes longer than average is often still absorbing the yolk sac. Pulling a shell away prematurely can cause fatal bleeding. The rule, backed by Purina Animal Nutrition's hatching guide: "Let the chick hatch on its own. Do not attempt to help." The only exception, and it requires experience to judge, is a chick that has clearly stopped making progress for 24-plus hours after external pip with humidity confirmed at lockdown levels - even then, consult a poultry vet or experienced hatcher before intervening.
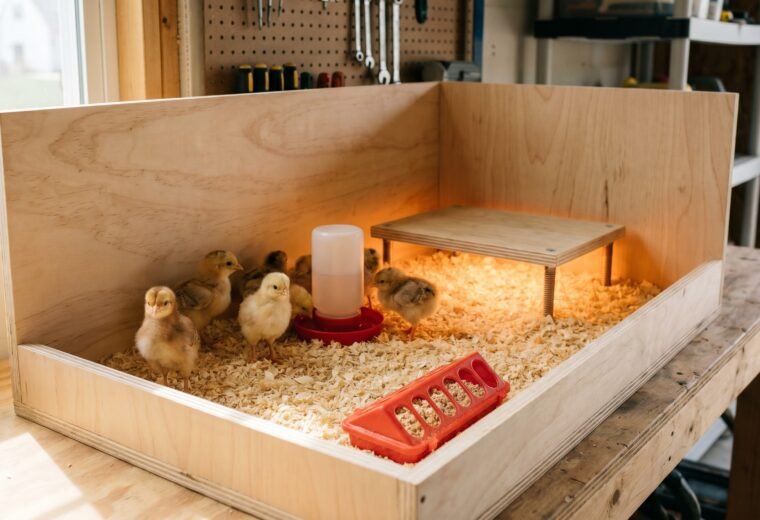
Leave hatched chicks in the incubator until they are fully dry and fluffy, even if that takes 24-36 hours. A wet chick in a brooder chills fast. Once they are dry, move them to a brooder set to 95°F for the first week. Do not rush this step.
If eggs have not hatched by day 22 or 23, give them another day or two before giving up - some breeds run slightly long, and a thermometer that reads slightly cool can push the hatch a day or more past day 21.
When only some eggs hatch and others do not pip by day 23: this is one of the most common first-hatch scenarios and does not necessarily mean those remaining eggs failed early. Before discarding them, do a terminal candle check in a dark room. A late-quitter that died in the shell will show a large dark mass filling the egg but no movement and no airspace at the small end. An egg that is still alive may show subtle movement or a clear air cell boundary at the large end. If you are uncertain, the float test gives additional information: lower the egg gently into a bowl of warm water (99°F). An egg with a live chick will often bob and wiggle noticeably; a dead or undeveloped egg will float or sit still. Do not submerge the egg for more than a few seconds, and return it to the incubator immediately if you choose to keep it. If you smell sulfur or the egg feels unusually light and sloshy, discard it away from the others to avoid contamination. By day 25 with no pipping, the chance of a live chick is very low and continuing the hatch is usually not worthwhile.
Incubation quick-reference: settings, day-by-day milestones, and what can go wrong
The table below consolidates every phase into one place. Values are drawn from Mississippi State University Extension and University of Illinois Extension guidance.
| Phase | Days | Temp (forced-air) | Temp (still-air) | Humidity | Turn? | Key milestone | Top beginner failure |
|---|---|---|---|---|---|---|---|
| Setting | 1 | 99-100°F | 102°F | 58-60% | Yes | Eggs placed large-end up | Not pre-warming incubator 24h before setting |
| Early development | 2-6 | 99-100°F | 102°F | 58-60% | Yes, 4-6x/day | Heart forms day 2; limb buds day 3 | Turning fewer than 3 times/day |
| First candle | 7 | 99-100°F | 102°F | 58-60% | Yes | Blood vessels visible; remove clear/blood-ring eggs | Leaving eggs out of incubator more than 10 min |
| Mid development | 8-13 | 99-100°F | 102°F | 58-60% | Yes, 4-6x/day | Beak and toenails forming by days 10-11; embryo clearly defined; feather tracts appear | Inconsistent turning schedule |
| Second candle | 14 | 99-100°F | 102°F | 58-60% | Yes | Embryo fills egg; eyes close; head turns toward air cell | Discarding late-developing eggs too early |
| Pre-lockdown | 15-17 | 99-100°F | 102°F | 58-60% | Yes | Feather tracts developing; embryo increasingly fills egg | Opening incubator unnecessarily |
| Lockdown | 18 | 99-100°F | 102°F | 65-70% | STOP | Remove turner; lay eggs on sides; raise humidity | Forgetting to raise humidity at lockdown |
| Internal pip | 19-20 | 99-100°F | 102°F | 65-70% | No | Yolk sac enters body (day 19); chick breaks into air cell; may hear chirping | Opening lid and dropping humidity |
| External pip and hatch | 21 | 99-100°F | 102°F | 65-70% | No | Chick cracks shell; zips; pushes free (10-20 hours) | Helping a chick that does not need help |
| Post-hatch | 21-23 | 95°F (for chicks) | - | 65-70% | No | Chick dries and fluffs up; move to brooder when dry | Moving wet chicks to brooder too soon |
Humidity: where the sources disagree and what to do about it
If you search incubation humidity, you will find a range of numbers that seem to contradict each other. They do not - they reflect different measurement methods and different tolerances built into different incubator designs. Here is how to read them.
Mississippi State Extension targets 58-60% relative humidity for days 1-18. University of Connecticut Extension recommends 60-65%. The Purina hatching guide lists 50-55% as a reasonable starting point. All three figures are defensible because what matters is not the percentage itself but the amount of water the egg loses over 18 days. A well-calibrated incubator at 50% in a humid climate may produce the same egg weight loss as one running 60% in an arid region.
The practical approach: start in the 58-65% range for days 1-17, using MSU's 58-60% as a baseline and nudging toward 65% if you are in an arid climate or your incubator runs dry. Candle at day 7 and day 14 to check air cell size - it should grow noticeably between the two checks, confirming the egg is losing weight at the right rate. Then raise to 65-70% at lockdown. If your hatch rates are poor and chicks seem stuck in the shell, your lockdown humidity is likely too low. If chicks hatch early and seem waterlogged, your incubation humidity is too high. Adjust the next batch based on what you observe.
For a deeper look at what the temperature and humidity numbers mean at each stage and how to calibrate your equipment, see our hatching temperature and humidity guide.
The dos and don'ts that beginners learn the hard way
Most first-hatch failures trace back to a short list of avoidable errors.
Do pre-run and stabilize your incubator for 24 hours before setting eggs. Temperature swings in the first few hours of a fresh setup are common, and you want those swings happening with no eggs inside.
Do mark your eggs with an X and O before setting. It costs ten seconds and eliminates the guesswork of whether every egg has been turned.
Do candle on day 7 and remove clear or blood-ring eggs promptly. A rotting egg risks contaminating the rest of the clutch.
Do open ventilation vents progressively as incubation advances. Embryos consume increasing amounts of oxygen as they grow, and a sealed incubator in the final days can starve late-stage chicks.
Don't open the incubator after day 18. Every lid-lift during lockdown crashes humidity and risks shrink-wrapping chicks inside their shells.
Don't set eggs that are older than seven days from lay, cracked, misshapen, or washed. Washing removes the egg's natural bloom, which seals the pores. Without the bloom, pathogens enter freely and hatch rates drop sharply.
Don't trust a single thermometer. Cheap dial thermometers drift. Use a calibrated digital thermometer with a probe, verify it against a second thermometer at least once, and position the probe at egg level.
Don't help a pipping chick unless you are certain something has gone wrong and you have experience making that call. The exertion of breaking free helps build the muscle strength chicks need to stand and walk.
Don't panic if day 21 comes and goes with no hatch. A thermometer reading half a degree low can push the hatch to day 22 or 23. Keep the incubator closed and wait.