Three paths lead to a box of peeping chicks on your kitchen table: you incubate eggs yourself, you let a broody hen do it, or you order day-old birds from a hatchery. Each one works. Which one fits your situation comes down to equipment, time, and how much uncertainty you can stomach. This guide covers all three starting points and walks you through every stage that follows, from lockdown day to the first trip outside.
Should you incubate eggs, use a broody hen, or buy day-old chicks?
Buying sexed day-old chicks is the fastest, lowest-risk path to a laying flock - no incubator, no hatch uncertainty, sex confirmed at 90-95% accuracy. Incubating your own eggs adds control over breed and timing but requires three weeks of daily attention. A broody hen costs nothing if you have one, but she may abandon the nest before day 21. Match the method to your equipment, time, and tolerance for variables.
Most first-time flock keepers buy day-old chicks, and for good reason. Hatcheries have already done the hardest part. Sexed pullets cost a bit more than straight run, but they remove the guessing game about roosters - worth every cent if your ordinance bans crowing or you simply want eggs rather than meat. The tradeoff is that you skip the hatch entirely and go straight to brooding.
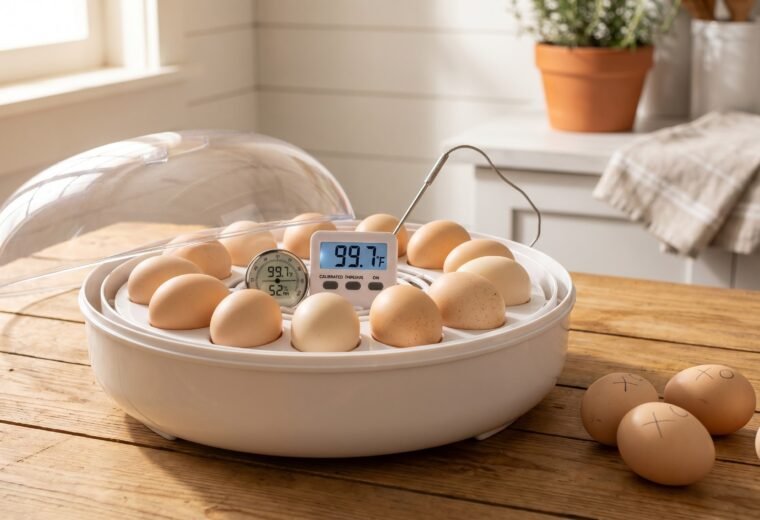
Hatching eggs yourself gives you full control over breed, timing, and the satisfaction of watching a chick emerge. You'll need a reliable incubator, a thermometer you trust, and three weeks of daily attention. Our incubation deep-dive covers the full equipment setup; the section below gives you the core parameters.
A broody hen is the lowest-tech option if you already have one. She maintains temperature and humidity without any electronics, turns the eggs herself, and broods the chicks when they hatch. What she cannot do is guarantee she'll stay broody for all 21 days, or that she won't accidentally crush an egg when another hen shoves her off the nest. Isolating a broody in her own box before she sets is the single most reliable improvement most keepers can make - details on managing a broody are in our broody hen guide. A good broody covering 10-12 eggs and left undisturbed can achieve very high hatch rates; an inattentive one, sitting in a shared nest box with other hens laying under her, will not. If she does break broodiness mid-set, transfer the remaining eggs to a warmed incubator immediately - the window for saving a mid-incubation clutch is short, and a running incubator on standby is worth having any time you are relying on a broody.
| Method | Startup cost | Hands-on time | Sex certainty | Best for |
|---|---|---|---|---|
| Buy sexed day-old chicks | Low (chick price only) | Low before arrival | High (90-95% accurate) | Beginners, egg-only flocks, urban keepers |
| Buy straight run chicks | Low (lower per-chick price) | Low before arrival | None until 16-24 weeks | Meat+egg dual purpose; rural properties that allow roosters |
| Incubate your own eggs | Medium ($50-300 for incubator) | High (daily for 21 days) | None unless sex-link breed | Breeders, educators, anyone who wants the experience |
| Broody hen hatch | Minimal (if hen is already in flock) | Low (hen does the work) | None | Flock owners with a reliably broody breed (Silkie, Orpington, Cochin) |
What temperature, humidity, and turning schedule does a chicken egg need for 21 days?
Forced-air incubators need a steady 100°F and 58-60% relative humidity from day one through day 17. Turn eggs at least four to six times daily. On day 18 - lockdown - stop turning, raise humidity to 65% or above, and do not open the incubator until hatch is complete. Get these three numbers right and a healthy fertile egg will hatch on schedule; miss any one of them by much and you lose the clutch.
Chicken eggs hatch on day 21. The entire process depends on two numbers: temperature and humidity. Mississippi State University Extension's guidance for forced-air incubators puts the ideal temperature at 100°F throughout the full incubation period. Stray more than a degree above that and you create serious risk - temperatures "only a degree or two above the recommended temperatures can kill chicks within 15-30 minutes," per MSU Extension. Still-air incubators run hotter, around 102°F measured at the top of the eggs, because they lack the fan to equalize warmth across the egg. Always verify your incubator's built-in display with a calibrated secondary thermometer placed at egg height - inexpensive units can read 3-4°F low, which means eggs are actually cooking at a lethal temperature while the display shows 100°F.
Humidity is equally unforgiving. Keep relative humidity at 58-60% from day one through day 17. On day 18 - called lockdown - stop turning the eggs, increase humidity to at least 65%, and open the vents wider to give hatching chicks more air. The higher humidity at lockdown keeps the inner membrane from drying out and trapping the chick as it pips.
Turn eggs at least four to six times daily from setting through the end of day 17. On day 18 - lockdown - stop turning entirely. Automatic turners handle this without any thought. If you turn by hand, an odd number of rotations per day prevents an egg from spending every night on the same side. Mark each egg with an X on one face so you can see at a glance whether you turned it.
The hatch-date calculator
Setting date + 21 days = expected hatch date. If you set a dozen eggs on June 1, plan for hatching around June 22. That three-day window around day 21 is normal; development can run slightly fast or slow depending on how steady your temperature held. Use this formula to plan your lockdown: subtract three days from your expected hatch date and mark it on your calendar. That is the day you stop turning and raise humidity.
| Setting date | Lockdown (day 18) | Expected hatch (day 21) |
|---|---|---|
| June 1 | June 19 | June 22 |
| June 15 | July 3 | July 6 |
| July 4 | July 22 | July 25 |
| August 1 | August 19 | August 22 |
| September 1 | September 19 | September 22 |
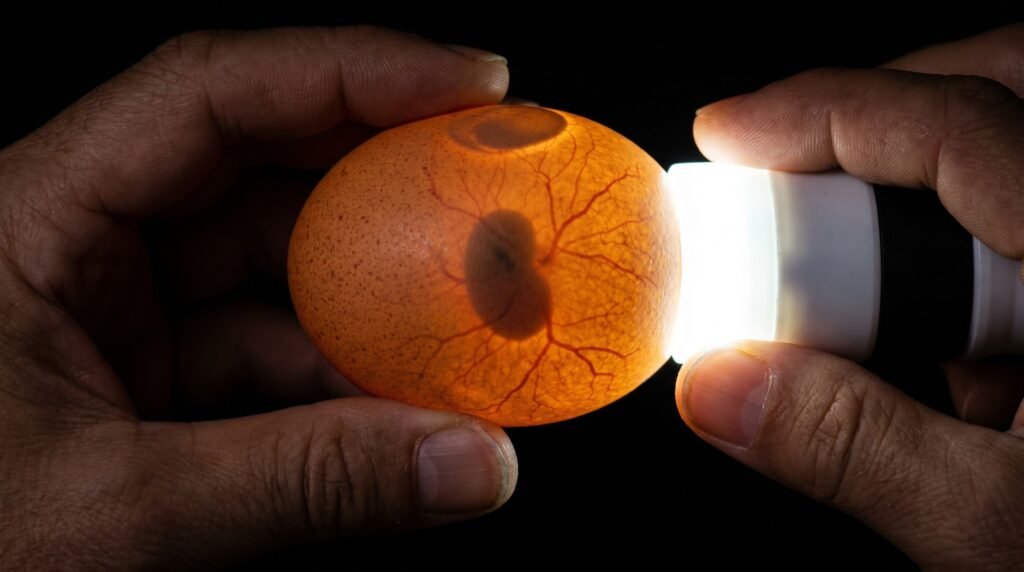
Candling: what to look for and when
Candle around day 7. In a dark room with a bright light pressed against the large end of the egg, a fertile egg with a living embryo shows a web of veins fanning outward from a dark center. A clear egg - no veins, just a yellowish glow - is infertile. A blood ring, which is a faint circle of vessels with no central mass, indicates the embryo started developing and died. Pull infertile and dead eggs promptly, since a rotten egg that explodes inside the incubator can contaminate the whole batch. Candle again around day 14 if you want confirmation, but avoid extended handling after that point, because chicks are positioning for the hatch and you risk disturbing them.
How do you set up a brooder before day-old chicks arrive?
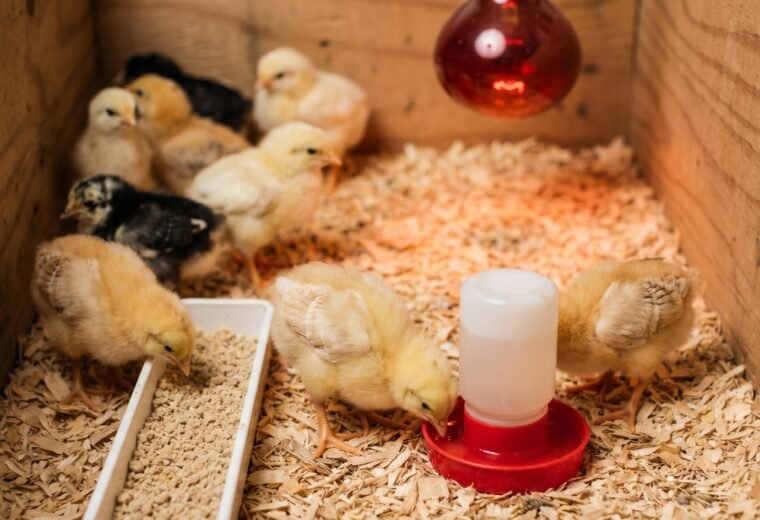
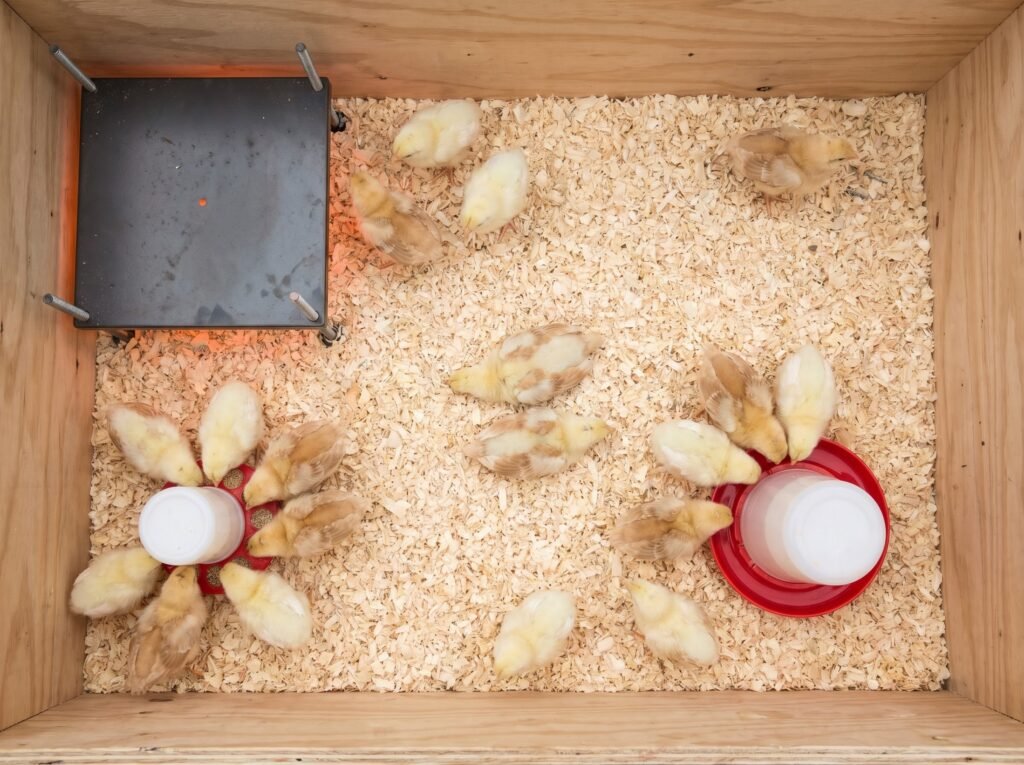
Have the brooder running and at 90-95°F at least two hours before the first chick steps into it. You need a heat source (lamp or plate), dry pine-shaving bedding, fresh water, and starter feed in place and tested before chicks arrive. A brooder that is too cold on day one is the most preventable cause of first-week losses - the setup checklist below removes the guesswork.
The brooder should be ready and warm before the first chick steps into it. A cold brooder kills chicks in the first hour.
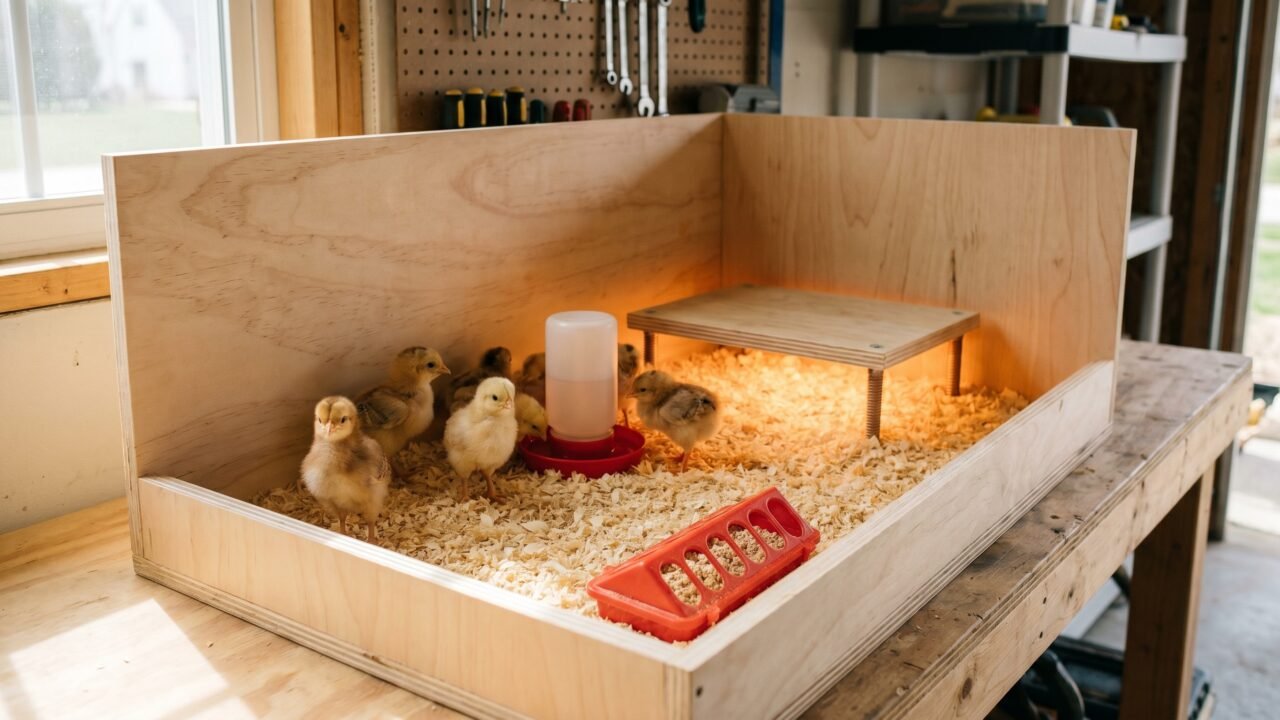
Plan on at least half a square foot of floor space per chick for the first six weeks - so a dozen chicks need at least 6 square feet of usable floor area. They grow fast. By week three they will look crowded in a space that felt generous on day one. Our brooder comparison covers specific containers and setups; the temperature rules below apply regardless of what you use.
Heat: lamp or plate?
The heat-lamp-versus-heat-plate debate is genuinely live in the backyard poultry world, and both sides have real points. A 250-watt heat lamp is inexpensive, widely available, and puts out plenty of warmth. It is also the heat source most often cited in coop fire reports. Running a 250W bulb around the clock over dry wood shavings and fluffy chick down carries documented risk, particularly if the clamp slips or a chick flies up into the bulb.
Radiant brooder plates - flat heated panels on adjustable legs - use between 15 and 66 watts, produce no open flame or hot glass surface, and allow chicks to experience normal day-night cycles because they emit heat without light. Chicks slip underneath them the way they would under a mother hen. The upfront price is higher than a lamp socket, but the fire risk is substantially lower. If you raise chicks indoors or in a garage, a plate is worth the extra cost. Our article comparing heat lamps and heat plates goes deeper on both options.
Temperature schedule
Start at 90-95°F measured two inches above the floor directly under the heat source. Drop five degrees each week until chicks are fully feathered or the ambient temperature matches the brooder temperature - whichever comes first. The chicks themselves are your most reliable thermometer.
| Week | Target temperature | What comfortable chicks look like |
|---|---|---|
| 1 | 90-95°F | Scattered loosely near heat, active, peeping steadily |
| 2 | 85-90°F | Moving between warm and cool zones freely |
| 3 | 80-85°F | Spending more time away from heat source |
| 4 | 75-80°F | Mostly exploring the full brooder floor |
| 5 | 70-75°F | Feathers visible on most of the body |
| 6 | 65-70°F (ambient) | Fully feathered, heat source rarely used |
Chicks huddled in a tight pile directly under the heat source are telling you they are cold - raise the lamp or increase the plate height. Chicks pressed flat against the brooder walls with their beaks open are too hot - lower the temperature immediately. Quiet, active birds scattered evenly across the floor? You have it right.
Bedding, water, and feed
Line the floor with three to four inches of pine shavings. Avoid cedar (the oils are harsh on young respiratory systems) and slippery surfaces like bare newspaper, which can cause leg problems called spraddle leg in the first week. A rubber shelf liner under shavings for the first two or three days gives chicks grip while they find their footing.
Fresh water at all times, always. Before you set each chick down in the brooder, dip its beak gently into the water so it learns where the drinker is. For shipped chicks that have spent 24-72 hours in a box, adding two tablespoons of plain sugar per quart of water for the first day helps replenish energy and reduces stress-related losses. Change the water daily; wet bedding around waterers is a fast path to respiratory illness and bacterial growth.
Feed an 18-22% protein chick starter from day one. Leave the feeder full at all times for the first several weeks - chicks eat frequently in small amounts. More on the full feed timeline is in our chick starter feed guide.
What do chicks go through week by week from hatch to coop-ready?
Chicks change faster than almost any other backyard animal - from a damp, wobbly hatchling to a fully feathered juvenile in six weeks. Week one carries the highest mortality risk; weeks three and four bring the fastest visible growth; week six marks the transition to outdoor life. Knowing what to expect at each stage helps you catch problems early and adjust the brooder before small issues become losses.
| Week | Key development | What to watch |
|---|---|---|
| 1 | Down only; completely heat-dependent; learning to eat and drink | Check vents daily for pasty butt; verify waterer is accessible; confirm brooder at 90-95°F |
| 2 | Wing feathers emerge; chicks become visibly more active and curious | Watch for feather-picking; signs of overcrowding; lower brooder to 85-90°F |
| 3-4 | Rapid feathering across chest and back; body doubles in size; roosting instinct appears | Add a low perch; increase feeder space; drop temperature to 80-85°F in week 3, then 75-80°F in week 4 |
| 5 | Most of the body covered in juvenile feathers; head and neck may still show down patches | Begin supervised outdoor time on warm days; brooder at 70-75°F |
| 6 | Substantially feathered; heat plate rarely used; ready for coop if overnight temps above 50°F | Coop transition; introduce to adult flock through wire before mixing |
Week one is the most fragile. Shipped chicks sometimes arrive with pasty butt - a paste of dried feces blocking the vent - which is almost always triggered by shipping stress and temperature swings during transit. Check vents daily for the first five days. Soften any blockage with a warm damp cloth, remove it gently, and dry the chick thoroughly before returning it to the brooder. A bird that cannot excrete will die, so do not skip this check.
By week two you will see proper wing feathers emerging. Chicks become noticeably more confident - more scratching, more pecking at each other's feathers out of curiosity. This is normal as long as nobody is drawing blood. If you see actual pecking wounds, check that the brooder is not too hot, too bright, or too crowded; those three conditions drive feather-picking more than anything else.
Weeks three and four bring rapid visible growth. The downy fluff gives way to true feathers at a satisfying pace. Chicks that once fit in your palm become difficult to hold with one hand. Their feed consumption jumps noticeably. This is also when they start becoming interested in roosting - a low perch, even just a thick branch on the brooder floor, encourages the instinct.
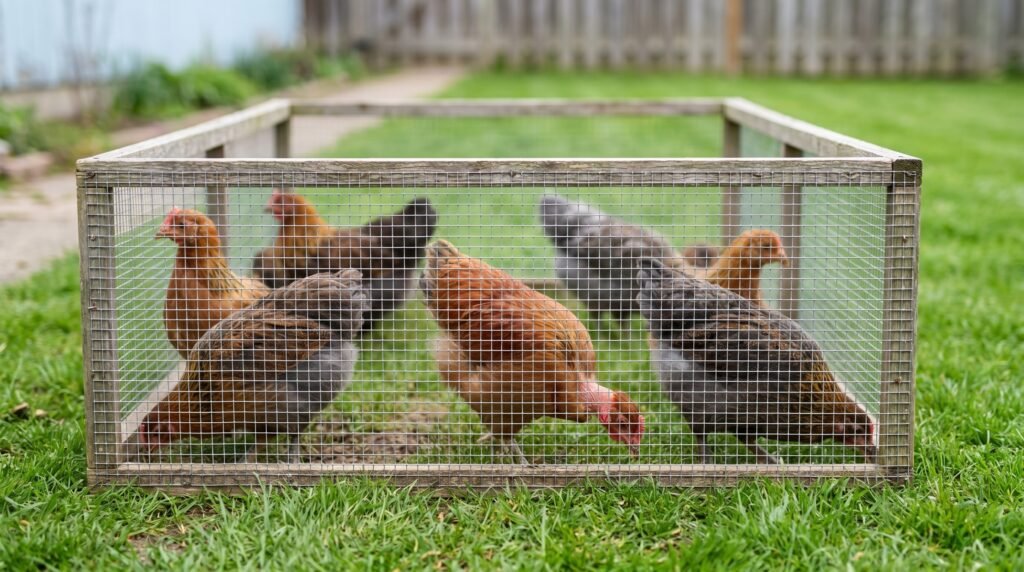
Weeks five and six are the finishing stretch. Most standard breeds are substantially feathered by week six, though bantams and some heavy breeds vary. On warm sunny days, supervised time in a small outdoor pen gives chicks their first exposure to grass, bugs, and real daylight - experiences that matter for both behavior and immune development. Our week-by-week development article goes into finer daily detail if you want to track milestones closely.
What are the two diseases that kill brooder chicks before keepers realize anything is wrong?
Coccidiosis and Marek's disease together account for the largest share of preventable chick deaths in backyard flocks. Both are largely invisible in early stages, both are prevented before chicks arrive rather than treated after - and the prevention strategies for each require decisions you make when you place your chick order, not after losses begin.
Most chick losses come from two sources that beginning keepers often miss entirely.
Coccidiosis is a parasitic gut disease caused by Eimeria protozoa that live in soil. It kills chicks fast - bloody droppings are the classic sign, but many chicks simply become lethargic and stop eating before that symptom appears. The two main prevention strategies are medicated chick starter feed (which contains amprolium, a thiamine blocker that stunts coccidia development without harming chicks) or a coccidiosis vaccine administered at the hatchery. You cannot do both: medicated feed cancels out the vaccine. Choose one approach before your chicks arrive and stick with it. If you order chicks vaccinated for Marek's disease and coccidiosis both, order non-medicated starter.
Marek's disease, caused by a herpes virus that spreads through feather dander, can kill between 1% and 50% of an unvaccinated flock, per Penn State Extension data. Vaccination must happen at the hatchery before chicks are exposed to the virus; post-hatch vaccination on your end is too late. Request it when you order. Vaccinated chicks still need four to seven days of isolation immediately after arrival to allow immunity to develop - exposure to wild-bird dander during that window can overwhelm the vaccine before it has time to work.
For any chick that stops eating, develops labored breathing, or shows bloody droppings, the right move is a call to a poultry-experienced vet. These are not problems to diagnose by internet; the treatments differ and the wrong one wastes time the bird does not have.
When are chicks ready to move from the brooder to the coop?
Most standard breeds are ready at six weeks old when fully feathered and when overnight outdoor temperatures are reliably above 50°F. Moving too early - while the coop is cold or before feathering is complete - sets chicks back and increases stress-related illness. A staged transition, where chicks spend a few days in a smaller enclosure inside the coop before the heat source is removed, makes the change far easier on the birds.
Most standard breeds are ready for the coop at six weeks of age, provided overnight temperatures stay above 50°F. Cold-hardy breeds like Plymouth Rocks and Wyandottes can tolerate temperatures into the low 40s once fully feathered. Wait for a spell of settled weather - a sudden cold snap the first week outside is stressful even for feathered birds.
Transition gradually if you can. Move the brooder (or a smaller enclosure) into the coop itself for several days so chicks acclimate to the smells, sounds, and temperature before you remove the heat entirely. Show them where the food and water are located in the new space. If you are introducing chicks to an established adult flock, keep them separated by wire for at least a week so the older birds can see but not harm the newcomers. Size matters at introduction: wait until the chicks are close to the same size as the adults before mixing the groups. More detail on this process is in our page on introducing new chickens.
What feed should chicks eat from hatch through their first egg?
Chick starter runs from hatch through about week six or eight, grower feed from week eight through laying age, and layer feed from 18 weeks or first egg. Each phase has a specific protein and calcium level tied to what the bird's body is doing at that stage. Getting the calcium wrong is the most common mistake: layer feed fed too early can damage kidneys in growing pullets who have no physiological way to process the high calcium load.
Chick starter (18-22% protein) covers weeks one through six or eight. After that, switch to a grower feed at around 16-18% protein (a manufacturer-recommended range; some brands such as Purina Flock Raiser run 20%) to support skeletal development without the excess protein that would go unused. Do not introduce layer feed until birds are 18 weeks old or laying their first eggs - whichever comes first. Layer feed contains 3% or more calcium, a level that can damage the kidneys of growing birds who are not yet producing eggs and do not have the physiological machinery to process it. Offer oyster shell free-choice in a separate dish once birds start laying; birds self-regulate their calcium intake remarkably well when it is available separately rather than baked into the feed.