Between 92 and 95 degrees the first week. That range is the anchor of chick care, and everything else in the brooder follows from it. Start there, drop 5°F each week, watch your chicks tell you when they're comfortable or cold, and you'll get a flock of healthy pullets to the coop without drama. The rest of this guide fills in the feed, the water, the week-by-week milestones, and the handful of problems that catch first-time keepers off guard.
If you haven't decided on a heat source yet, our comparison of heat lamps vs. heat plates covers the tradeoffs before you buy anything.
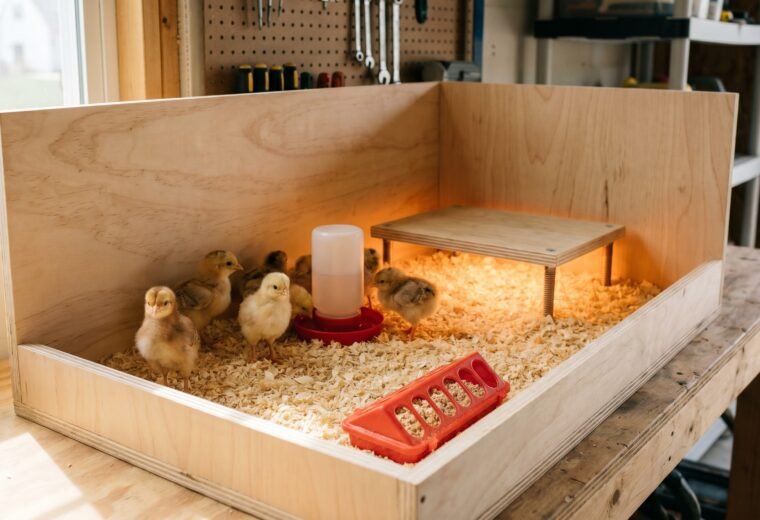
Setting up the brooder before chicks arrive
Get the brooder running and at temperature at least 24 hours before the chicks show up. Cold bedding and a lamp that hasn't stabilized is one of the fastest routes to stressed, pasted chicks.
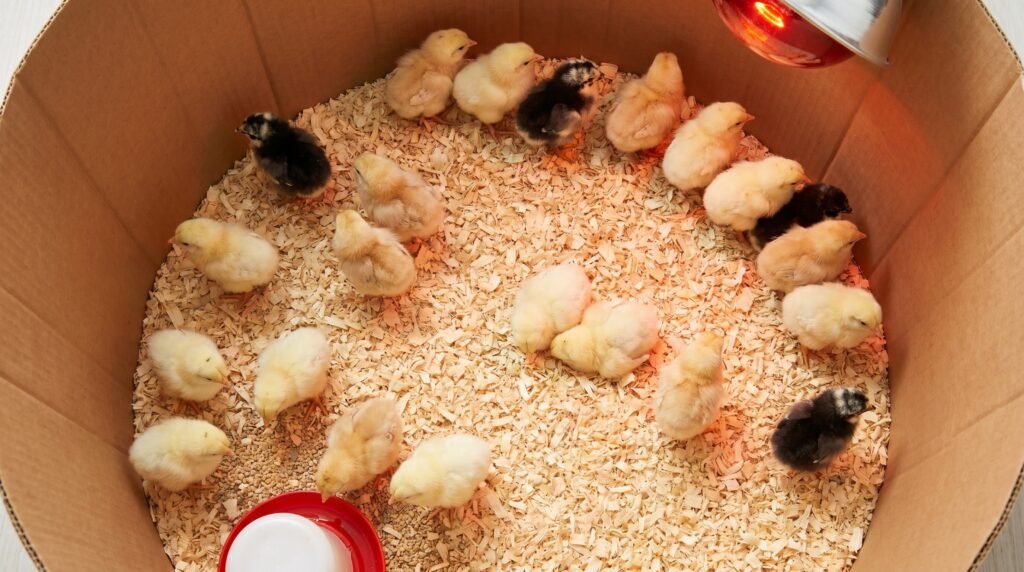
Space matters more than most people expect. Penn State Extension's brooding guidance recommends starting at 1/4 square foot of floor space per bird for the first week, growing to 1/2 square foot by weeks two through three, and 3/4 square foot for week four. From week five through week eight, plan on 1 square foot per bird minimum, then expand to 1.5 to 3 square feet as they approach coop age. Overcrowding raises ammonia, increases pecking, and makes temperature management nearly impossible.
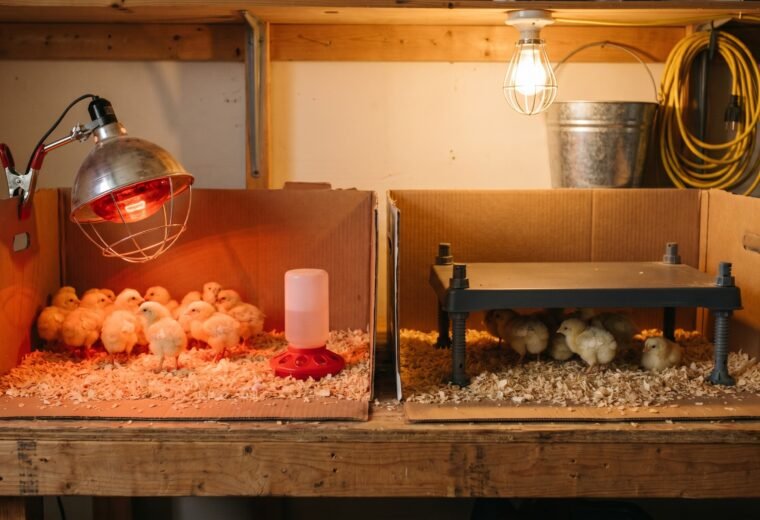
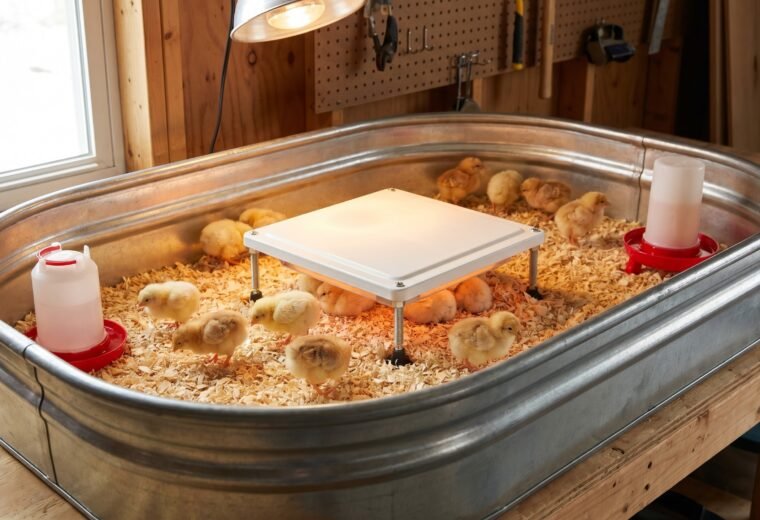
A brooder ring - a simple cardboard circle 18 to 24 inches tall - keeps young chicks corralled near the heat source and prevents drafts. Penn State recommends starting with a ring 4 feet across for 25 chicks and widening by 2 feet for every additional 25 birds.
Bedding should be 3 to 4 inches of pine shavings. Skip newspaper for the first week: the slick surface causes splayed legs - a condition most extension advisors flag as directly linked to inadequate footing in the first days. Cover the shavings with paper towels for the first few days while chicks learn to eat from feeders instead of pecking at the floor.
For your heat source, a radiant heat plate is safer than a traditional heat lamp. Heat lamps carry real fire risk - K&H Pet Products, a manufacturer of poultry brooders, notes that lamps "pose serious fire risks" and should be kept "at least 20 inches from anything flammable." If you do use a lamp, chain it, never cord it, and hang it over the center of the ring where chicks can move toward or away from the heat zone freely.
The temperature schedule, week by week
Penn State Extension's guidance is clear: start at 92-95°F directly at chick level, then drop 5°F per week until you reach about 70°F or the birds are fully feathered. The Merck Veterinary Manual cites a slightly lower starting range of 85-90°F at floor level - the difference reflects where you're measuring. At lamp height the reading is higher than directly on the bedding. Measure at chick-head height, roughly 2 inches above the litter, and aim for the 92-95°F range the first week.
| Week | Brooder temp (at chick level) | Key milestone | Space per bird |
|---|---|---|---|
| 1 | 92-95°F | Arrive; learning to eat and drink; pasty butt risk highest | 1/4 sq ft |
| 2 | 87-90°F | Wing feathers emerging; chicks exploring the whole brooder | 1/2 sq ft |
| 3 | 82-85°F | Tail feathers appear; personality becomes obvious | 1/2 sq ft |
| 4 | 77-80°F | Body feathering well underway; less reliance on heat | 3/4 sq ft |
| 5 | 72-75°F | Near fully feathered for most layer breeds | 1 sq ft |
| 6 | ~70°F (ambient) | Fully feathered; heat can be removed if ambient is 65°F+ | 1 sq ft |
| 7-8 | Ambient | Ready to transition outside when weather cooperates | 1.5-3 sq ft |
The thermometer gives you a starting point. Your chicks tell you the truth. UMN Extension puts it simply: "If the chicks crowd together they need more heat. If the chicks move away from the heat source, they're too hot." A comfortable flock spreads evenly around the brooder, eating, drinking, and sleeping in loose groups - not piled in a corner, not panting at the far wall.
On cold nights, resist the urge to crank the heat to compensate. Instead, check that your brooder ring contains drafts and that bedding is deep enough to hold warmth. Sudden temperature swings stress chicks more than a steady cool-but-stable environment does.
Feeding baby chicks: what, when, and how much
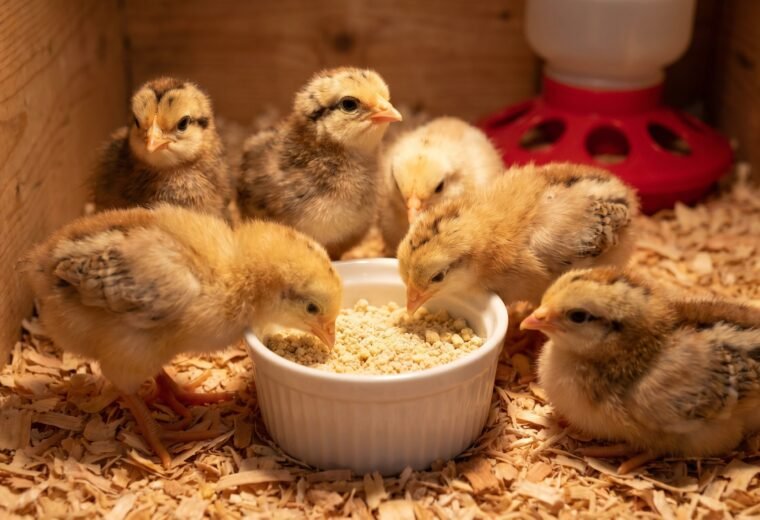
Chick starter crumbles are the only thing a young chick needs for the first six weeks. Penn State Extension recommends an 18-20% crude protein starter for laying-breed chicks through week six to eight. The poultry.extension.org feeding guide puts the range slightly higher, at 20-22%, for the same period. Either figure works for most layer breeds; use what your local feed store carries in that protein range and you'll be in the right ballpark.
Meat breeds (Cornish Cross, Freedom Rangers) have higher protein needs - UMN Extension suggests 22-24% for broilers, at least in the early weeks. If you're raising a mixed flock of layers and meat birds together, the higher-protein starter is fine for everyone.
After week six, switch layer chicks to a grower or developer feed at 14-15% protein. Hold them on grower until they approach laying age, then transition to layer feed (16-18% protein with added calcium) around week 18-20 or when the first eggs appear. Never feed layer ration to growing chicks - the extra calcium burdens their kidneys before they're ready for it.
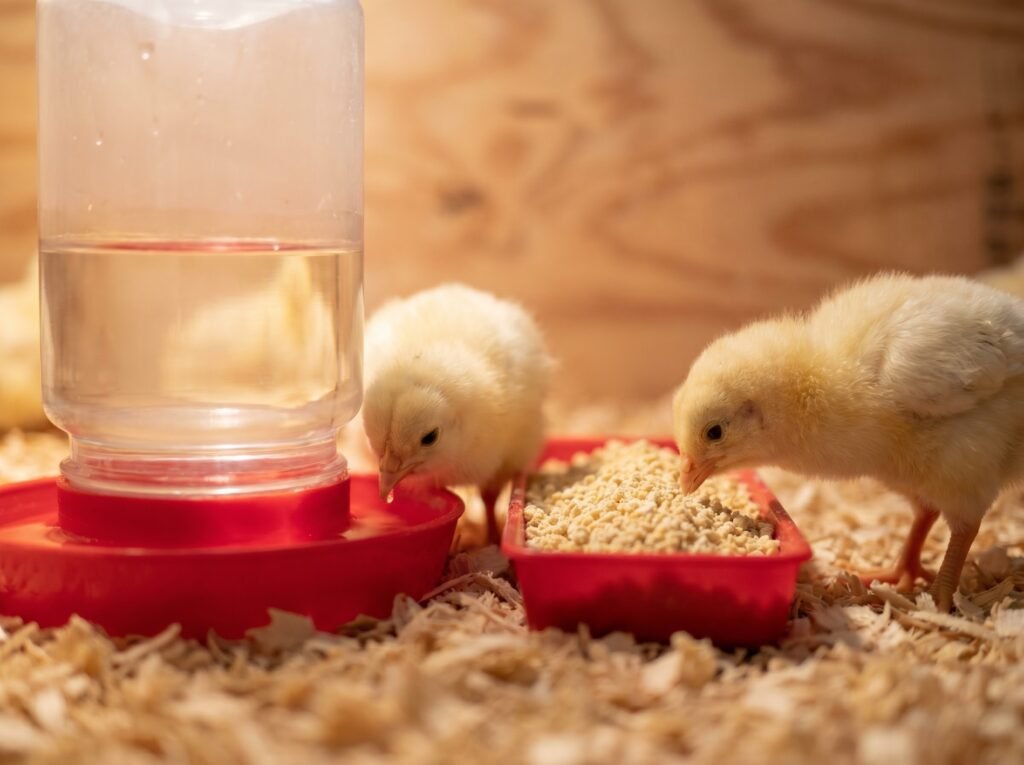
Fill feeders to overflowing for the first two days. Young chicks don't automatically know where their food is, and abundance helps them find it fast. Dip a few chick beaks gently into the waterer when they arrive so they associate the drinker with water.
Grit: chick starter crumbles dissolve easily in the crop, so grit is not needed while chicks eat only commercial feed. The moment you introduce anything else - grass clippings, a handful of scratch, treats - provide chick-sized grit free-choice in a separate small dish. Oyster shell is not a grit substitute; it's too soft to grind food and too calcium-rich for growing birds.
Treats stay off the menu until week six at the earliest, and even then they should make up no more than 10% of the diet. Purina's chick-care guidance recommends feeding "a complete starter-grower feed as the sole diet" and delaying treats to protect gut health and prevent early pasting. See our full guide to chick starter feed for brand comparisons and medicated vs. non-medicated options.
Water: the most overlooked factor in brooder setup
Young chicks dehydrate fast. Water must be available every hour of every day, and it must be clean. UMN Extension recommends one gallon of water fountain capacity per 50 chicks for the first two weeks - for a small backyard batch of 6-10 chicks, a single one-quart chick waterer works, but check and refill it twice daily.
Keep waterers shallow. Chicks can drown in surprisingly little water. Purpose-built chick waterers with a narrow trough are the right tool; a bowl or dish is a hazard. Position the waterer level with the chicks' backs once they're past the first few days - too low gets the bedding wet, too high makes drinking awkward.
Scrub waterers every other day with a mild solution and rinse thoroughly. Algae and bacterial slime grow fast in a warm brooder, and dirty water is a direct cause of digestive upset - which feeds the pasty butt problem covered in the next section.
Temperature of the water matters less than cleanliness, but very cold tap water can briefly stress very young chicks. Room-temperature water is a simple courtesy in the first few days.
A word on apple cider vinegar in chick water: you will encounter this advice online, often recommended for gut health and disease prevention. The evidence for benefit in very young chicks is weak and inconsistent, and undiluted or over-diluted ACV can irritate the crop of fragile newly-hatched birds. Until your chicks are past the first two weeks and you are using a plastic or ceramic waterer (not metal - ACV corrodes galvanized founts), skip it. Clean water and correct temperature do more for chick gut health than any additive.
Pasty butt: the highest-frequency week-one problem
Pasty butt - droppings that dry onto the vent and plug it shut - is the most common crisis in the first 10 days. Left unnoticed, it is fatal. Caught early, it resolves easily.
The cause is usually a combination of shipping stress, temperature fluctuation, and the gut adjusting from absorbed yolk to solid feed. The yolk that newly hatched chicks carry provides nutrition for the first 24-48 hours; the droppings produced during that transition are stickier than normal. A brooder that runs too hot or too cold compounds the stress and worsens the problem.
Check every chick's vent at least once daily through the first week. The vent sits just below the tail. Any dried matter plugging it needs to come off the same day you see it.
Purina Animal Nutrition's guidance on treatment:
- Soak the area with a warm, wet washcloth - or hold the chick's rear end under a trickle of warm (not hot) water - until the material softens.
- Apply a small amount of vegetable oil to help loosen the plug, then remove it gently with a cotton swab using a downward motion.
- Dry the chick thoroughly. Use a hair dryer on low heat held at least 8 inches away. A wet chick chills fast, and a chill invites another round of pasting.
- Apply a thin dab of petroleum jelly or vegetable oil to the vent area to prevent re-sticking.
Most chicks work through the condition on their own by days 7 to 10 as their digestive systems mature. If a chick is pasting repeatedly after that window, or if you notice lethargy, closed eyes, or a hunched posture alongside the pasting, contact a poultry vet - those signs point to something beyond normal digestive adjustment.
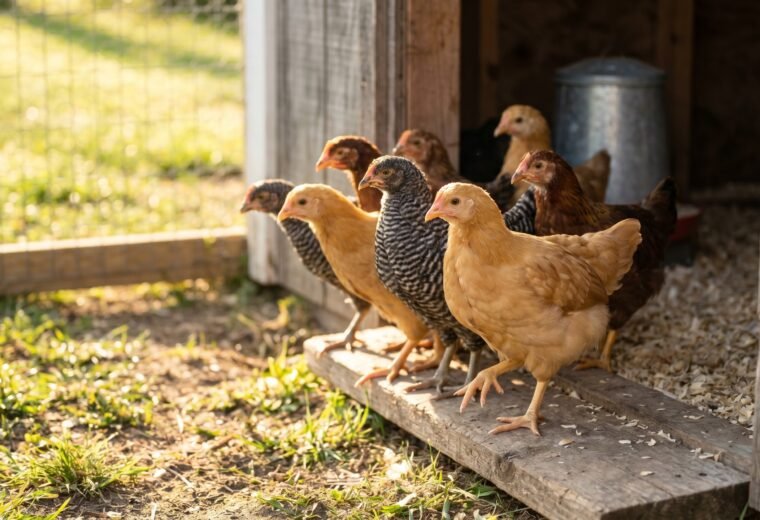
When chicks are ready to leave the brooder
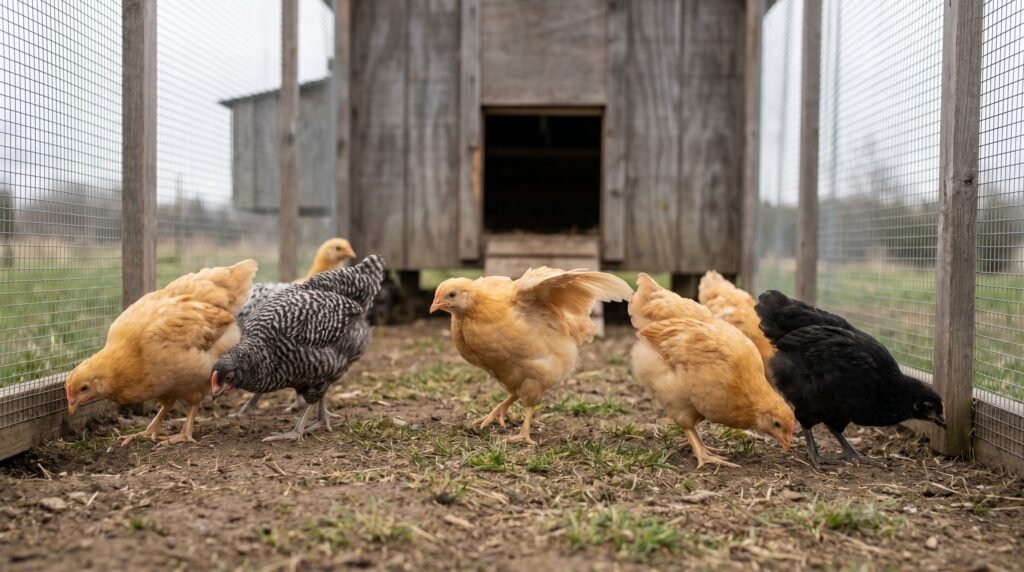
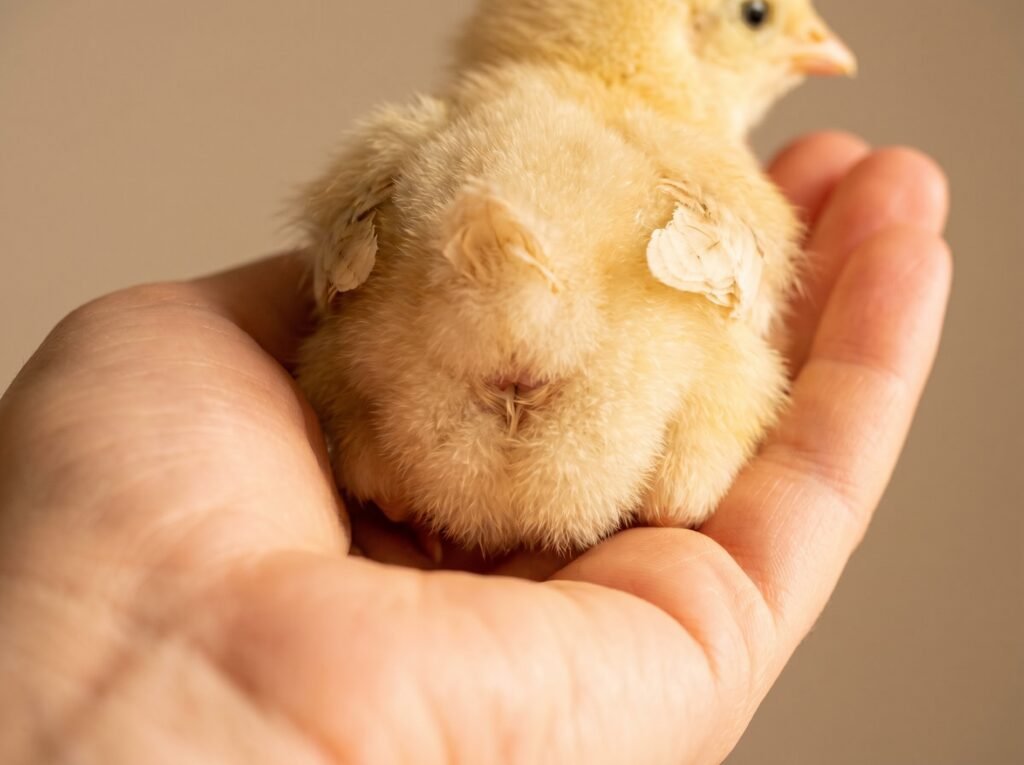
Feathering is the real indicator, not age alone. Layer-breed chicks are generally well-feathered by 6-8 weeks - meat breeds finish faster, often by four weeks, per UMN Extension's meat chicken guidance. A fully feathered bird can regulate its own body temperature, so supplemental heat becomes optional rather than essential once the feathers are complete.
"Optional" carries a caveat: poultry.extension.org recommends continuing heat for the full six weeks in cold conditions, even on feathered birds, because the waterers and litter still need to stay functional. If the outdoor temperature will stay above 65°F during the day and above 50°F at night, a six-to-eight-week-old feathered chick can typically handle the transition. Sudden cold snaps after an early move can set birds back hard.
Do a short outdoor acclimation before a full move. Let chicks spend a few hours in a sheltered run on warm days during weeks six and seven, then bring them in at night. That gradual exposure to wind, varying temps, and outdoor sounds does a lot to reduce the stress of a full coop transition.
Our full guide on when to move chicks outside covers timing by season, weather thresholds, and how to introduce young pullets to an existing flock without a war breaking out. For brooder setup options before you get to that point, the raising chicks overview lays out the full picture.
Quick-reference FAQ
What if I don't have a thermometer in the brooder?
Your chicks will tell you. A cold flock piles into a tight cluster directly under the heat source. An overheated flock spreads to the brooder walls, holds wings away from the body, and pants. A comfortable flock moves freely, eats, drinks, and sleeps in loose groups spread evenly across the floor. Watch for those patterns in the first hour after setup and adjust before the chicks are stressed, not after. A cheap dial thermometer clipped at chick-head height is still worth having - but chick behavior is the real feedback loop, and a thermometer without that behavioral check will mislead you if it's placed at the wrong height.
Do I need a heat lamp, or will a heat plate work?
A heat plate works well and carries much lower fire risk than a heat lamp. Heat lamps require secure mounting, proper wattage matching, and adequate clearance from bedding and walls. Either can brood chicks successfully; the plate is the safer choice for most backyard keepers.
Can I combine a heat plate with a lamp on cold nights?
Yes, and it works well. A radiant heat plate is the safer primary source - lower fire risk, no harsh light disrupting sleep - but on nights when the brooder space is uninsulated and temperatures dip unexpectedly, adding a low-wattage brooder lamp (or a red incandescent, not white) as a secondary source can keep the ambient air warm enough that the plate doesn't have to do all the work. Run the lamp to warm the room, not directly over the chick cluster; the plate is where chicks press in for body warmth. Just verify total temperature at chick-head height before leaving them overnight: you want 92-95°F in week one, not more.
Why does my chick keep getting pasty butt after I clean it?
Recurring pasting after day 10 often signals a temperature problem (too hot or too cold), contaminated water, or a digestive issue. Check your brooder temperature carefully, scrub the waterer, and confirm the chick is eating starter crumbles only. Persistent pasting in a lethargic chick warrants a call to a poultry vet.
Can chicks eat treats or grass from the yard?
Hold off until week six at the earliest, and keep anything beyond starter crumbles to under 10% of daily intake. Introduce chick-sized grit the moment you add anything other than commercial feed. When you do start treats, the safest first options are small pieces of scrambled egg (yes, chicks eat egg - they don't know what it is), mealworms, and short clippings of tender grass. Avoid anything salty, sugary, or large enough to choke a young bird. Bread, chips, and scratch grains are not treats - they're filler with no nutritional value for growing chicks and push protein intake down at exactly the age when chicks need it most.