Most barn fires started by poultry keepers trace back to a single culprit: a 250-watt heat lamp clipped above a box of fluffy chicks. The heat plate arrived as a direct answer to that problem, and today it splits the backyard flock community almost evenly. Both tools keep chicks alive. The question is which one fits your setup, your budget, and your tolerance for risk - and the answer is not the same for everyone.
For most backyard keepers raising a small batch of chicks indoors, a heat plate is the safer and more chick-friendly choice. For larger batches in an unheated garage or cold barn, a heat lamp may still be necessary - with precautions. Read on for the full breakdown so you can decide with confidence.
The fire question: what the numbers actually show
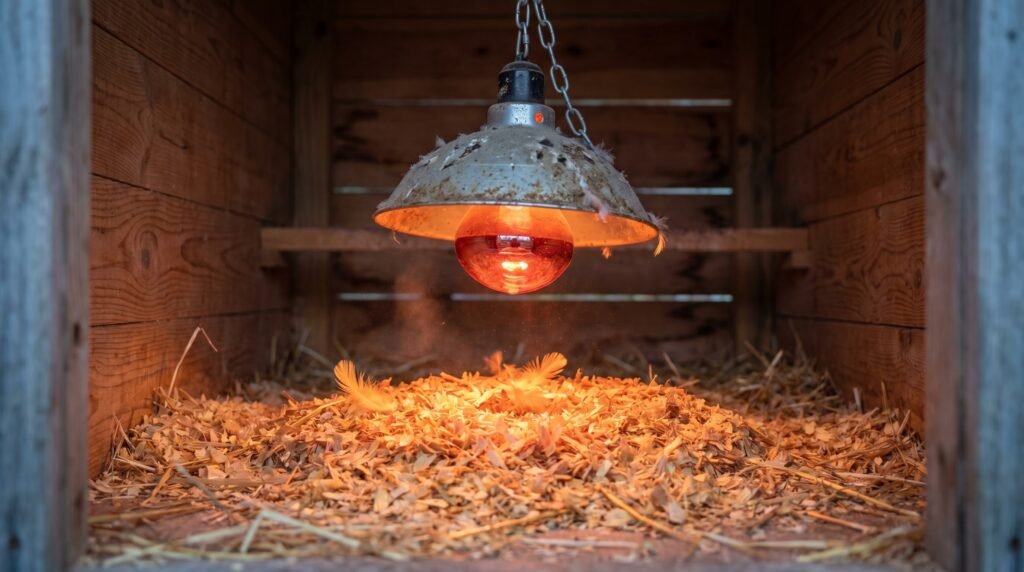
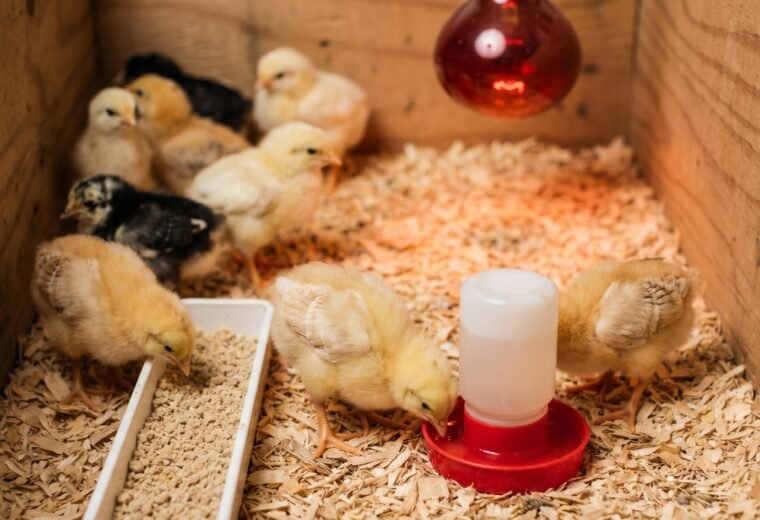
A standard brooder heat lamp runs a 250-watt infrared bulb continuously for up to six weeks. Brinsea, the largest dedicated brooder manufacturer, states plainly that "running a 250W bulb 24/7 over flammable bedding is a leading cause of coop and barn fires." MSU Extension echoes the warning, advising keepers to keep heat lamps "securely fastened to prevent them from falling and lighting the bedding on fire." UNH Extension adds that the lamp cord itself is a hazard: "Do not hang the lamp by the cord - a chain will provide strong and safe suspension."
What makes this a persistent problem is the failure mode. A lamp that is clipped rather than chained can fall when a chick flaps into it, when a clamp fatigues, or when a gust from a door startles the whole brooder. Once a 250-watt bulb touches pine shavings, ignition takes seconds. The bulb can also shatter when cold water splashes on the hot glass, sending a spray of live filament into the litter.
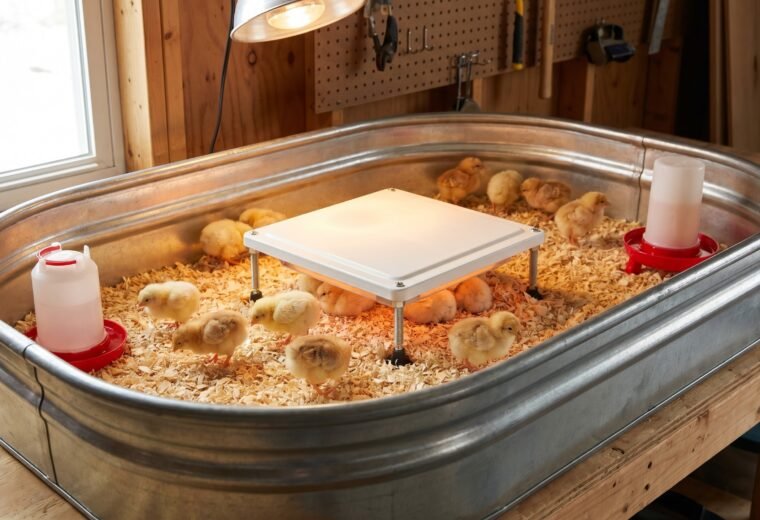
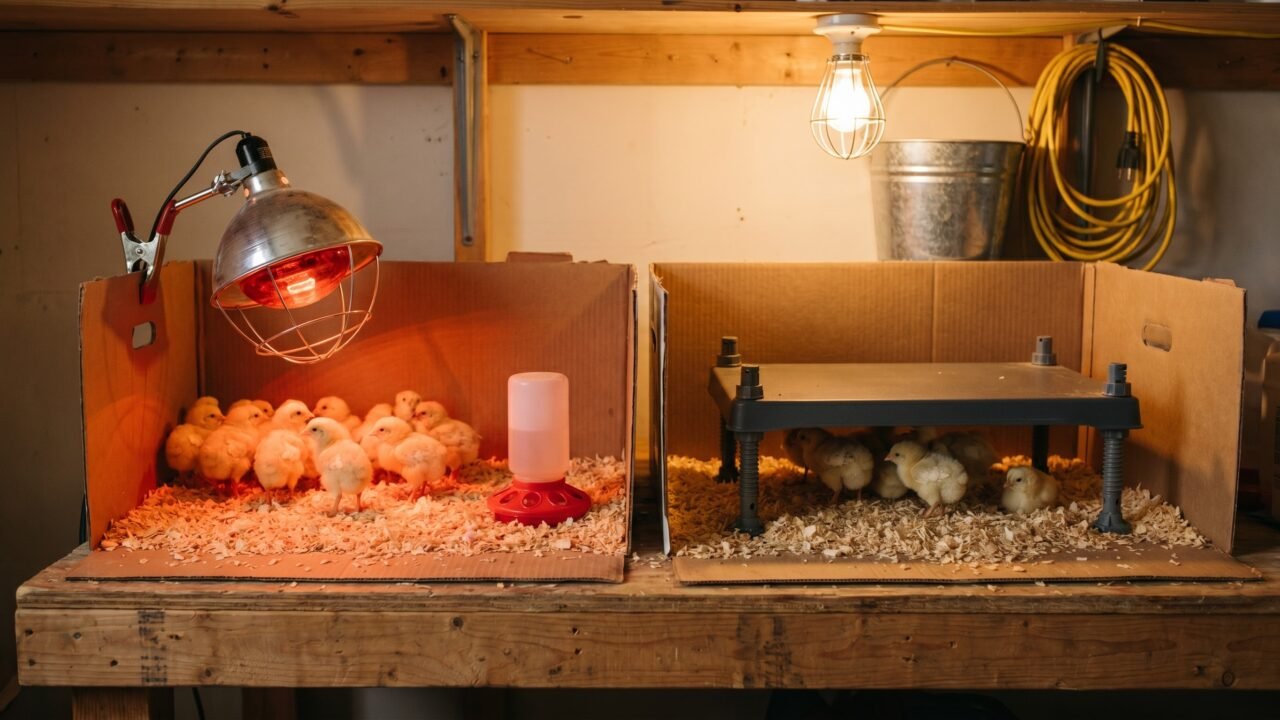
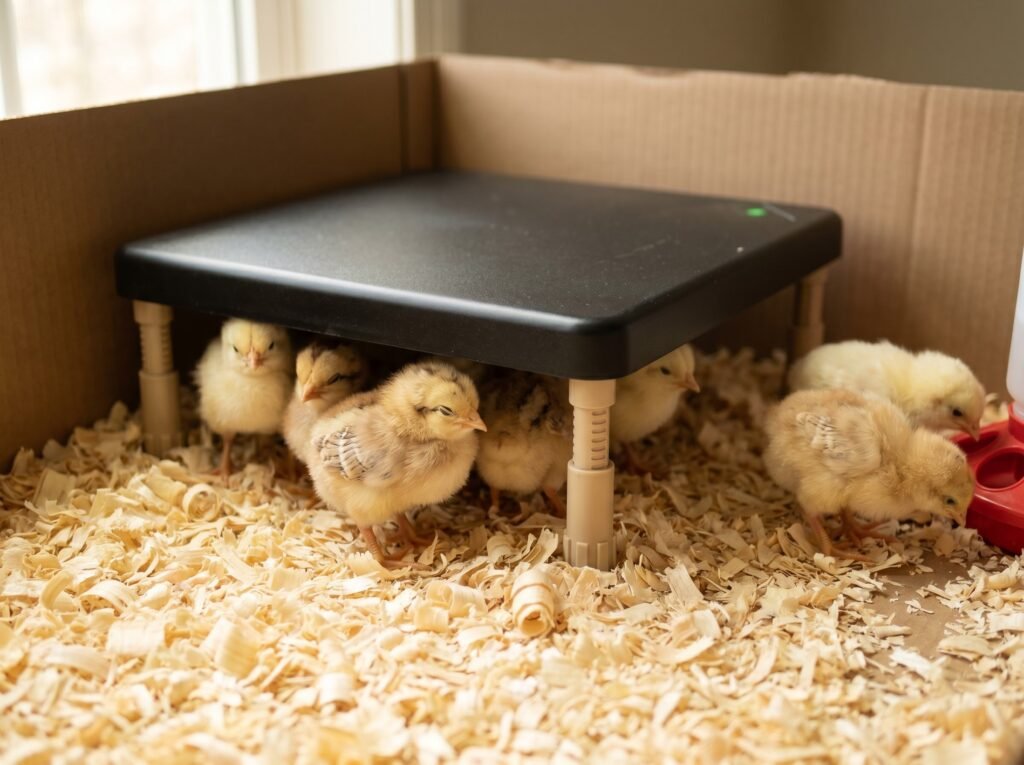
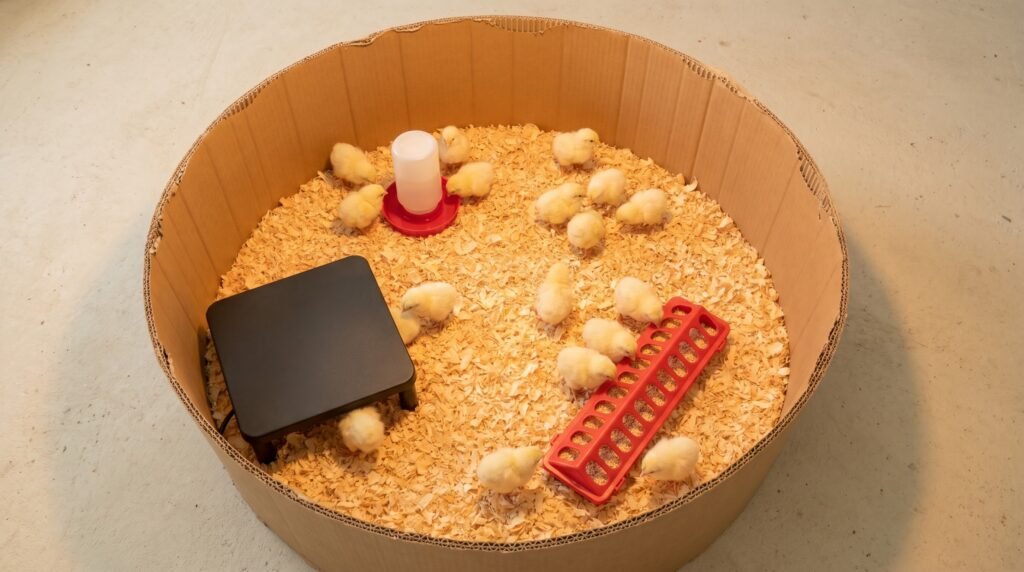
A heat plate runs at 12 to 22 watts depending on the model. It sits on four legs a few inches above the litter, draws low-voltage power from a supplied transformer, and has no exposed hot bulb. The surface is warm to the touch rather than scorching. If it were to tip over - which requires some effort given the low, wide stance - it contacts cool litter with a warm surface, not a searing element. Brinsea's specification for the EcoGlow Safety 600 explicitly calls out "safe 12 volt operation from a mains transformer" as a core safety feature. RentACoop's 12x12-inch plate product page states it operates "without the fire risk of heat lamps."
Fire risk is not zero with a heat plate, but the mechanism that causes most lamp fires - a falling 250-watt bulb igniting bedding - simply does not exist.
Temperature: what each device actually delivers
Both UNH Extension and MSU Extension recommend starting chicks at 95°F at chick level in week one, then dropping that temperature 5°F per week until the chick no longer needs supplemental heat (at six to eight weeks, when they are fully feathered). The Merck Veterinary Manual pegs the floor temperature under the brooder at 85-90°F - a slightly lower figure because it measures the floor, while the extension services measure 2.5 inches above the litter directly under the heat source. Both recommend the same 5°F-per-week reduction schedule.
Lamps deliver ambient warmth to the entire brooder space. Turn one on, hang it at the right height, and the air temperature below the cone climbs into range. Height adjustment controls heat output: raise it to cool down, lower it to warm up. This approach is blunt but legible. You can read the temperature with a thermometer placed 2.5 inches above the litter and adjust the hang accordingly.
Plates work differently. Rather than heating the whole space, they warm only the chicks physically under them - the same way a broody hen warms the chicks tucked against her belly feathers. The air temperature in the rest of the brooder stays at room temperature. That is the critical tradeoff: a heat plate is not a space heater, so it cannot compensate for a very cold room. Brinsea states that the EcoGlow must be used in a space where the ambient temperature stays above 50°F. For very young chicks in the first 72 hours, many experienced keepers treat 60°F as a more cautious practical floor - at that room temperature, day-old chicks can chill quickly the moment they step out from under the plate.
The behavioral read is the same for both heat sources. Chicks huddling tightly under the heat source are cold. Chicks panting at the edges are too hot. Chicks spread comfortably, moving freely in and out, are just right. Mississippi State University Extension points out that in warm climates, overheating is actually more common than too little heat - a mistake that a heat plate, by design, is harder to make, since the air temp in the brooder remains close to room temperature.
Mimicking a hen: the behavior difference that matters
Chicks under a mother hen do not live in a warm room - they duck under her feathers on demand and come out to eat, drink, and scratch. Research published in the Journal of Animal Science and Biotechnology found that constant light exposure in early life suppresses melatonin secretion and is associated with significantly higher fear-related behaviors in chickens. The authors concluded that "constant light exposure in early life suppress melatonin secretion and disrupts hippocampal expression of genes involved in circadian clock and BDNF/ERK pathway, thereby contributing to fear-related behaviors in the chicken." A 250-watt heat lamp, even an infrared one, produces light 24 hours a day - which is exactly the constant-light condition the study describes.
A brooding plate produces no light at all. Chicks tucked under it experience a normal day-night rhythm, can orient themselves by ambient light during the day, and retire under the plate's warmth at night. The poultry behavior literature on extension.org notes that chicks instinctively "press against any source of warmth if they are cold," and that their bond to a warm, overhead contact surface is hardwired. A plate mimics that contact. A lamp mimics a warm sun - useful, but not the same instinct.
For keepers tracking development week by week, the practical upside shows by week two: chicks under a plate learn to regulate their own exposure, walking in and out as needed, which appears to produce calmer, more exploratory birds than chicks that cannot escape the warmth of an overhead lamp.
Cost: upfront, electricity, and the replacement math
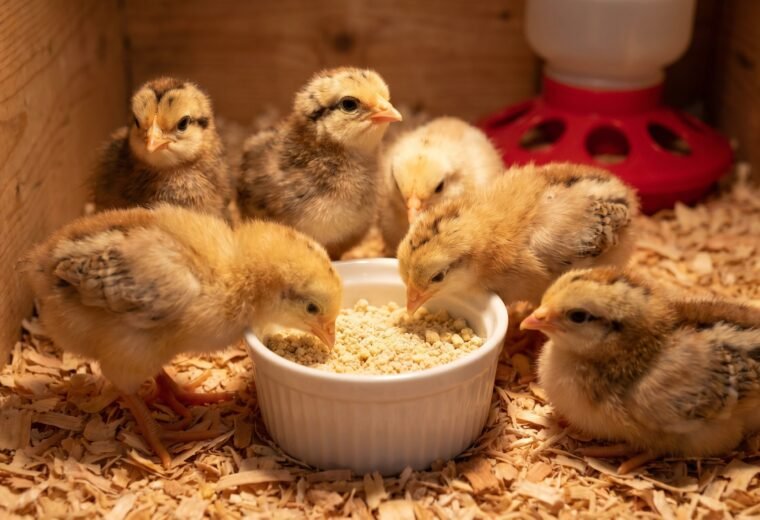
A 250-watt heat lamp fixture runs $10-25. A single infrared bulb costs $7-15 and has a limited lifespan, especially if it shatters from a water splash. A heat plate costs $45-100 depending on size and brand, with no consumable bulb to replace.
The electricity difference is substantial. At a US average rate of around $0.16 per kilowatt-hour, a 250-watt heat lamp running continuously costs roughly $0.04 per hour - about $40 over a six-week brooding period (0.25 kW x 24 h x 42 days x $0.16 = $40.32). The Brinsea EcoGlow Safety 600 draws 12 watts; at the same rate, that works out to approximately $1.94 for the full six weeks. RentACoop's 12x12 plate (22 watts) adds up to roughly $3.56 for six weeks straight. The heat plate pays back its price premium in electricity savings within a few batches, assuming you brood more than once.
Below is a side-by-side reference across the variables that matter most to a backyard keeper choosing between these two heat sources. Use it alongside your specific situation - batch size, room temperature, and how often you brood.
| Factor | Heat lamp (250W) | Heat plate (12-22W) | Verdict |
|---|---|---|---|
| Fire risk | High - falling 250W bulb over flammable litter is a leading cause of coop fires (Brinsea, MSU Ext.) | Very low - low-voltage, no exposed bulb, warm surface only | Plate wins clearly |
| Upfront cost | $10-25 fixture + $7-15 per bulb | $45-100 (no consumable) | Lamp cheaper to start |
| Electricity (6 weeks, 24/7) | ~$40 at $0.16/kWh (250W x 42 days) | ~$1.94-$3.56 depending on model (12-22W) | Plate wins by a wide margin |
| Room temp requirement | Works in cold spaces; heats the whole brooder | Room must stay above 50°F per Brinsea; treat 60°F as the practical floor for day-old chicks | Lamp for cold garages/barns |
| Light exposure | Continuous light 24h; research links constant light to fear behaviors and melatonin suppression | No light; natural day-night cycle preserved | Plate wins for chick welfare |
| Mimics a hen | Overhead warmth only; chicks cannot escape the heat source | Contact warmth from above; chicks go in and out naturally | Plate is closer to natural brooding |
| Batch size flexibility | One lamp handles 25-50+ chicks | Plates sized for 15-30 chicks; stack two for larger flocks | Lamp simpler for big batches |
| Readability | Thermometer reads air temp; straightforward | Read chick behavior; no useful air-temp reading in the brooder | Lamp easier for first-timers to verify |
When a heat lamp still makes sense
The heat plate's Achilles heel is cold ambient temperature. If you are brooding in an unheated barn, an outdoor coop in winter, or a garage that drops below 50°F at night, a plate alone cannot do the job - it does not produce enough total heat to warm a chick that is standing in 35°F air once it steps out from under the plate. In these situations, a heat lamp (properly secured with a chain and a backup clip, never cord-only) is still a practical option.
Very large batches also favor lamps. One 250-watt lamp covers 25-50 chicks in a reasonable-sized brooder ring. Covering the same number with plates requires multiple units and good spatial planning. For keepers setting up a dedicated brooder with a large first hatch, the math sometimes favors a lamp - just apply every safety precaution and inspect the setup every day.
A sensible middle path: use a heat plate as the primary heat source in an insulated room, and keep a heat lamp on hand as a backup for power outages or cold snaps. That way you get the plate's everyday safety and the lamp's raw heat output only when you need it.
Getting the brooder right either way
Whichever heat source you choose, the things that kill chicks in the first two weeks are almost never the choice of lamp vs plate. They are a brooder that is drafty, wet, or overcrowded. The chick behavior check - huddling vs spreading vs even distribution - applies to both heating methods and tells you more than any thermometer reading.
A commonly cited rule of thumb for brooder floor space is roughly half to one square foot per chick - enough room that birds can move away from the heat source without piling on each other. Fresh, dry bedding matters as much as temperature: pine shavings or chopped straw at least three inches deep, replaced or topped up before it becomes wet and matted. Water should be shallow enough that a day-old chick cannot drown in it, and placed away from the heat source so spilled water does not reach the lamp (or the plate's cord connection).
If you want a full timeline - when to drop the temp, when to add a roost, when chicks are ready to go outside - the raising baby chicks week by week article walks through all six stages. Before you buy your brooder box, feeder, and waterer, the best chick brooders page lays out what to look for so you do not end up with an undersized setup on day one.
One last note on pasty butt, the most common early crisis: it is often linked to temperature stress in the first 48 hours - either too cold or too hot - though shipping stress and a sudden dietary change can also trigger it. Both heat lamps and poorly sized plates can cause it. If you see chicks panting near the edges of the brooder and one or two develops a caked vent, lower your heat source (or raise the plate legs a notch) before anything else.