Ninety-five degrees in week one, then five degrees cooler every week after that - that is the short version. A flock of 15 chicks arriving on day one needs a brooder area hitting 95°F measured two inches above the floor under the heat source, and that target drops by 5°F each week until you reach the ambient temperature of the room or the chicks are fully feathered, whichever comes first. The rule is simple. Applying it well is where most beginners go wrong.
Below is the full week-by-week chart, the behavioral signals that tell you more than any thermometer will, a practical comparison of heat plates and lamps, and a clear decision guide for weaning your birds off supplemental heat.
Week-by-week brooder temperature chart
University of Florida IFAS Extension puts it plainly: chicks need 95°F at brooder floor level for the first week of life, with a 5°F reduction for each week that follows. Penn State Extension's guidance aligns: drop the heat by 5°F per week until the brooder reaches the building's ambient temperature or 62-65°F. The Merck Veterinary Manual gives a floor range of 85-90°F for week one. Our reading of these two sources together suggests that Merck's figure reflects the coolest edge of the brooder - not the spot directly under the bulb - while the heat source itself runs hotter; the two sources are not contradicting each other but are measuring different points in the same setup.
Use the table below as your field reference. The "floor range" column gives the temperature at the cool edge of the brooder, 2 inches above the bedding; the "directly under heat" figure is what a probe touching the spot beneath the lamp or plate will read.
| Week | Target at brooder floor (cool edge) | Directly under heat source | Min. floor space per chick |
|---|---|---|---|
| 1 | 90-95°F | ~95°F | 0.25 sq ft |
| 2 | 85-90°F | ~90°F | 0.5 sq ft |
| 3 | 80-85°F | ~85°F | 0.75 sq ft |
| 4 | 75-80°F | ~80°F | 0.75 sq ft |
| 5 | 70-75°F | ~75°F | 0.75 sq ft |
| 6 | 65-70°F | ~70°F | 1 sq ft |
| 7-8 | Ambient (62-65°F min.) | Ambient | 1 sq ft |
Space increases matter because crowded chicks pile on one another for warmth even when the temperature is correct, which can smother weaker birds. Penn State Extension lays out the full progression: 0.25 sq ft per bird for the first week, 0.5 sq ft through week two, 0.75 sq ft through weeks three through five, and 1 sq ft by weeks six through eight.
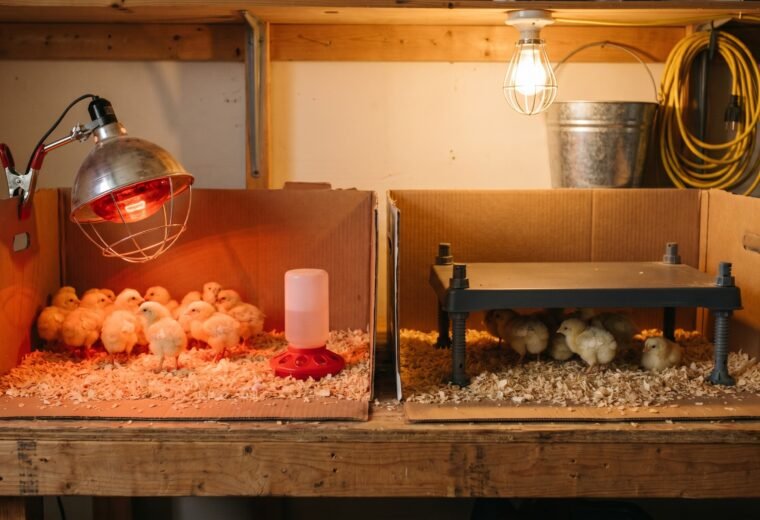
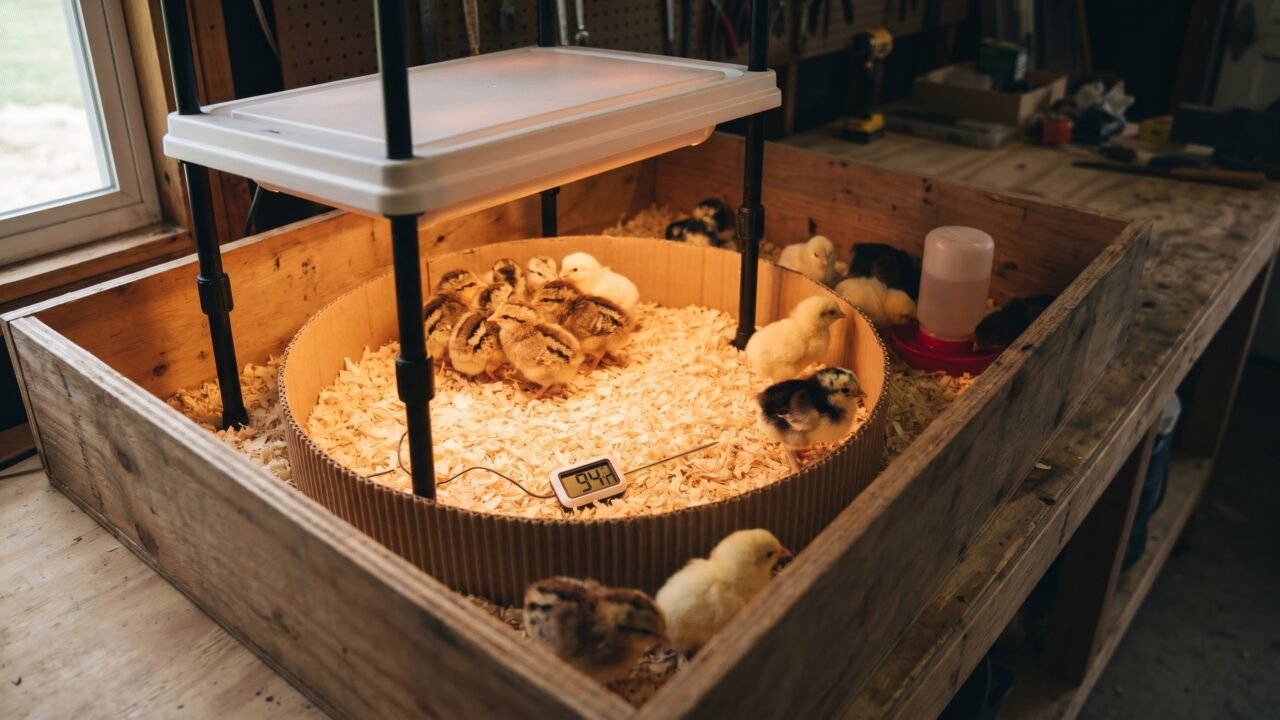
One note on heat lamp technique: raise the lamp 2 inches per week to drop the temperature, or dial a thermostat if you are using one. The lamp itself should hang from a chain or wire - not the cord - at least 18 inches above the bedding to start, per Extension.org guidance on infrared lamp brooding. For heat plates, follow the manufacturer's height chart; most plates are raised as chicks grow taller.
Reading chick behavior instead of the thermometer
Your birds will tell you whether the temperature is right faster than any probe. The signals are obvious once you know what to look for.
Three patterns matter:
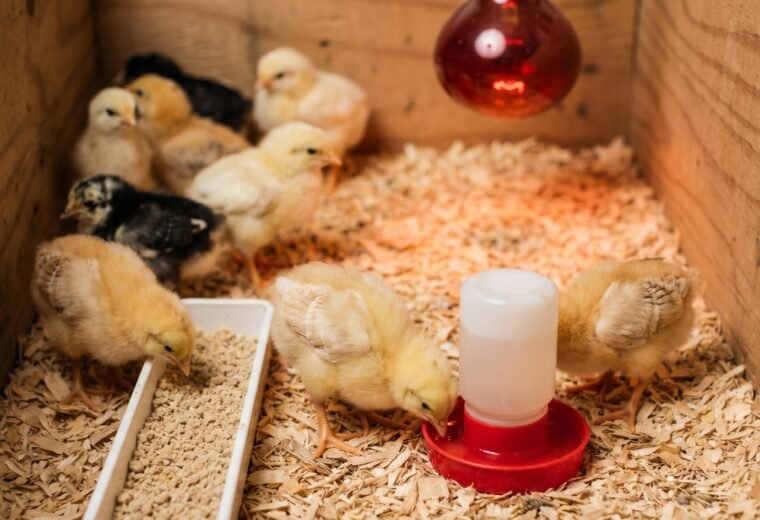
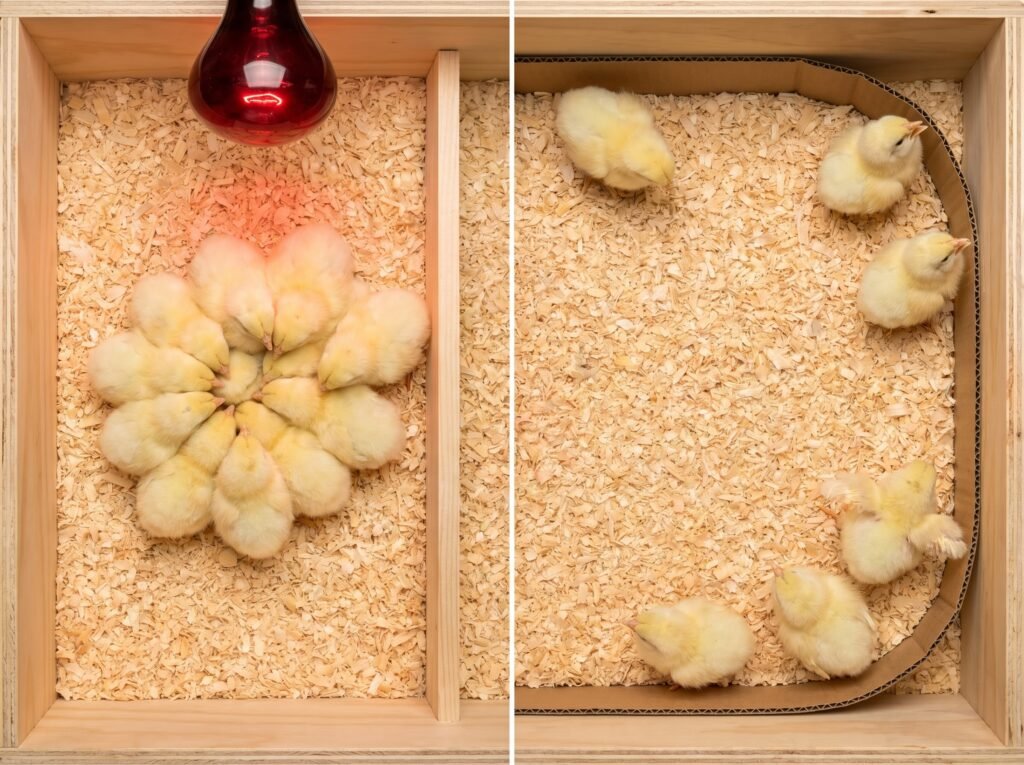
- Piled under the heat source, cheeping loudly: the brooder is too cold. Increase heat or lower the lamp. Cold chicks are at immediate risk - chilling is the single most common cause of early chick mortality.
- Spread to the outer walls, panting or holding wings away from the body: the brooder is too warm. Raise the lamp or reduce the plate temperature.
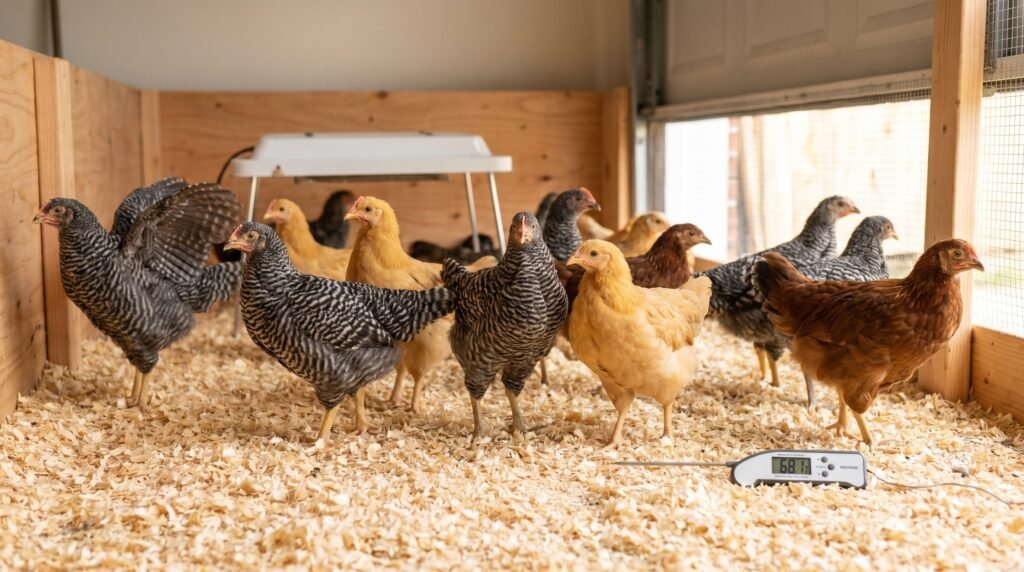
- Moving freely throughout the space, peeping quietly, eating and drinking: temperature is correct. This is what you want to see.
University of Florida IFAS Extension describes the cold pattern as chicks that "huddle up in the middle directly under the heat source" and the hot pattern as chicks that "move to the edge of the brooder away from the heat source," adding that comfortable chicks "move about freely throughout the available space." Extension.org's brooding guide echoes this: cold hatchlings "crowd together under the brooder" while overheated ones "try to get as far away from the brooder as possible."
Check behavior at least twice daily during week one - once first thing in the morning before the room warms, and again in the afternoon. Temperature swings between night and day are where beginner setups drift. A Penn State Extension warning is worth posting on your brooder: "Many producers tend to forget to decrease the brooding temperature as the weeks go by and the chickens become heat-stressed." The fix takes 30 seconds. Missing it costs you feed conversion and comfort for weeks.
One common misread: a group of chicks huddled on one side of the brooder but not directly under the heat source often signals a draft, not a temperature problem. Check for gaps in the brooder walls and correct them before adjusting heat.
Heat plate vs. heat lamp: which one to use
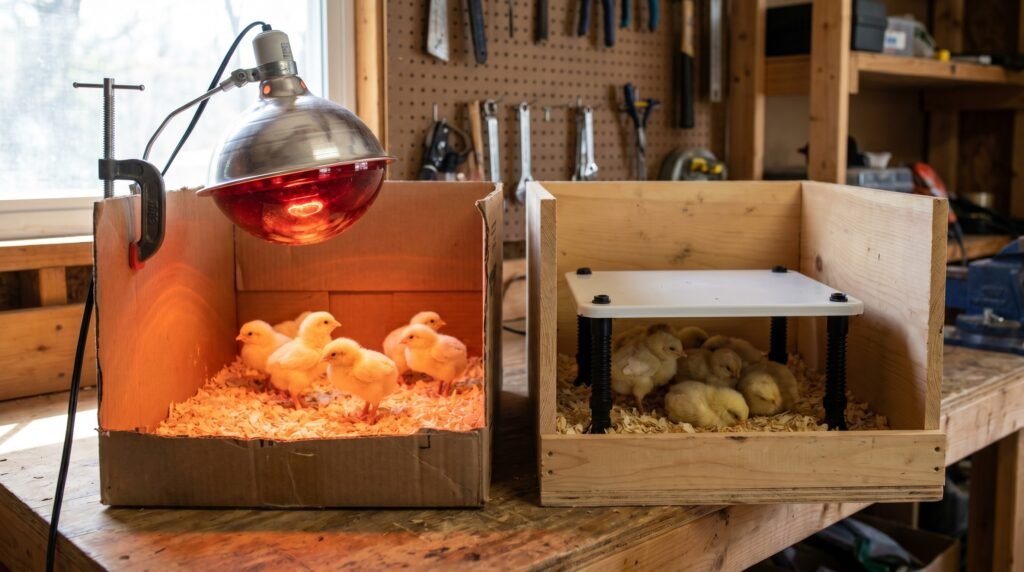
Both heat plates and traditional infrared lamps brood chicks successfully. The choice comes down to flock size, fire risk tolerance, and how you want to manage the setup day to day.
| Feature | Infrared heat lamp (250W bulb) | Heat plate (radiant panel) |
|---|---|---|
| Fire risk | High - 250W bulb over dry bedding is a documented coop fire cause | Low - low-voltage element, no open flame or extreme surface heat |
| Power draw | 250W continuous | 12-18W (per manufacturer spec) |
| Light output | Continuous light 24/7 (red bulb reduces but does not eliminate this) | No light; chicks experience natural dark periods |
| Flock size suitability | Up to 250+ chicks with correct hover setups | Typically 10-50 chicks depending on plate size |
| Temperature control | Adjust by raising or lowering lamp height | Adjust plate height as chicks grow; some models have dials |
| Chick behavior effect | Constant light can disrupt rest patterns | Chicks self-regulate, going under when cold and out when warm |
| Setup complexity | Simple; hardware widely available | Simple; costs more upfront |
The fire risk is real and worth taking seriously. A 250-watt bulb running continuously over dry pine shavings is a well-documented cause of coop and barn fires in poultry keeping - the mechanism is straightforward: a lamp knocked loose or tipped by a bird contacts bedding that ignites quickly. Heat plates sidestep this risk by design. One major heat plate manufacturer specifies their radiant panels draw only 12-18 watts at low voltage, with no exposed surface hot enough to ignite bedding. The lower wattage also cuts running cost compared to a lamp drawing 250 watts around the clock.
The behavioral science also favors heat plates for small flocks. A peer-reviewed study published in PMC found that chicks reared with dark brooders (heat plates) "spent less time on feather pecking, locomotion and fleeing" compared to chicks under continuous light, and described the approach as "a successful method of reducing or preventing some of the major welfare problems in layers, e.g., feather pecking, cannibalism and fear." The darkness under the plate allows rest cycles that a 250W red lamp does not provide.
For heat-lamp wire gauges, thermostat pairing, and running-cost math, the heat lamp vs. heat plate comparison breaks it down by flock size and building type.
If you do use a heat lamp: hang it from a chain, never the cord; use a porcelain socket rated for the wattage; keep at least 18 inches of clearance above bedding; and never leave chicks unattended during the first 24 hours with a new setup.
When to wean chicks off supplemental heat
Chicks are ready to go without supplemental heat when they are fully feathered - which for most standard breeds happens somewhere between six and eight weeks. Extension.org's brooding guide is clear: "Provide supplemental heat until the hatchlings are well feathered." Feather development varies by breed; fast-feathering production hybrids such as Red Sex-Links tend to finish earlier, while some heavy-bodied heritage breeds take the full eight weeks or longer.
Three conditions should all be true before you cut the heat:
- Chicks have full feather coverage across the back, wings, and vent area (not just wingtip feathers).
- The brooder temperature has already been reduced to match ambient room temperature through the weekly step-down schedule.
- Nighttime temperatures in the brooder space will not drop below 65°F, or the chicks are moving to a coop with adequate ventilation and feather cover.
In cold weather or a drafty garage, be conservative. Extension.org notes that in winter conditions, "heat should be continued for the first six weeks after birds arrive, even if the birds are fully feathered, to prevent waterers from freezing" - a secondary but practical reason to keep supplemental heat running a little longer than the calendar strictly requires.
Chick physiology is the underlying reason for the caution. Research published in PMC on broiler thermoregulation found that mature thermoregulation is not present until approximately four weeks of age, and that younger chicks cannot maintain body temperature at cool ambient temperatures even when their initial feathering has begun. The step-down schedule maps directly onto that developmental arc.
Moving birds outside is a separate decision with its own checklist. The guide on moving chicks outside covers minimum outdoor temperature thresholds, acclimation steps, and what the coop needs to be ready before the flock transitions.
Setting up a brooder that actually works
Temperature management does not happen in isolation. The physical setup shapes whether the numbers on your thermometer translate to comfortable chicks.
Pre-warm the brooder. It is generally recommended to run the heat source for at least 24 hours before chicks arrive. Bedding, waterers, and the brooder floor itself absorb heat slowly; a setup that reads 95°F after two hours of warming can still deliver chilled flooring at chick level if the bedding and walls have not equalized.
Use a chick guard for the first week. A cardboard ring 18-24 inches high around the brooding area prevents drafts and keeps young chicks from wandering into cold corners. Extension.org recommends sizing the guard to roughly 4 feet across for 25 chicks, adding 2 feet of diameter for each additional 25 birds up to about 100. At seven days, the guard can come down.
Measure where the chicks are, not above them. Place the thermometer probe two inches above the bedding, at the perimeter of the heat zone - not at the center directly under the bulb. That edge temperature is what most of the flock experiences most of the time.
One final bedding note that trips up new keepers: use pine shavings, not cedar. Cedar releases aromatic oils that irritate chick respiratory tracts, and the irritation compounds any temperature stress the flock is already experiencing. Keep the bedding dry as well - wet patches under waterers pull heat from the floor and create a disease environment no matter what the thermometer says.
If you are still choosing a brooder - or questioning whether your current box will hold up through the summer - commercial tubs, homemade builds, and ventilation details are compared in the best chick brooders roundup.
Heat management is only one thread of the first eight weeks. Feed transitions, grit introduction, and handling for tameness all have their own timing - the raising baby chicks week by week calendar maps out the full care sequence once your brooder is running well.