Twelve inches wide, 12 inches deep, 12 inches tall - that is the standard nest box that fits nearly every standard breed, from Barred Rocks to Rhode Island Reds. Get the size right and most other nesting-box problems simply go away: hens go in willingly, eggs stay whole, and floor-laying drops to near zero. Get it wrong and you spend mornings hunting eggs in corners.
This guide covers the full setup: dimensions for standard birds and bantams, how many boxes a flock actually needs, where in the coop they belong, which bedding holds up best, whether herbs do anything useful, and the two problems that frustrate keepers most - floor-laying and egg-eating.
What are the right nest box dimensions for chickens?
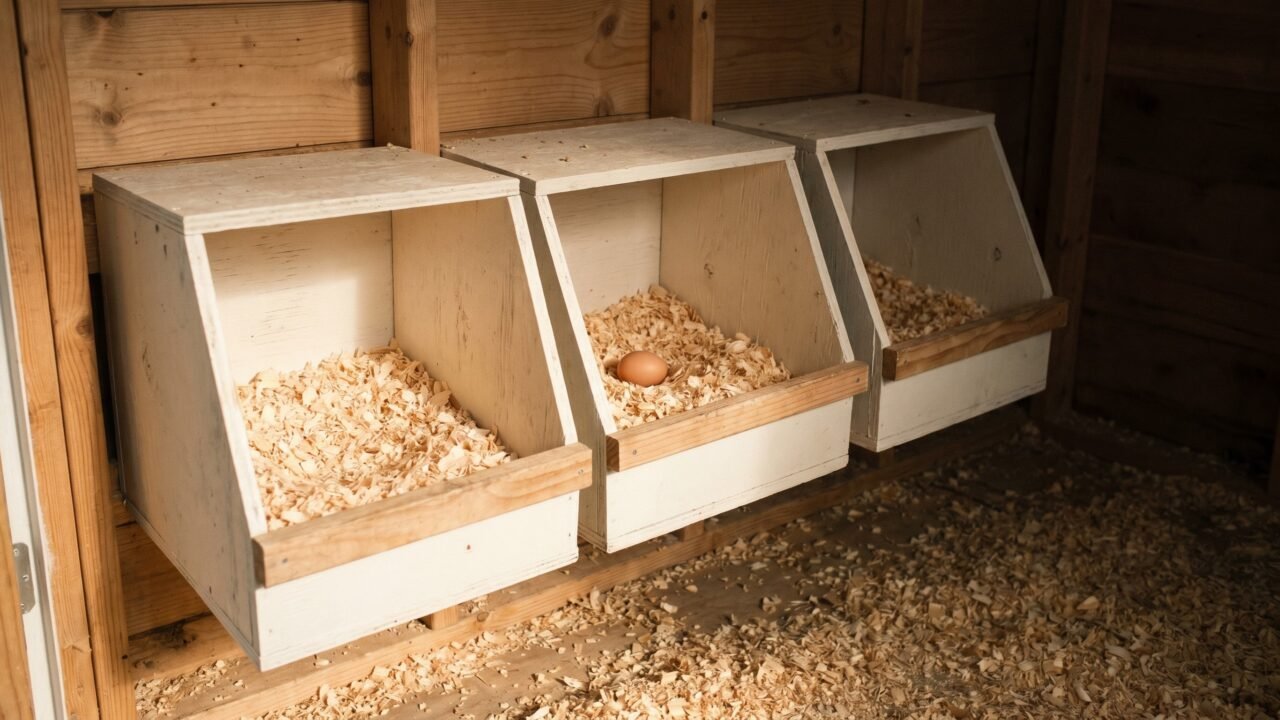
Penn State Extension sets the standard at 12 inches wide by 12 inches deep by 12 inches tall for standard-size hens. That interior gives a bird room to turn, settle, and scratch the bedding into shape. Larger breeds need 14 x 14 inches; bantams are fine in standard boxes. The single most-used add-on is a 3- to 4-inch front lip to keep shavings in the box.
Penn State Extension's guidance is consistent across all three of their small-flock publications, and the number does not change with breed weight within the standard range.
Larger breeds need more. A Jersey Giant or a Buff Brahma will overhang a 12-inch box, which discourages use and leads to cracked eggs near the lip. For heavy breeds, sizing up to 14 x 14 inches costs almost nothing in materials and pays back in clean, centered eggs.
Bantams are the opposite situation. Standard 12-inch boxes work fine - bantams tend to use whatever is available rather than demand a perfect fit - but a 10 x 10 inch box is a comfortable option if you are building a dedicated bantam setup. In a mixed flock, the full-size boxes serve everyone.
One design detail that earns its place: a 3- to 4-inch lip across the front of each box. Penn State's guidance specifically calls this out to keep nesting material inside the box. Without a lip, shavings kick out onto the floor and eggs land on bare wood, which breaks them - the opening move in most egg-eating stories.
| Bird size | Recommended interior (W x D x H) | Notes |
|---|---|---|
| Standard layer (up to ~7 lb) | 12 x 12 x 12 in | Works for Leghorns, Plymouth Rocks, Australorps, most dual-purpose breeds |
| Heavy/large breed (7-12 lb) | 14 x 14 x 12 in | Brahmas, Jersey Giants, Cochins; prevents overhang that causes edge breakage |
| Bantam | 10 x 10 x 10 in (or standard) | Standard boxes work in mixed flocks; dedicated bantam housing benefits from the smaller size |
How many boxes does a flock need?
Penn State recommends one 12-inch-by-12-inch nest per four hens with a hard minimum of four boxes. Scale using this formula: two boxes for the first four hens, then one additional box for every four more birds. A 16-hen flock therefore needs five boxes. Research in Poultry Science confirms that adequate nest access keeps 90-95% of eggs landing where they should, and that overcrowding inside boxes drives the rest to the floor.
Penn State's laying-flock management guide and egg-eating prevention resource agree on the scaling rule: two boxes for the first four birds, then one additional box for every four more birds added. Run those numbers on a real flock: 16 hens means two boxes for the first four, then three more for the remaining 12 - five boxes total. In practice, a 16-hen flock typically settles into using four to five favorites consistently, with the extra sitting nearly empty, a pattern consistent with the Poultry Science finding that laying synchrony concentrates use in a subset of available boxes.
Why does the minimum-of-four rule exist even for tiny flocks? Because hens are particular about occupancy. When too few boxes are available, birds queue up, jostle, and occasionally lay on the floor or in the run. The Poultry Science research confirmed that in aviary systems, 90-95% of eggs land in nests when nest access is adequate - but that figure drops when crowding inside the boxes increases, because insufficient space for egg laying correlates directly with more non-nest eggs and more damaged eggs.
Adding extra boxes beyond the four-per-hen ratio rarely hurts. Hens routinely prefer two or three "favorite" boxes and ignore the rest, but having the extras available prevents traffic jams on busy mornings.
Where in the coop should nesting boxes be placed?
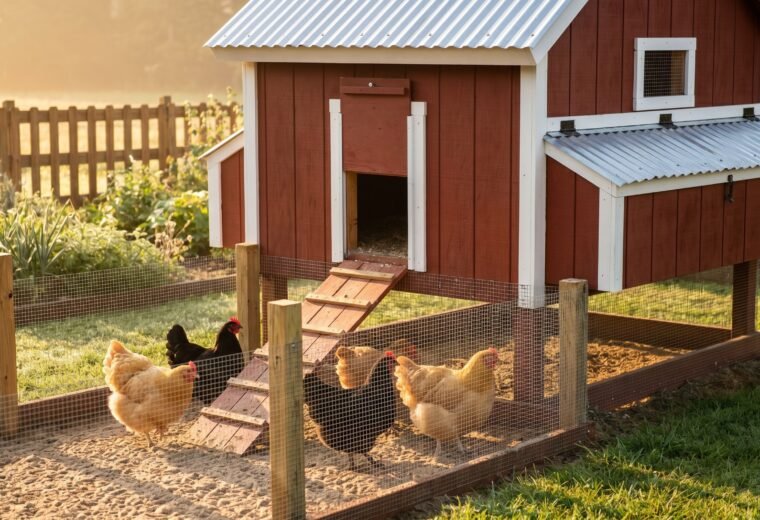
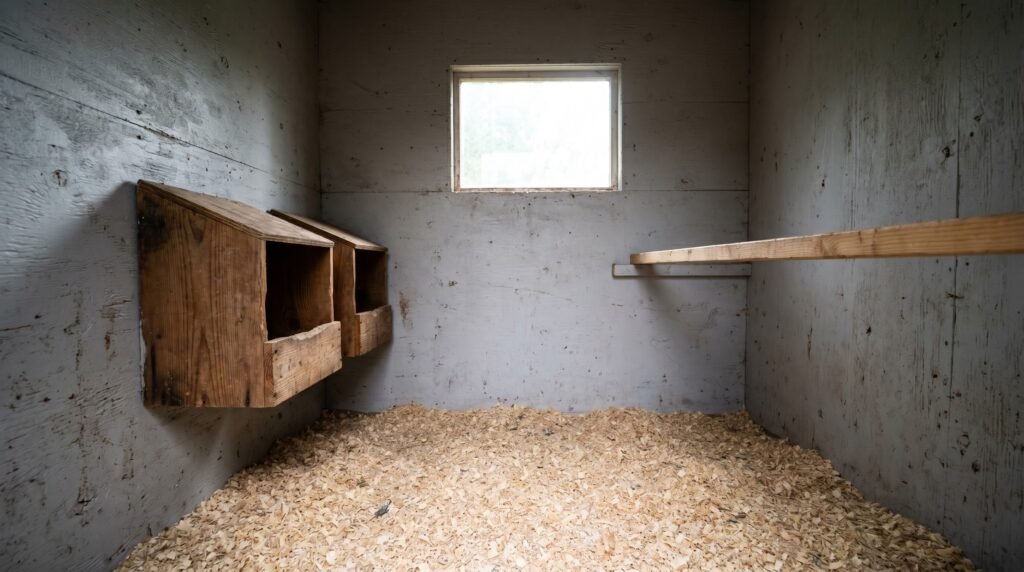
Penn State specifies 24 inches above the floor and away from the roosts. Mount boxes on the dimmest, quietest wall, below the roost bars. Roosts must always sit higher than nest boxes - if boxes are higher, hens sleep in them and fill them with droppings. Keep adequate physical separation between boxes and roost bars so that falling droppings do not contaminate bedding and eggs.
The 24-inch height keeps boxes off damp ground-level litter, out of easy predator reach through any ventilation gaps, and - critically - below the roost bars. Roosts should always sit higher than nest boxes. This distinction is the single most important placement rule. Chickens instinctively roost at the highest available point; if nest boxes are higher than the roost bars, hens sleep in them, fill them with droppings overnight, and you lose both your eggs and your bedding. The roost bars and perch design article shows exactly how bar height, bar count, and placement interact - useful if you are building or retrofitting a coop from scratch.
The "away from roosts" part means physical separation, not just vertical difference. Keep enough distance between the nesting boxes and the roosting bars that droppings falling from roosts cannot reach the box bedding or eggs. The exact gap depends on roost height and coop layout; the principle is that boxes should be in a distinct zone from the roosting area.
Placement within the coop wall also shapes usage. Hens choose darker, quieter spots for laying. Place boxes along a wall that gets minimal foot traffic, avoid the corner directly below a busy pop door, and if the boxes receive direct morning sun through a window, a simple partition board on the side solves it. Hens given a choice between a bright box and a dim one will consistently pick the dim one, and that preference, if ignored, is a leading cause of floor-laying in otherwise well-designed coops.
What bedding goes inside nesting boxes, and how often should it be changed?
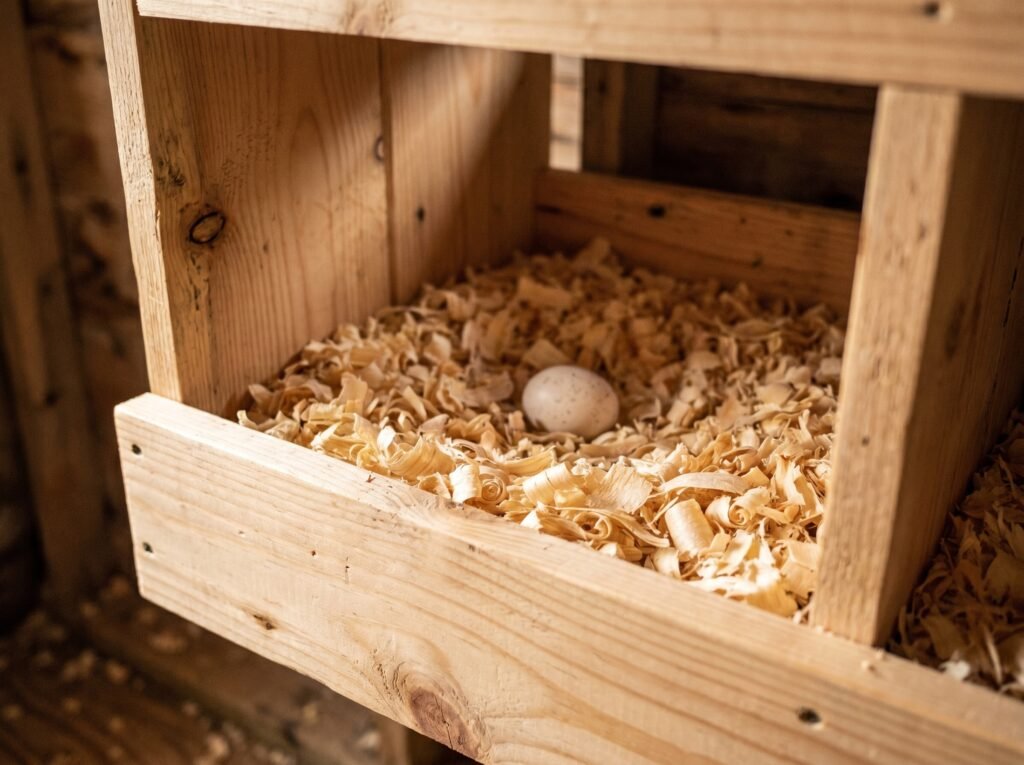
Penn State recommends three inches of clean pine shavings as the standard, with two inches as the absolute minimum. Below two inches, eggs hit bare wood and crack - the trigger for most egg-eating problems. Replace bedding whenever it becomes compacted or wet, typically every two to four weeks. Pine shavings are the most practical choice; straw works if pre-chopped to one inch or less.
Penn State's small-flock guide specifies three inches of clean pine shavings in the nests - enough to cushion eggs, give hens material to scratch and shape, and absorb the occasional droppings from a bird who settles in too long. Their egg-eating prevention publication sets two inches as the absolute floor, beyond which eggs hit bare wood and the breakage-to-eating cycle begins.
Pine shavings are the most practical choice for most keepers: available almost everywhere, absorbent, and easy for hens to manipulate. The extension.org litter guide describes quality bedding as "nontoxic to the birds" and "very absorbent," with reduced thermal conductivity - pine shavings check all three boxes.
Straw works but demands more attention. If you use it, cut or use pre-chopped straw that is an inch or less in length - long-strand straw mats over quickly, loses its cushioning, and becomes a damp layer that breaks eggs and breeds bacteria, a point the extension.org litter guide backs up. Whole-straw nests need replacing at least weekly; short-cut straw lasts longer.
Nest pads - rubber mats or artificial turf inserts - are a legitimate alternative, especially if you are battling the Northern fowl mite, since smooth surfaces give mites fewer hiding places. They do not absorb moisture the way shavings do, so pair them with daily egg collection and occasional rinsing. Some small-flock keepers use a pad as the base layer and top it with an inch of shavings for the best of both.
A note on herbs in the nest boxes
Lavender, mint, and other aromatic herbs tucked into nesting boxes are a popular practice, and the reasoning behind it is real - aromatic volatile compounds in these plants have demonstrated insecticidal properties in laboratory studies. Some wild bird species incorporate fresh green plant material into nests, which researchers have investigated under what is called the nest protection hypothesis.
The evidence from controlled experiments, though, is mixed. A comprehensive literature review in Behavioral Ecology found that adding aromatic material to nests did not consistently reduce parasite or pathogen loads compared to non-aromatic material. So herbs may make the nesting area smell pleasant and may offer some minor deterrent effect, but they are not a substitute for treating a confirmed mite infestation with a proven approach - and they should never delay that treatment. If you enjoy adding a handful of dried lavender to fresh bedding, there is no harm in it. Just do not count on it as pest control.
How do you stop chickens from laying eggs on the floor?
Floor-laying almost always starts at pullet stage. Install boxes before birds reach laying age, position them in the dimmest corner, and keep roost bars higher than box tops. Extension researchers confirm that pullets are mimics: the first layers set the pattern for the whole flock. Intervene early, block attractive floor corners, and use a ceramic egg inside the box as a visual cue - those three steps resolve most floor-laying before it becomes a habit.
Pullets who discover a floor spot before the nest boxes are introduced will train every bird that follows - "birds are mimics - the first layers become the teachers for the remaining pullets in a flock," the extension.org behavioral guide notes. The first eggs determine the template.
The practical fix is simple and front-loaded:
- Install boxes before pullets reach laying age (typically 18-24 weeks, depending on breed). Give them a week or two to explore the boxes as a roosting option before they have the laying urge.
- Position boxes in the darkest corner of the coop, not against the brightest wall. Hens search out low-light, secluded spots when the pre-laying drive hits.
- Keep roosts higher than boxes. A pullet who finds a dim corner at floor level that is lower than everything else in the coop has found her preferred nest - whether you put a box there or not.
- Block attractive floor corners temporarily. Cardboard, a small feed sack, or a piece of board across an inviting dark corner removes the competition while hens learn.
If floor-laying is already established, the same interventions apply, plus patience. Move any floor eggs found immediately - leaving them in place is an invitation. For stubborn cases, placing a ceramic egg or golf ball inside a nest box can trigger the "there is already an egg here, this spot is safe" response that hens use to select their spot.
Floor-laid eggs are also more likely to be dirty, cracked, and missed at collection. The collecting and storing eggs article breaks down bloom loss, refrigeration timing, and how a cracked shell on pickup shortens shelf life.
How do you stop egg-eating in chickens?
Once egg-eating starts, it is extremely difficult to break - Penn State's research is unambiguous on that point. Prevention is far easier than a cure. The chain starts with a cracked egg in a box with too little bedding. Keep at least 2-3 inches of cushioning at all times, supplement calcium so shells stay hard, keep boxes dim, and collect eggs twice daily - mid-morning and early afternoon. If eating is already happening, identify the hen by dried yolk on her beak and remove her promptly.
Penn State's egg-eating prevention guide states it plainly: "once a hen discovers the palatability of eggs, the habit is extremely difficult, if not impossible, to break." The break in the chain is nearly always a cracked egg - most often from a thin shell landing on inadequate bedding - and observational learning spreads it from there.
Prevention at the box level:
- Maintain at least 2-3 inches of cushioning bedding at all times. A hard-bottomed box breaks eggs; broken eggs start the habit.
- Offer free-choice oyster shell alongside layer feed. Thin shells crack more easily. Penn State explicitly recommends "free-choice oyster shells or limestone as a calcium supplement" to harden shells.
- Avoid bright lighting near the boxes. Penn State notes that bright light "increases nervousness and picking habits" - dim boxes calm birds down and reduce the chance of an accidental peck becoming a deliberate one.
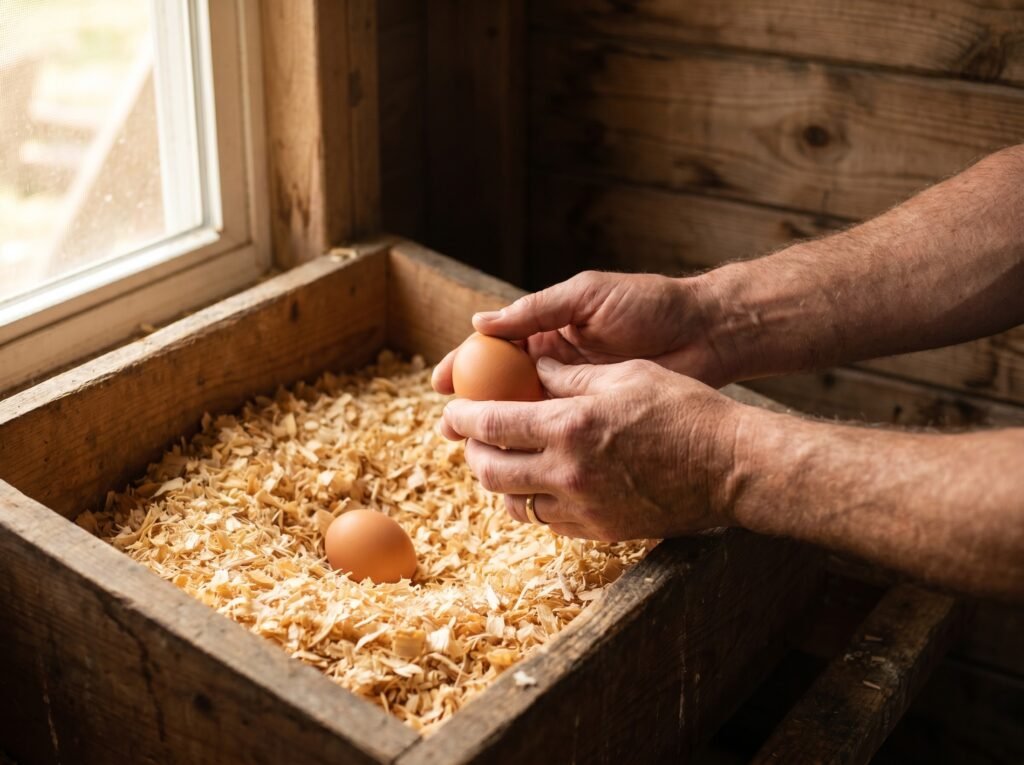
- Collect eggs early and often. Penn State's guidance: "Collect eggs often and early in the day. Most hens will lay before 10:00 a.m. each morning." Two collections daily - once in mid-morning, once in early afternoon - removes eggs before boredom leads to investigation.
If egg-eating is already happening, identify the culprit first. Look for dried yolk on the beak and the sides of the face - the extension guide describes this as the most reliable visual cue. The recommended action is to remove that hen promptly. Culling or rehoming the individual before the behavior spreads to the rest of the flock is the standard advice from extension services.
Roll-away nest boxes - where the floor is sloped so eggs roll back out of reach - are a structural solution worth considering for persistent problems. Research in aviary systems notes that roll-away egg catchment "largely prevents the problem of egg eating as eggs are inaccessible to hens," though crowding inside those boxes can prevent eggs from rolling cleanly, so nest occupancy management matters there too.
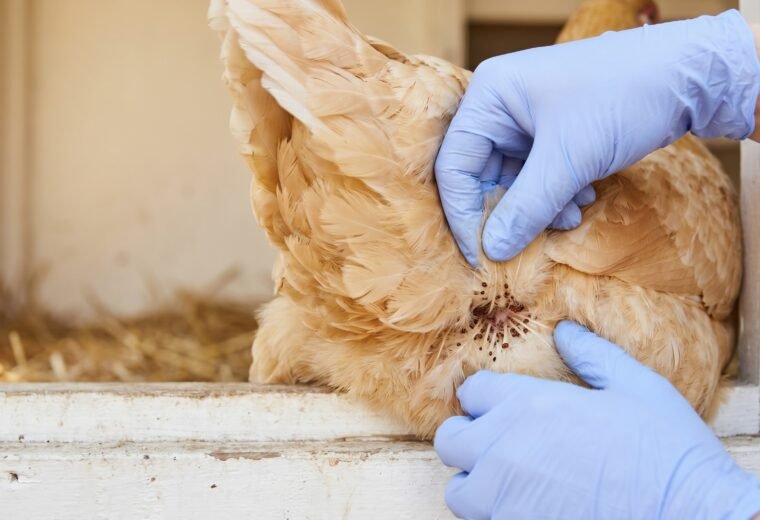
How do you keep nesting boxes clean and free of mites?
Replace all bedding whenever it becomes compacted, wet, or shows droppings - typically every two to four weeks. Inspect box corners and frame undersides at each change; red roost mites leave grayish-brown dust and tiny moving specks. Treat both structure and birds if you find them, and repeat in seven to ten days to break the egg cycle. Food-grade diatomaceous earth helps in clean, dry boxes but cannot resolve an established infestation on its own.
Clean nesting boxes and clean eggs are directly linked. A box that accumulates wet shavings, feathers, and droppings will produce dirty eggs that need washing - which removes the bloom and forces refrigeration. More practically, wet litter is where red roost mites (Dermanyssus gallinae) shelter during the day, crawling onto hens at night and making birds restless enough to avoid the boxes.
The Northern fowl mite and the red roost mite behave differently but both use the nesting area. Northern fowl mites live on the bird continuously; red roost mites hide in cracks and crevices in the coop and nest boxes during daylight. Any mite treatment needs to hit both the birds and the nest boxes - "It is important to treat the inside of the poultry house, making sure the nesting area, roosts, and any cracks and crevices are treated," the extension.org external parasite guide confirms.
A practical maintenance schedule for the boxes:
- Top up bedding whenever depth drops below two inches.
- Remove and replace all bedding when it becomes compacted, wet, or shows droppings. Many keepers do this every two to four weeks depending on flock size and season.
- Inspect the corners and underside of box frames at each bedding change. Red roost mites leave a grayish-brown dust and tiny moving specks. If you see them, treat both the structure and the birds, and repeat in seven to ten days to break the egg cycle.
- Food-grade diatomaceous earth (DE) sprinkled into dry bedding is a common addition - the abrasive particles disrupt the mite's waxy cuticle layer. Extension guidance is honest about its limits, though: DE does not kill mite eggs, so it can suppress a light infestation but cannot resolve an established one. Use it as a deterrent in clean boxes, not as a stand-alone treatment once mites are present.
For a bird that seems ill, lethargic, or injured regardless of what you see in the nesting box, the right next step is a poultry vet - not home treatment.
What does the nest box setup checklist look like at a glance?
The table below condenses every variable covered in this guide into a single reference. Use it when building a new coop, auditing an existing setup, or troubleshooting a laying problem. All figures are drawn from the Penn State Extension and poultry.extension.org sources cited at the end of this article.
| Variable | Minimum / baseline | Better practice | Why it matters |
|---|---|---|---|
| Box size (standard breeds) | 12 x 12 x 12 in | 14 x 14 x 12 in for heavy breeds | Prevents overhang, reduces edge breakage |
| Boxes per hen | 1 per 4 hens; 4 box minimum | 2 boxes for first 4, +1 per additional 4 | Reduces queue-caused floor laying |
| Height above floor | 24 in (Penn State recommendation) | 24 in; ensure roost bars are higher still | Keeps boxes above damp litter, below roosts |
| Distance from roosts | Separate wall or dedicated area | Enough gap that droppings from roost bars cannot reach box bedding | Prevents overnight droppings contaminating bedding |
| Bedding depth | 2 in (minimum cushion) | 3 in clean pine shavings or short-cut straw | Cushions eggs; fewer broken shells = less egg-eating risk |
| Front lip | 3 in | 3-4 in | Keeps bedding in box; reduces egg rolling to edge |
| Lighting near boxes | Dim / indirect | Darkest area of coop, shaded from windows | Encourages use; reduces nervousness and picking |
| Egg collection frequency | Once daily | Twice daily (mid-morning + early afternoon) | Fewer eggs exposed = less accidental breakage, less egg-eating |