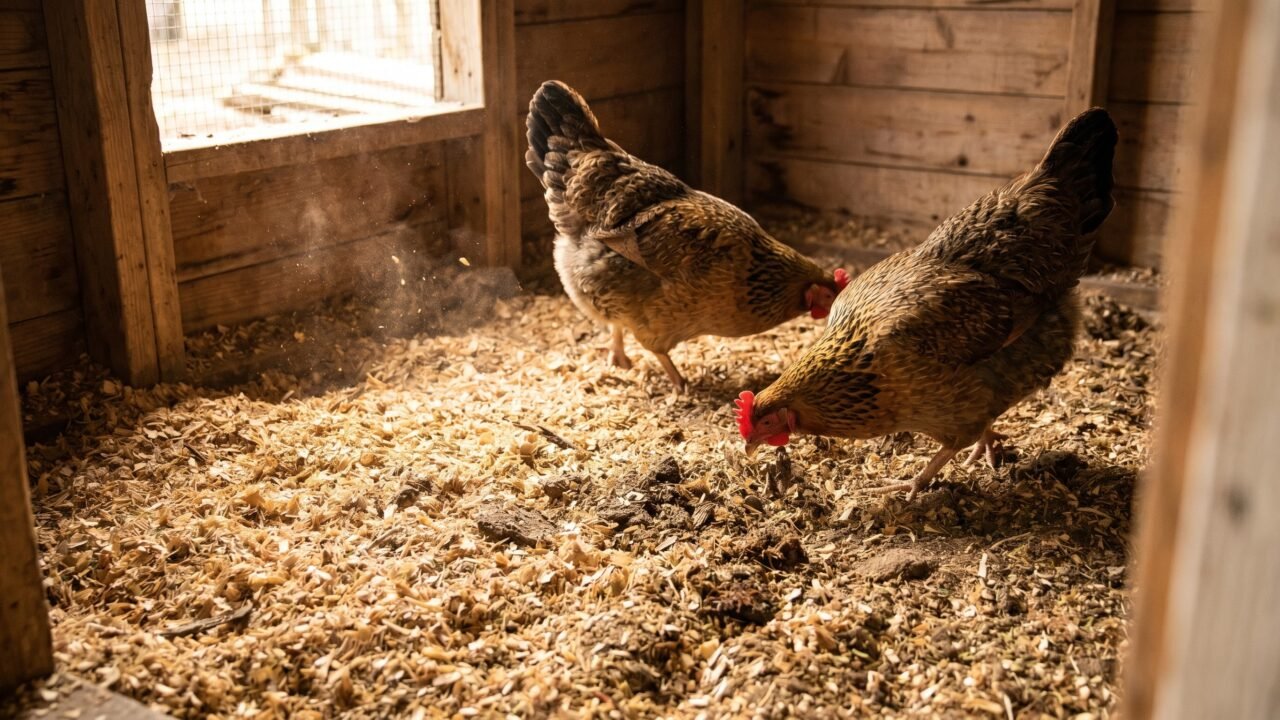
Picture the floor of a well-run coop in mid-January: a thick, dry, slightly warm bed of shavings that smells faintly of earth rather than ammonia. That is what the deep litter method looks like when it is working. Rather than stripping out soiled bedding every week, you layer fresh material on top of the old and let resident microbes break the manure down inside the coop. The result, over six to twelve months, is an actively composting floor that absorbs odor, retains some warmth, and turns into ready-to-use garden amendment when you finally do clean out.
The method is not a "never clean the coop" shortcut. Managed badly, it becomes a wet, ammonia-laden slab that threatens respiratory health and spikes coccidiosis risk. The line between those two outcomes is moisture.
What the deep litter method actually is
The deep litter method is a bedding management system where manure and carbon material accumulate in place and compost on the coop floor rather than being removed weekly. Chickens scratch and aerate the bed themselves. Beneficial microbes break down waste, release modest heat, and compete with pathogens. The result, over six to twelve months, is a composting floor that manages odor and produces usable garden amendment at cleanout.
Deep litter is a bedding management approach in which manure and carbon-based material are allowed to accumulate and compost in place rather than being removed on a weekly or biweekly schedule. Chickens scratch and turn the material themselves, introducing oxygen and mixing fresh droppings into the older layers. Beneficial bacteria and fungi colonize the bed and decompose the nitrogen-rich waste, releasing modest heat and competing with pathogens in the process.
The term "deep" refers to depth. You start with 4 to 6 inches of fresh material and add thin layers as the season progresses, eventually reaching 8 to 12 inches by the time you do a full cleanout. Mississippi State University Extension puts the useful range at 4 to 6 inches as an operational target, with 3 inches as the minimum that should be maintained at all times. Below that, the system loses its buffering capacity and manure concentrates at the surface.
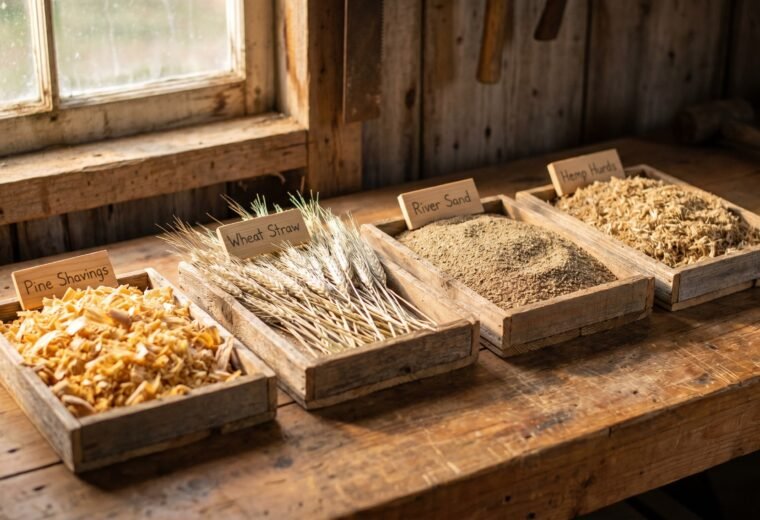
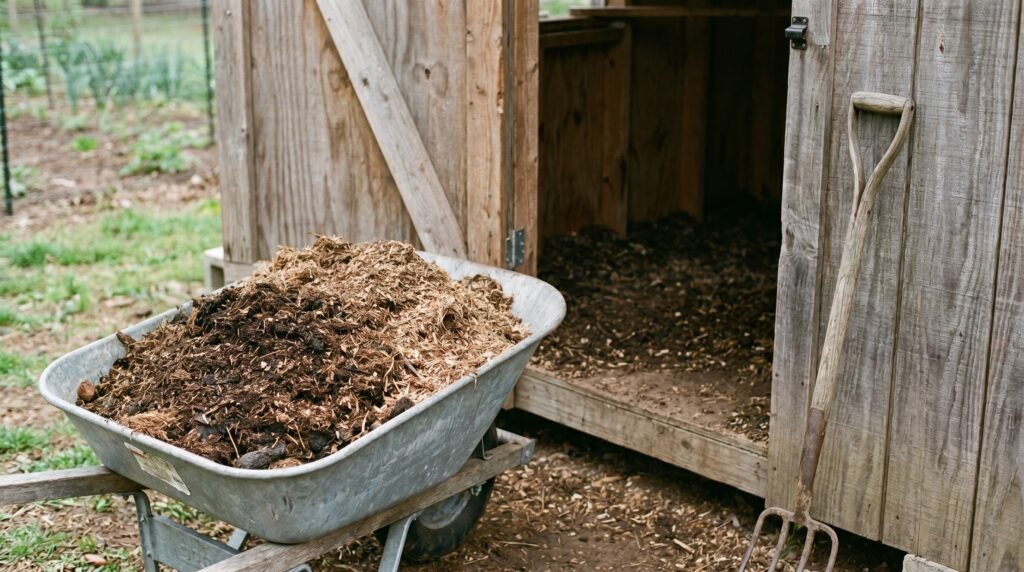
Pine shavings are the go-to starting material. They are highly absorbent, have a large surface area for microbial colonization, and resist compaction better than straw. Straw can work as a supplement, but it mats more easily and makes caking harder to spot. Sawdust packs too tightly on its own and should be blended with coarser shavings. Avoid hay, which stays damp and invites mold.
How to start and maintain it
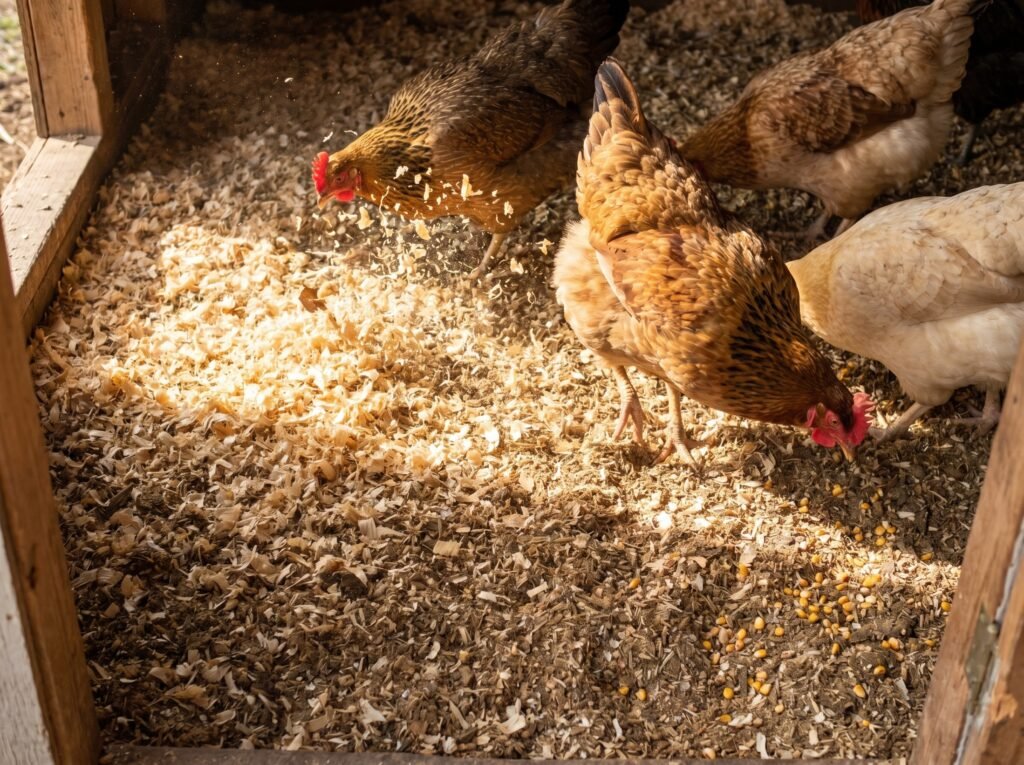
Start with 4 to 6 inches of pine shavings on a clean, dry floor. From there, maintenance is a cycle of watching the surface, adding thin layers of fresh carbon material when it looks damp or smells off, and spot-removing any caked patches before they can spread. Giving your flock scratch grain a few times a week keeps them turning the bed, which provides the aeration the composting biology needs to stay active.
Starting is straightforward. Spread 4 to 6 inches of pine shavings across a clean, dry coop floor. That initial layer is your carbon foundation. From there, the routine is simple: watch the surface, and add a thin layer of fresh shavings whenever the top looks damp, matted, or smells like ammonia. Tossing a handful of scratch grain into the coop a few times a week gives the flock a reason to scratch and turn the bedding, which is the aeration the composting process depends on.
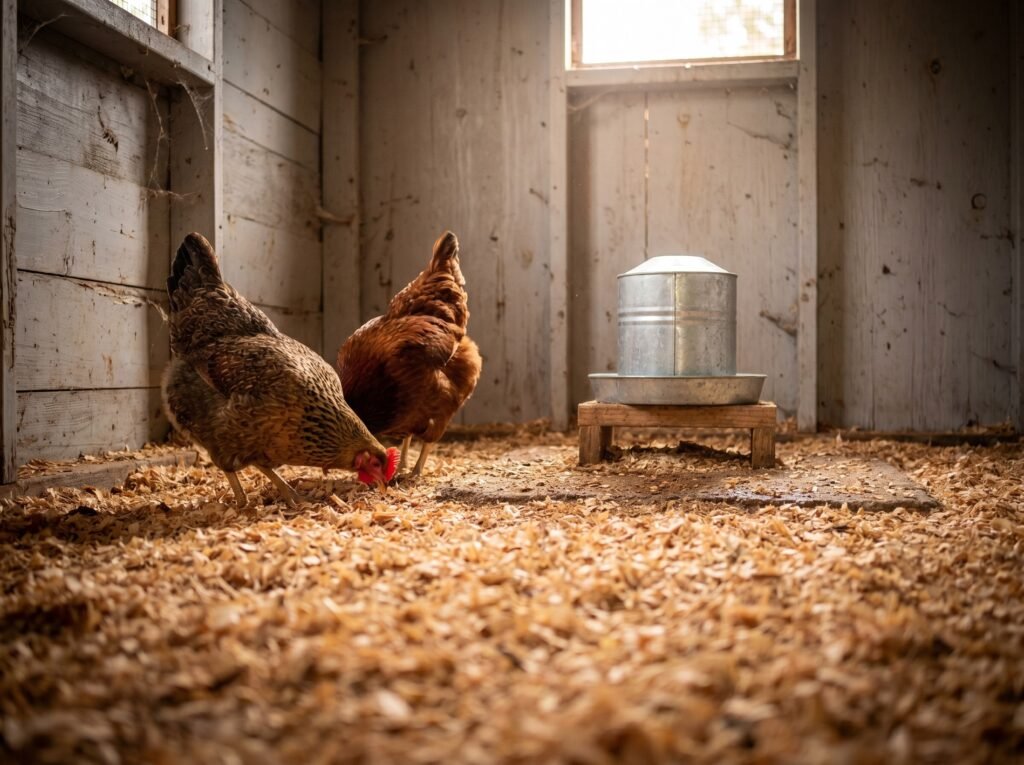
Pay particular attention to two zones: directly under the roost bar, where most of the night-dropping load lands, and around the waterer. Both accumulate wet patches faster than the rest of the floor. Scoop out any visibly caked spots promptly and replace them with fresh shavings. That targeted removal prevents one wet corner from seeding the rest of the bed with ammonia-producing bacteria. Penn State Extension notes that caked litter keeps fecal matter undiluted and in direct contact with birds, concentrating parasite ingestion risk in exactly the spots where hens spend the most time.
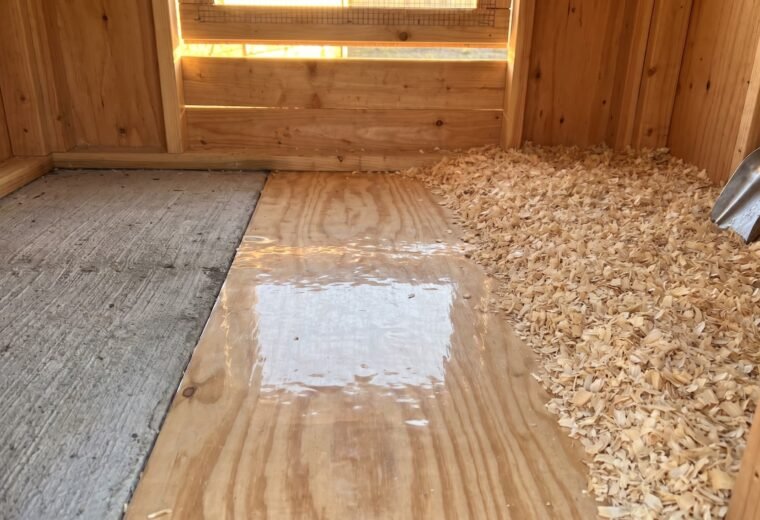
For a flock of 12 standard hens in a 50-square-foot coop, expect to add a light top-dressing every week to two weeks during heavy-use winter months when birds are indoors more and ventilation runs low. Summer is easier: better airflow and more time outdoors mean slower moisture accumulation. A good moisture check is to grab a fistful of litter from a few inches down. It should clump slightly but crumble apart without leaving your hand wet. If it stays in a hard ball or feels slimy, the bed is too wet and needs more carbon and better air movement.
Good coop ventilation is not optional here. Poultry manure deposits an enormous amount of water vapor into the coop air, and the only practical way to remove it is airflow. Without adequate venting, moisture builds faster than the litter bed can absorb it, and the whole system tips toward the problematic side of the ledger within days.
The ammonia problem: numbers that matter
Ammonia is the critical risk in any deep litter system because it builds silently - your nose won't detect it until levels are already high enough to irritate your flock. Keep litter moisture low, remove caked spots promptly, and maintain good airflow. Poultry health guidelines call for staying below 25 ppm, and MSU Extension recommends 20 ppm or less. Birds at floor level face higher concentrations than a standing person does.
Ammonia is the single most important thing to monitor in a deep litter system, and here is the catch: by the time your nose detects it, the concentration is probably already high enough to irritate your flock's airways. Penn State Extension found that the human nose typically does not register ammonia until it reaches 20 to 30 parts per million (ppm), yet poultry health guidelines call for keeping levels below 25 ppm, and MSU Extension recommends staying at or below 20 ppm to avoid production problems. Birds are exposed at floor level, where concentrations run higher than at the height of a standing person.
The moisture-ammonia connection is direct and steep. A 5% increase in litter moisture - say, from 20% to 25% - can increase ammonia release by roughly 140%, according to Penn State Extension data. That is why wet patches under the waterer matter far more than they appear to. MSU Extension confirms that bacteria survive for a short time in genuinely dry litter but persist much longer in wet material - which is the core reason moisture control is the single most important variable in the system.
Practical ammonia check: crouch down to bird level and breathe normally. Any eye or nasal sting means levels are too high. Add fresh dry shavings, remove any visible cake, and assess whether ventilation is adequate. If the problem persists after those steps, a full cleanout may be needed sooner than planned. Never ignore ammonia in a brooding area - young chicks are most vulnerable during their first three weeks, when even moderate exposure can compromise respiratory defenses.
| Ammonia level | What it means for the flock | Action |
|---|---|---|
| Under 10 ppm | No measurable effect; litter is in good shape | Continue normal management |
| 10-20 ppm | Below the threshold humans smell; mild airway irritation possible with prolonged exposure | Add dry carbon material; check ventilation |
| 20-25 ppm | At the upper limit of poultry health guidelines; performance begins to drop | Remove caked areas immediately; boost airflow |
| Above 25 ppm | Measurable respiratory damage documented in research; weight gain, disease resistance affected | Emergency cleanout of worst areas; full cleanout if persists |
Benefits and honest tradeoffs
When managed well, deep litter cuts labor significantly, adds low-level floor warmth in winter, and produces rich compost at cleanout. The honest tradeoff is that it demands consistent moisture management - a wet, poorly ventilated coop with too many birds can tip the system from beneficial compost into an ammonia-generating slab within days. The method rewards attentive keepers and punishes neglect.
When conditions stay right, deep litter offers three genuine advantages for a backyard flock.
First, labor goes down significantly. Instead of weekly wheelbarrow runs, you are adding thin top-dressings and spot-removing problem areas. Two full cleanouts per year - or even one - replaces 52 weekly cleanings.
Second, the composting process generates low-level heat. The microbial activity that breaks down manure releases warmth into the litter bed, which can buffer floor temperature on cold nights. This effect is modest in a small backyard coop compared with a large commercial house, but it is real and appreciated by hens that roost low or by bantams that sleep on the floor.
Third, the finished material is excellent compost. After six to twelve months of in-coop decomposition, the litter is a partially composted soil amendment ready for the garden bed or a secondary compost pile. Poultry litter is nitrogen-rich, and the deep litter process begins to stabilize that nitrogen before it ever leaves the coop. University of Georgia Cooperative Extension notes that composting temperatures above 130°F indicate microbes are breaking down organic matter effectively - that same biology is at work, at a lower intensity, in your coop floor.
The tradeoffs are equally worth knowing. Wet litter is not a minor inconvenience - it is the condition that most undermines the system. A coop that lacks cross-ventilation, has a waterer that splashes, or houses too many birds for its square footage will tip wet faster than the microbes can compensate. For birds sharing a run with ducks, the risk of wet floor areas is substantially higher; ducks are enthusiastic water-spillers. The deep litter method works best in a dry, well-ventilated structure with sensible stocking density.
Coccidiosis deserves direct mention. Dry, deep litter can reduce the risk of coccidia cycling back through the flock because the fecal matter is diluted across a large volume of material - a thick, dry layer effectively reduces the number of coccidia ingested during litter pecking, while wet, caked litter does the opposite, concentrating oocysts right where birds stand and eat (Penn State Extension). So the method is not inherently protective or dangerous on the coccidiosis front; litter moisture determines which side of that equation you land on. Coccidiosis is one of several conditions that become more likely when litter management slips, and the chicken health guide covers recognizing and responding to it alongside the other common flock ailments.
When to do a full cleanout
Plan on one to two full cleanouts per year - most commonly in spring after a long indoor winter season and in fall before the next one begins. The coop itself gives better timing signals than the calendar does: ammonia detectable at bird level despite fresh additions, litter depth at 12 inches or more, persistent wet areas that won't dry out, or any confirmed disease outbreak are all triggers for a full cleanout regardless of season.
Most keepers do one to two full cleanouts per year. Spring after the birds have spent a long winter indoors, and fall before the next indoor season begins, are the most common timing choices. Neither is wrong. The coop itself gives better timing signals than the calendar does:
- Litter depth has reached 12 inches or more and additional layers are no longer practical.
- Ammonia is detectable at bird level despite adding fresh material and improving ventilation.
- The bed has stayed wet through multiple corrections and no longer dries out between additions.
- A disease outbreak has occurred. In that case, do a complete cleanout, let the coop stand empty for several weeks if possible, and disinfect before adding new material. Beneficial microbes in mature litter are a plus in normal management, but a disease reservoir in an outbreak scenario.
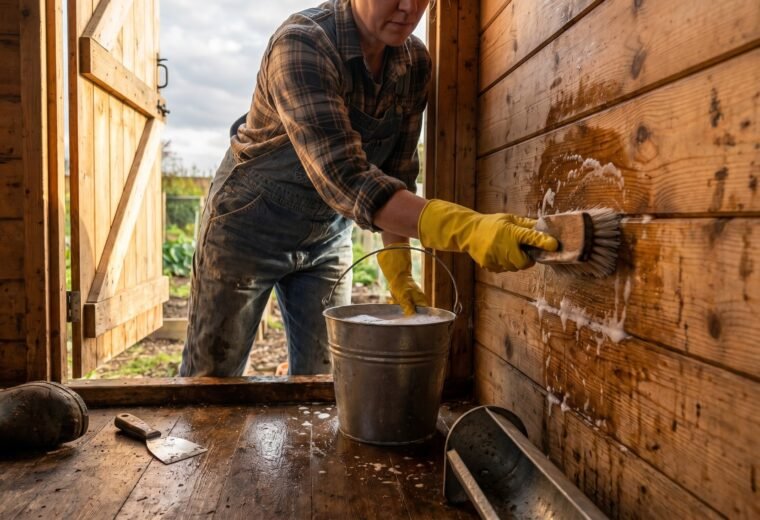
When you do clean out, resist removing every last scrap of litter. Leave two to three inches at the base. That remnant layer is seeded with the beneficial microbial community the bed spent months building, and it gives the next cycle a head start. Spread fresh shavings on top and the new deep litter cycle begins immediately. Sanitizing the walls, roost bars, and nest boxes between cycles is the next step once the old litter is out - that full process, including what products to use and in what order, is in the coop cleanout walkthrough.
Situations where deep litter is not the right fit
Deep litter works best in a permanent coop with solid or earthen floors, adequate cross-ventilation, and a manageable number of birds for the space. It is not suitable for portable tractors that move weekly, very cramped and overcrowded spaces where manure load overwhelms the carbon material, coops with moisture infiltration problems, or brooders housing day-old chicks who need very clean conditions.
The method works well in permanent coops on earthen or solid floors with adequate ventilation and manageable stocking density. It is a poor fit for a few specific situations:
- Chicken tractors or portable coops that move weekly. The whole point of deep litter is an established, maturing microbial bed - you cannot build one if the floor changes.
- Very small or cramped spaces where birds are packed at very high density. The manure load overwhelms the carbon material faster than the microbes can process it.
- Coops with significant moisture infiltration from roof leaks, ground moisture wicking through a dirt floor, or an attached run that directs rainwater inside.
- Brooding setups for day-old chicks. Young chicks need very clean conditions and are especially sensitive to ammonia. Fresh bedding changed frequently is the right approach for a brooder.