Sealing up a coop for winter sounds logical until condensation starts dripping from the ceiling onto your bedding. Getting an insulated chicken coop right requires solving two problems at once: slowing heat loss through the shell AND keeping enough airflow to carry moisture out. Do one without the other and you trade cold birds for wet birds - which is the worse outcome.
Cold flocks manage fine. Wet flocks develop frostbite, respiratory illness, and foot problems fast. Extension poultry researchers put it plainly: chickens can withstand quite low temperatures as long as they are dry and out of the wind. The goal of insulation is not to build a warm room for birds that don't need one - it's to stabilize temperature just enough that your ventilation system can do its job without freezing.
Why ventilation does more work than insulation
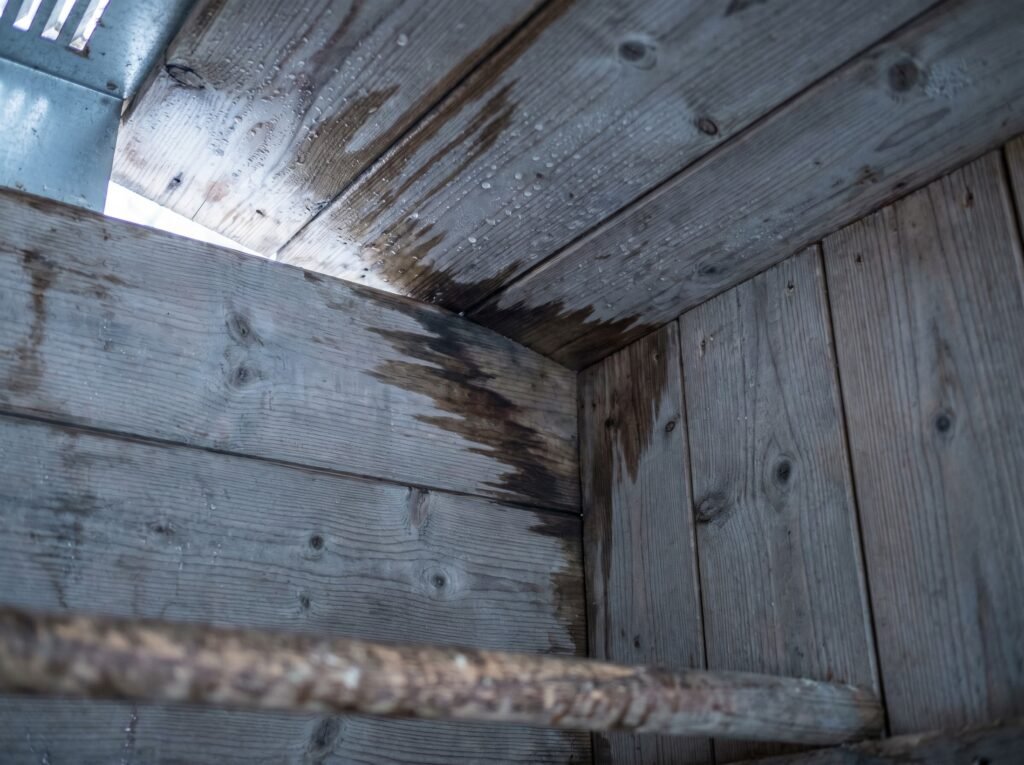
Before picking an insulation material, understand what you're actually fighting. Chicken manure is roughly 70% water (University of Minnesota Extension). Add 10 birds breathing through a winter night and a coop produces an enormous amount of water vapor. That moisture has to go somewhere - and if it cannot exit through intentional vents, it condenses on every cold surface it touches: the walls, the ceiling, the roost boards, eventually your birds' combs.
The main function of a ventilation system is to maintain adequate oxygen levels while removing carbon dioxide, moisture, dust, and odors (extension.org Small and Backyard Poultry). Insulation's supporting role is to keep wall and ceiling surfaces warm enough that incoming cold air doesn't hit a surface below the dew point and immediately condense. But ventilation does the actual removal.
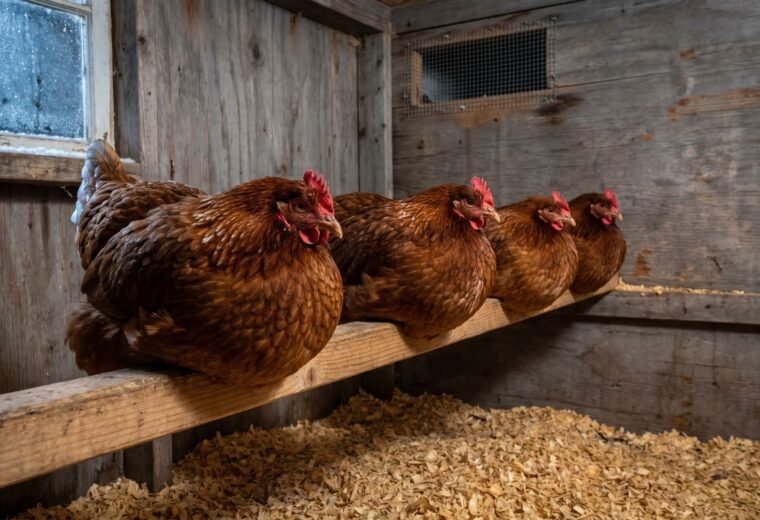
This is why University of Minnesota Extension researchers flag condensation as the real frostbite culprit: high moisture in a coop combined with cold temperatures can lead to condensation, which can cause frostbite. Frostbite hits combs, wattles, and feet first. The damage starts long before you see it, because litter that's merely damp is already a humidity bomb. Your nose and eyes will tell you when ventilation is failing: ammonia smell and thick cobwebs on the rafters both signal that not enough air is moving through (University of Maryland Extension).
Our general rule with small flocks is to size ventilation before sizing insulation. Add vents until the litter stays dry and you cannot detect ammonia at bird height, then add insulation to slow heat loss through the building shell. Reversing the order - sealing the coop tight and then worrying about air - produces the damp trap nearly every beginner falls into.
Where insulation actually pays off
Not every surface needs the same treatment. Here's where insulation earns its place and where it rarely matters:
| Location | Priority | Why | Suggested R-value |
|---|---|---|---|
| Ceiling / underside of roof | Highest | Heat rises; the roof loses the most energy. This surface also condenses first in an uninsulated coop. | R-12 minimum; R-19 preferred (extension.org guidance) |
| Walls (north and west-facing) | High | Takes the brunt of prevailing winter wind; uninsulated walls cool quickly and create condensation surfaces. | R-10 to R-13 practical target (fiberglass batt in 2x4 stud wall) |
| South-facing wall | Moderate | Less wind exposure; often the location of windows that provide passive solar gain and ventilation. | Same as other walls if you're insulating; no need to insulate differently |
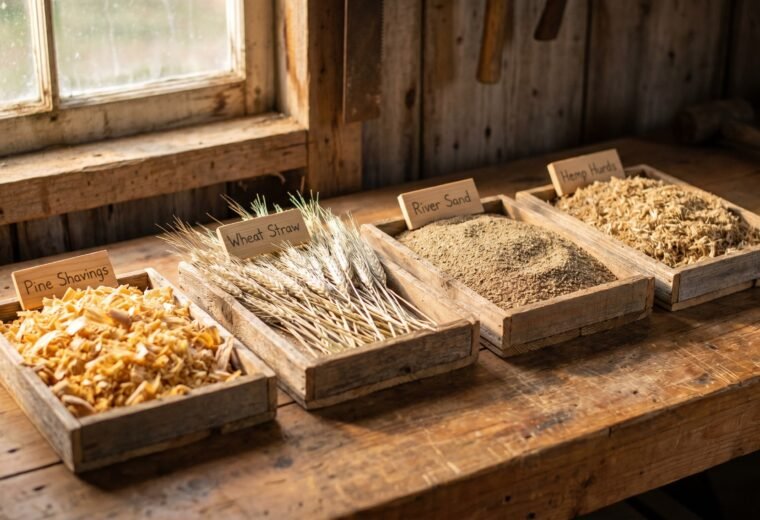
| Floor | Low for most builds | Deep litter starts at 4-6 inches of pine shavings and builds to 12 or more inches as the season progresses, generating composting heat and providing thermal mass. Concrete slabs are the exception - they drain heat rapidly. | Deep litter is practical substitute; rigid foam under concrete slab if building new |
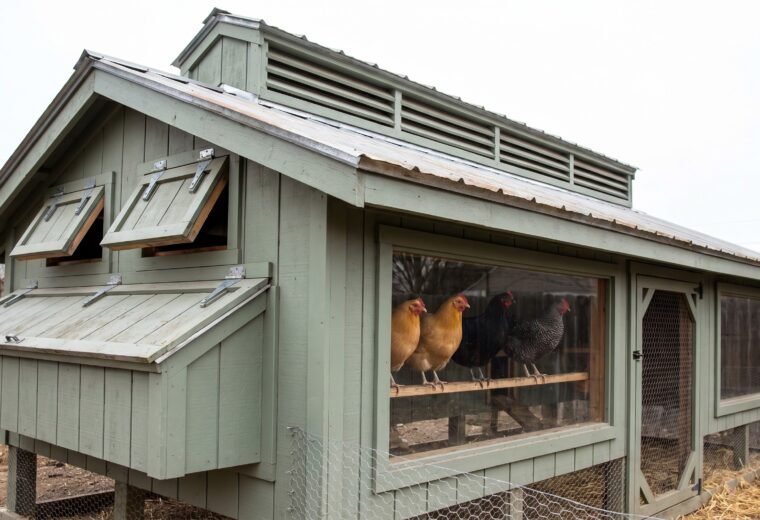
| Nest boxes (exterior) | Low | Hens warm them during use. Ventilate boxes slightly to prevent egg sweating; do not seal tight. | Not typically insulated separately |
Extension.org poultry housing guidance notes that insulation installed directly under the roof is the most effective placement when building new, because the attic space above doesn't need heating and because that surface is the primary condensation point. In an existing coop, adding rigid foam under the roof boards - then covering it immediately (more on that below) - is often the single highest-return upgrade.
What R-value to target and how to reach it
R-value measures a material's resistance to heat flow - the higher, the slower heat escapes. Extension.org poultry housing guidance classifies materials with R-values above 10 as good insulators. For backyard coop use, the targets that balance cost, practicality, and moisture risk are:
- Ceiling: R-12 minimum, R-19 preferred. Blown-in cellulose runs about R-3.2 per inch, so R-19 takes roughly 6 inches. Standard fiberglass batt in a 3.5-inch stud cavity gives R-11 to R-13.
- Walls: R-10 to R-13 for cold-climate builds. A 2x4 stud wall with standard fiberglass batt lands in this range.
- Minimum floor insulation: R-5 rigid foam under a concrete slab if building from scratch; otherwise rely on deep litter.
For context, a tiny 4-bird coop in a cold region (say, Minnesota) benefits more from hitting R-13 in the ceiling than from any other single change. For 12 birds in a moderate-winter climate (Virginia, for example), even R-10 in the ceiling makes a meaningful difference in whether condensation forms on cold nights.
Spray-applied closed-cell polyurethane foam can reach about R-7 per inch, which is useful for retrofitting cramped wall cavities or oddly-shaped roof panels. It also air-seals at the same time. The tradeoff: it must be fully covered before birds go back in, and any missed patches will be discovered by curious beaks within days.
The moisture trap: how insulation creates the problem it's meant to solve
This is the failure mode that quietly ruins coops every winter. Here's the mechanism: warm, moist air from inside the coop migrates outward through the wall. As it moves toward the cold exterior, it crosses the dew point - the temperature at which air can no longer hold its moisture in vapor form. That moisture condenses inside the wall cavity. Wet insulation loses much of its R-value, promotes mold, and in a wood-framed structure, starts rotting the framing from the inside out. You won't see it happening until the damage is significant.
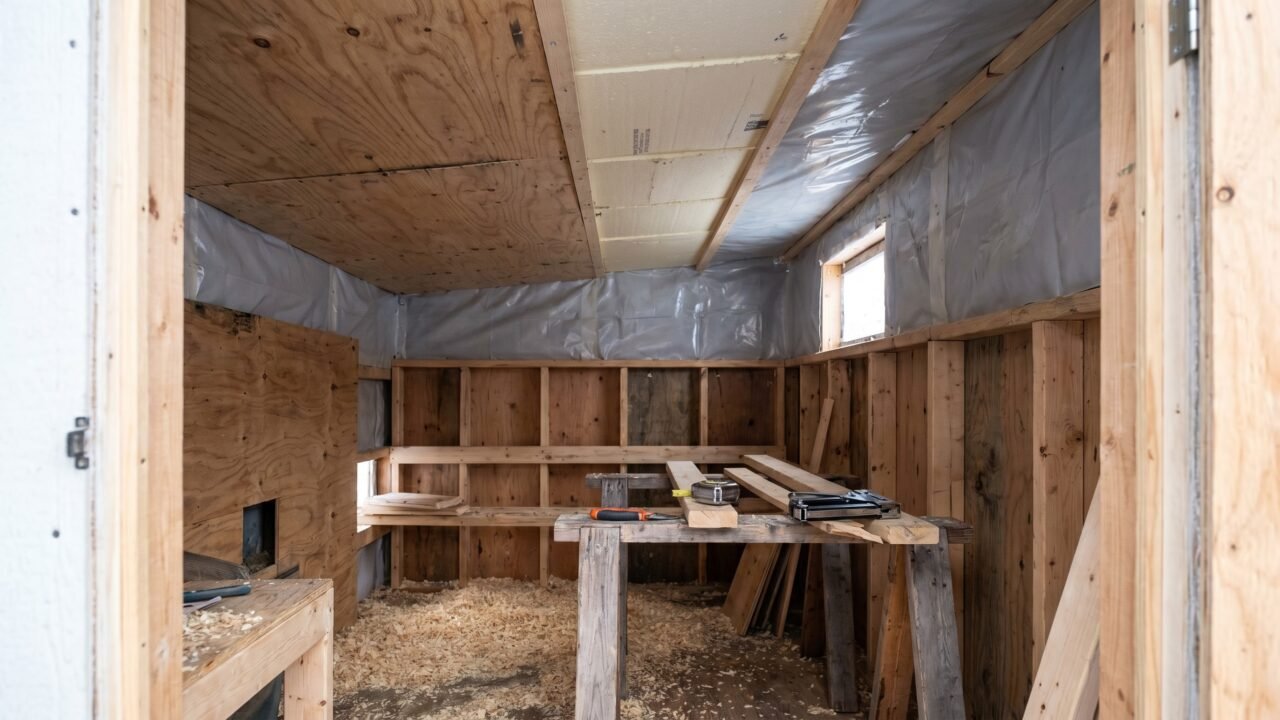
The fix is a vapor barrier - a layer of plastic sheeting (typically 6-mil polyethylene) placed on the warm, interior side of the insulation. Extension.org is explicit on placement: the vapor barrier goes on the side of the insulating material that faces into the poultry house. This keeps moisture from migrating into the wall cavity in the first place.
A few practical notes on getting this right:
- The vapor barrier goes on the inside face of the insulation - toward the birds, not toward the exterior siding.
- If you're using foil-faced or paper-faced fiberglass batts, those facings serve as the vapor barrier. Install them facing the interior.
- Cover the vapor barrier immediately with plywood, OSB, sheet metal, or rigid plastic. Extension.org poultry guidance is direct: birds should not be exposed to or have access to the insulation or vapor barrier. Polystyrene and foil facings are both dangerous if ingested.
- In mild-winter climates with average January lows above about 10 degrees F (roughly the US South and Pacific coastal areas), vapor barriers are less critical but still worth including if the coop is well-sealed.
The companion article on winterizing your coop covers the full seasonal prep sequence, including checking for gaps that bypass the vapor barrier at rafters and sill plates.
Protecting insulation from pecking
Chickens investigate everything with their beaks. Exposed foam, fiberglass, or foil facing will be pecked, shredded, or eaten within hours of a flock returning to an improperly covered coop. Beyond the structural damage, ingested foam or fiberglass presents a real health risk.
The solution is complete coverage with a rigid interior sheathing layer. Acceptable materials include:
- 1/2-inch plywood or OSB (most common; easy to source and fasten)
- Sheet metal or aluminum flashing (harder to work with but virtually peck-proof and easy to wipe clean)
- Rigid plastic panels (greenhouse corrugated polycarbonate works well in smaller coops)
Gaps at corners, around windows, and at the roofline junction are the spots most commonly missed. Run your hand along every joint before you put the birds back. If your fingertip can poke into a gap, a beak absolutely will.
One more practical note: rodents are as interested in batt insulation as chickens are. Batt and blanket materials are attractive nesting sites for mice. Rigid foam boards and spray-applied closed-cell foam offer less rodent opportunity than fiberglass batts left accessible at the wall base or behind loose panels.
Ventilation and insulation together: a worked example
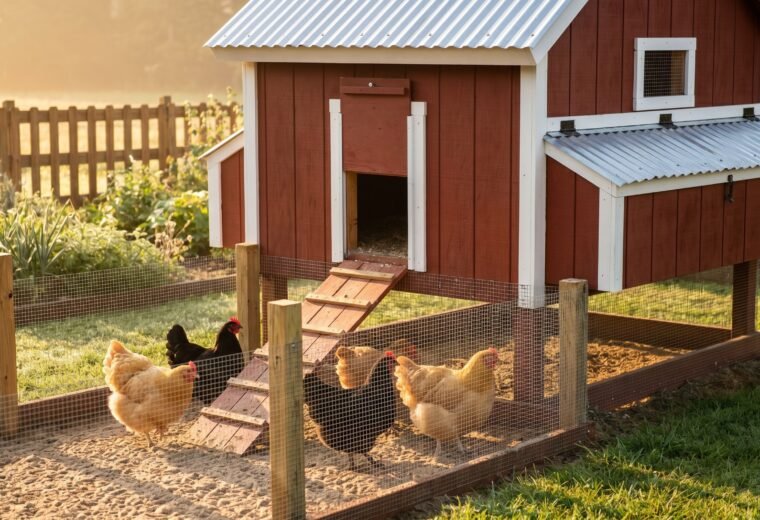
Consider a 4x8-foot shed-style coop housing 4 standard birds. The floor area is 32 square feet - well above the 3-4 square feet per bird guideline, giving the flock generous room. Here's how to size and sequence the work:
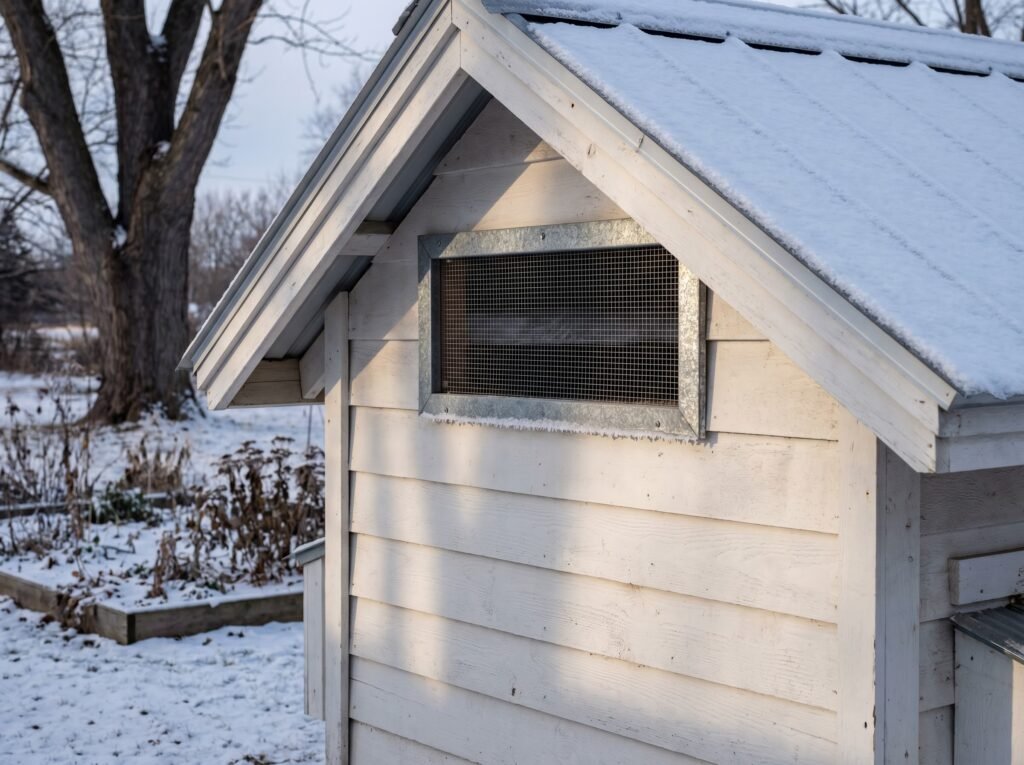
- Ventilation first. Open ridge or eave vents totaling at least 4 square feet of opening (roughly 1 square foot per bird). Position inlets high on the south or east wall; place outlets at the peak. Cold air enters, warms slightly as it descends, picks up moisture, and exits warm and moist at the top. Do not cover the ridge vent with insulation - that kills the chimney effect.
- Ceiling insulation. Run R-13 fiberglass batts between the ceiling joists, vapor barrier facing down into the coop. Cover with 3/8-inch plywood. This single step stops the roof from being the primary cold surface where condensation forms.
- Wall insulation. Insulate the north and west walls with R-13 batt, again vapor-barrier-in, then sheath with plywood or metal. South and east walls can wait or be done with thinner rigid foam if access is limited.
- Check the result. After the first cold night, inspect the underside of the plywood ceiling at dawn. Dry surface with no drips means the ventilation is adequate. Wet surface means either the vents are undersized, partially blocked, or the vapor barrier has a gap driving moisture into the ceiling assembly.
Penn State Extension notes that failure to insulate or ventilate properly causes moisture to accumulate on the walls and ceiling in cool weather. In this 4-bird coop scenario, the ceiling fix alone typically eliminates the dripping problem that most small-flock keepers experience in their first winter. If condensation persists, the next diagnostic step is adding more ventilation area - not more insulation.
For a deeper look at whether your flock actually needs supplemental heat on top of insulation, this guide on winter heat for chickens runs through the breed-by-breed and climate considerations. Spoiler: most healthy adult birds don't need it even in cold winters, provided the coop is dry and draft-free.
If you're still in the planning or building stage and wondering how insulation fits into the broader coop design, our coop design overview covers the full structural picture from siting to roost placement.