Once your flock crosses ten birds, the rules of coop design change in meaningful ways. A structure that works fine for six hens becomes a moisture trap, a pecking-order battlefield, or a weekly cleaning nightmare when you double the headcount. The core numbers stay the same - 3 to 4 square feet of indoor floor space per standard bird, 8 to 10 square feet per bird in the attached run - but applying them at scale requires thinking through layout, airflow, and access in ways that smaller coops do not demand.
This guide covers how to size and plan a coop for flocks of 10 to 25 birds, where the common layout mistakes happen at that scale, and what ventilation and multi-section design look like when you are managing a full flock rather than a starter setup.
Getting the square footage right for a bigger flock
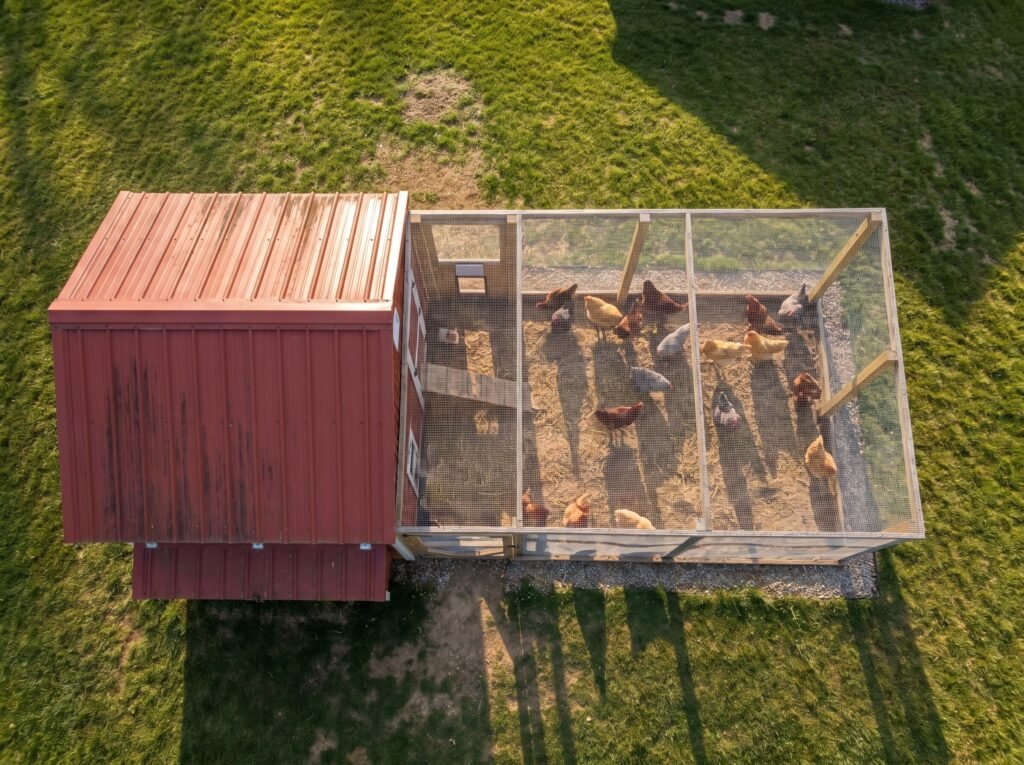
Plan on 4 square feet of coop floor per standard bird and 10 square feet per bird in the attached run - those are the working minimums backed by multiple extension services. For a 20-bird flock that means at least 80 square feet of coop and 200 square feet of run; going slightly larger on both makes cleaning and flock management noticeably easier.
The eXtension Foundation's poultry housing guidance gives a clear starting point: 3 to 4 square feet per hen indoors, 10 square feet per hen in the outdoor run. For a flock of 15 standard layers, that puts you at a minimum of 45 to 60 square feet of coop floor and 150 square feet of run. A 6 x 10 coop (60 sq ft) paired with a 10 x 15 run (150 sq ft) lands right at that minimum. Going slightly larger on both - say, 8 x 10 coop and 10 x 20 run - gives you breathing room for a few extra birds and makes interior cleaning considerably easier.
The University of Florida IFAS Extension and NC State Extension both land in the same range for indoor space. NC State puts it at "a minimum of 2.5 to 3.5 square feet per bird inside the weather-tight coop," while IFAS uses 3 sq ft as the hard floor. For large coops, we treat 4 sq ft per bird as the working target in our planning notes, because flock size fluctuates - a hen goes broody, you add pullets, you winter-over birds that were supposed to be table birds. That cushion prevents a cramped mess six months after build day.
Bantams need somewhat less: 2 to 2.5 sq ft indoors is a commonly cited rule of thumb for lighter breeds, though extension services do not publish a separate official standard for bantam-only flocks. If your flock mixes standards and bantams, calculate against your heaviest birds and you will be fine.
The sizing table: floor plans for common large-flock sizes
Use this as a quick planning check. All figures assume standard laying breeds with daily access to a run. "Nest boxes needed" follows the one-per-four-hens standard from Penn State Extension; roost linear footage uses 10 inches per bird as the working value.
| Flock size | Min. coop floor (4 sq ft/bird) | Example footprint | Min. run (10 sq ft/bird) | Nest boxes | Roost bar length needed |
|---|---|---|---|---|---|
| 10 birds | 40 sq ft | 5 x 8 | 100 sq ft | 3 | ~8 ft 4 in |
| 15 birds | 60 sq ft | 6 x 10 | 150 sq ft | 4 | ~12 ft 6 in |
| 20 birds | 80 sq ft | 8 x 10 | 200 sq ft | 5 | ~16 ft 8 in |
| 25 birds | 100 sq ft | 10 x 10 | 250 sq ft | 7 | ~20 ft 10 in |
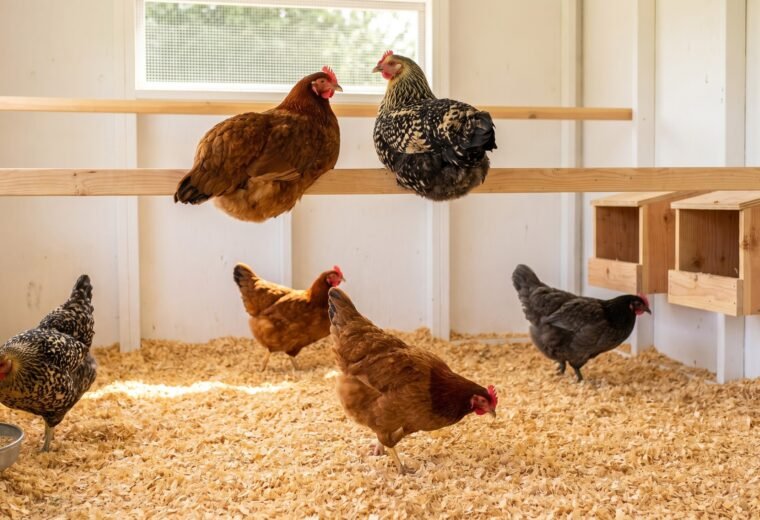
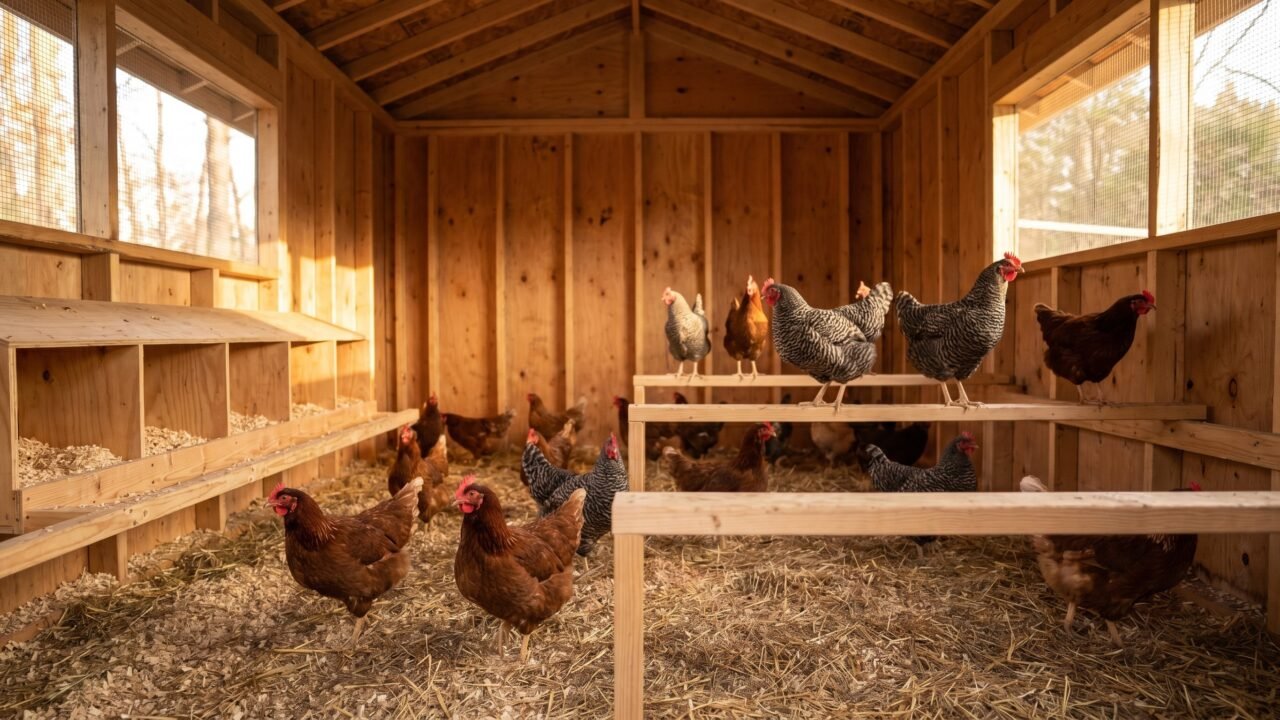
These roost-bar totals assume one continuous run of bar or multiple parallel bars adding up to that length. At 20 birds you typically run two or three parallel bars, each 6 to 8 feet long, at the same height and staggered in depth so birds are not directly over each other. See our full breakdown of roost dimensions, bar materials, and mounting height.
One number that often surprises first-time large-flock keepers: you need those nest boxes whether the hens share nicely or not. In practice, most hens favor one or two boxes regardless of how many you install - but having one per four birds prevents bottleneck stress during the morning laying rush. Each box should measure 12 x 12 x 12 inches and sit about 24 inches off the floor, placed away from the roosts to discourage overnight roosting inside the boxes.
Why ventilation is the highest-stakes design choice at scale
At large-flock scale, ventilation matters more than insulation, floor material, or supplemental heat combined. Moisture and ammonia build faster with 15 to 20 birds than any other variable, and fixing a poorly ventilated large coop after the fact is far harder than designing airflow in from the start.
Ten hens breathing, drinking, and defecating overnight produce far more moisture and ammonia than six ever did. Respiratory diseases, frostbitten combs in winter, and general flock health problems more often trace back to poor airflow than to temperature. Penn State Extension sets 25 ppm as the maximum safe ammonia level; if you can smell ammonia when you walk in, the birds are already well above what is healthy for their airways.
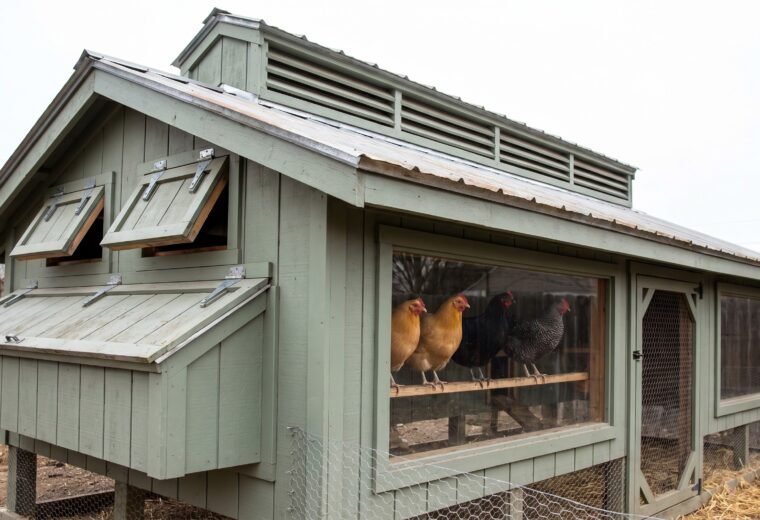
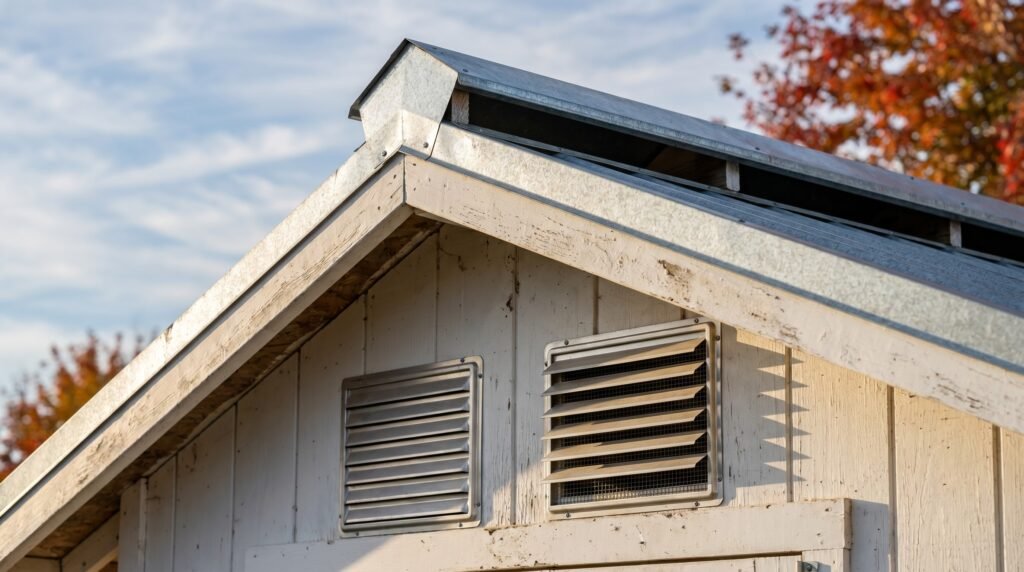
Good large-coop ventilation has two layers. The first is passive airflow through fixed ridge vents, soffit vents, or gable openings that run year-round. The second is adjustable cross-ventilation - windows or vents near the roofline on opposite walls that you can open wide in summer and throttle back to a crack in January. The Alabama Cooperative Extension System's guidance on cold-weather moisture control recommends keeping coop relative humidity between 50 and 70 percent; above that, you will see wet litter, respiratory irritation, and a coop that smells bad even after cleaning.
For a coop in the 80 to 100 square foot range, a common passive setup is two or three adjustable soffit vents plus a continuous ridge vent, supplemented by two hardware-cloth-covered windows that can open fully in warm weather. The hardware cloth keeps predators out when vents are open at night. What you want to avoid is a "draft at bird level" scenario where cold air blows directly across the roost - position vents above roost height so fresh air enters high and mixes before it drops.
Our coop tests in late fall found that a poorly positioned vent directly above the roost bar dropped the microclimate at bird level by 8 to 10 degrees below ambient and increased litter moisture noticeably within two weeks. Moving the opening 18 inches higher fixed both problems without reducing total airflow. We also track ammonia by smell on a simple schedule: a quick check each morning before opening the pop door tells you more than any sensor for day-to-day management. If there is any detectable ammonia smell at nose level when the door first opens, we stir the litter that day and crack a second vent; if the smell is strong enough to make you pull back, the ventilation needs structural adjustment before the next night cycle. For a deep dive on vent placement and sizing, our ventilation guide covers the math in detail.
Layout choices that matter once the flock grows past 12
Walk-in height, multiple feed and water stations, and the option to partition are the three layout decisions that separate a smoothly managed large coop from one that becomes a daily chore. Getting at least two of the three right during the build avoids retrofits later.
At 10 to 15 birds you can usually get away with a single open room. Past 15 or 20, a partitioned layout starts paying real dividends.
A dividing wall or removable panel inside the coop lets you isolate a sick bird or a newcomer without building a separate structure. It gives you a place to brood chicks in spring with their heat plate while the adult flock carries on as normal. It also makes managing a rooster in a multi-rooster situation far less dramatic. The partition does not need to be permanent - framed hardware-cloth panels that hook into place work well and store flat when not needed.
A few layout details that matter more than people expect at large-flock scale:
- Walk-in height. Coops under 5 feet tall are manageable for 6 birds. At 20 birds, you are cleaning, refilling feeders, and checking for mites multiple times a week. A full-height walk-in coop is not a luxury; it is a time and back-pain calculation. NC State Extension's coop guidance notes that coops built tall enough to walk into upright make routine maintenance considerably easier - a point that becomes obvious fast at large-flock scale.
- Multiple feed and water stations. Penn State Extension recommends 3 linear inches of feeder space per bird and 1 inch of waterer space per bird. For 20 birds that means at least 60 inches of feeder lip and 20 inches of waterer access. One hanging feeder and one waterer cannot deliver that, so plan for two of each - placed far enough apart that a single dominant hen cannot patrol both.
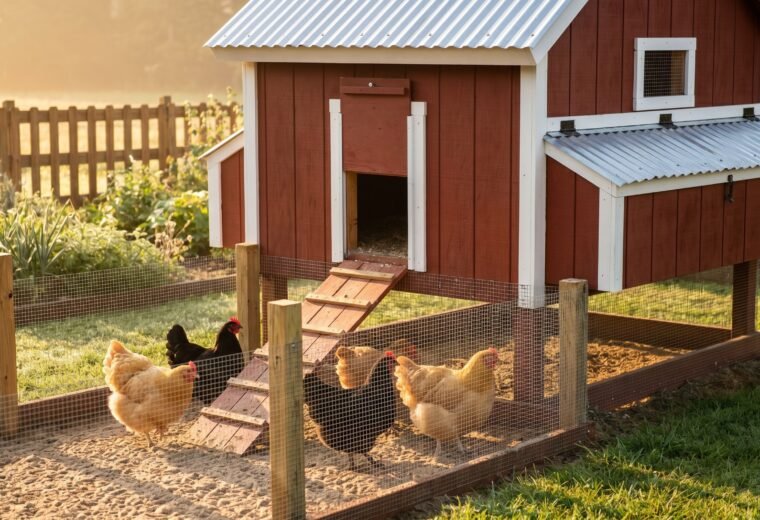
- Exterior egg access. A hinged exterior nest-box lid eliminates the need to walk into the coop every morning. On a 20-bird setup with five boxes, that lid may be the most time-saving design choice in the whole structure.
- Deep litter consideration. Larger floor areas work well with the deep-litter method: a base layer of bedding (wood shavings, straw, or a mix) that you turn and add to rather than fully replacing weekly. The biology functions better in a larger footprint because the composting layer has more volume. A starting depth of 4 to 6 inches, building over a season, is commonly recommended for establishing the composting layer effectively.
For a comparison of walk-in versus compact designs at various flock sizes, the walk-in vs. compact coops article works through the tradeoffs honestly. Flooring material choices - concrete, dirt, rubber mats, hardware cloth - are covered separately in our coop flooring guide.
Predator-proofing a large footprint
A large coop has more linear perimeter to secure than a small one, and every extra foot of fence or wall is another potential gap. The materials standard does not change - hardware cloth plus buried apron - but you cannot afford the shortcuts that a small builder sometimes gets away with.
A bigger structure has more perimeter to secure, more potential entry points, and often more visual cover that predators can use for approach. The rules do not change, but the margin for skipped steps shrinks. Colorado State University Extension is direct: 1-by-2-inch mesh or smaller welded wire beats cheaper 2-by-3-inch fencing because raccoons and members of the weasel family can reach or squeeze through the wider gaps. Hardware cloth at 1/2-inch mesh is the practical standard for most openings; 1/4-inch adds protection against small weasels and is worth using on low vents.
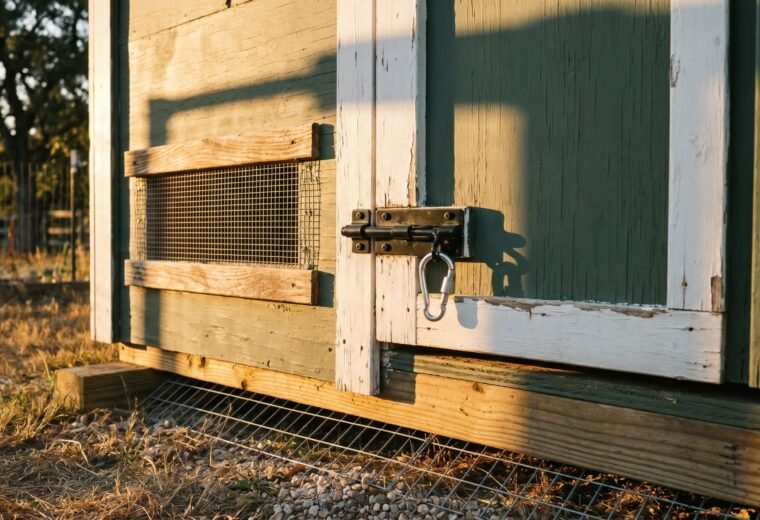
Every opening - vents, windows, pop doors - should be covered with hardware cloth, not chicken wire. Chicken wire keeps chickens in; it does not keep determined predators out. The distinction matters enormously for a large flock that represents a significant feed and time investment. More on why in our hardware cloth vs. chicken wire comparison.
Burial is the other piece most builders skip. University of Maryland Extension recommends digging a trench 12 to 18 inches deep around the full coop perimeter and burying hardware cloth there, turned outward at the bottom in an L-shape to defeat diggers. Foxes, raccoons, and groundhogs will test a coop they can see and smell. An apron of buried mesh is cheap insurance on a large structure. Our predator-proofing guide walks through the full installation method including latches and pop-door locks.
Pre-built large coops: what to check before you buy
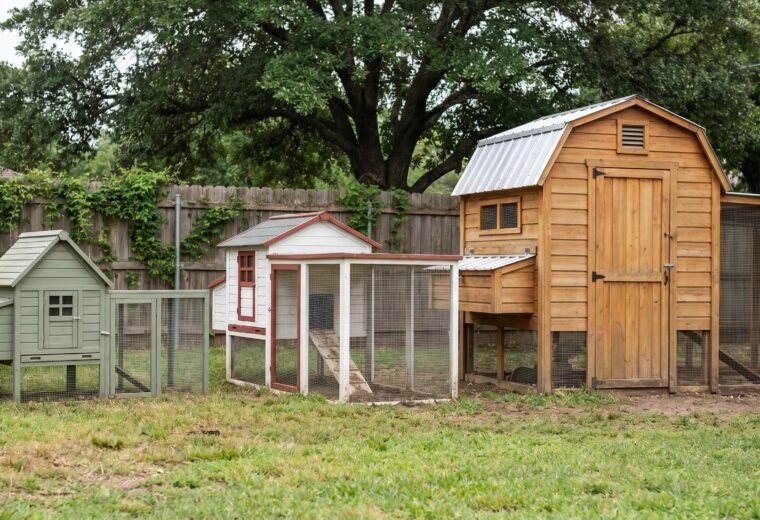
Divide the listed interior floor area by four to get the honest bird capacity. If that number is lower than your flock size, keep looking - capacity claims on packaged coops are routinely inflated by a factor of two or more.
The market for large pre-built coops is noisy. Capacity claims are often inflated by a factor of two or three. A product labeled "for 20 chickens" frequently measures 40 to 50 square feet of usable floor space - generous for 10 to 12 standard hens, crowded for 20. Before ordering, take the listed interior floor dimensions and divide by four. That quotient is the honest bird capacity for a flock with regular run access.
A few other checks worth running on any large coop:
- Ventilation area: look for ridge vents plus adjustable wall vents, not just a single screened window.
- Roost design: flat 2x4 boards (wide side up) at a consistent height are better for foot health than rounded dowels, especially in cold climates where birds flatten their feet over their toes at night for warmth.
- Build material: thin OSB panels that are painted rather than sealed degrade quickly in wet climates. Pressure-treated framing, painted T1-11 siding, or metal roofing add years of service life.
- Access points: a large coop with only one small door makes cleaning a miserable project. Two doors, or one full-width door on hinges, saves hours per year.
Our tested roundup of best chicken coops includes large-flock models with honest capacity ratings based on the 4 sq ft per bird standard. If you are still deciding on overall coop style and how it fits your property, the main coop planning guide covers site selection, orientation, and the design questions to settle before spending money. And if you want the square-footage math explained more thoroughly, including how to adjust for bantams, mixed flocks, or confined setups without run access, our coop size per chicken calculator works through each case.
The single failure mode that takes down large flocks
Moisture from inadequate ventilation is the leading cause of large-flock health problems, not cold temperatures. Fix the airflow first; everything else is secondary.
Moisture. More specifically, inadequate ventilation combined with crowding. A damp coop at 20 birds produces wet litter fast, and wet litter means elevated ammonia, which means respiratory damage, which means a vet call and possibly multiple losses. The fix is not heat - it is airflow. Healthy adult chickens tolerate cold temperatures remarkably well when they are dry and draft-free. Supplemental heat sources introduce fire risk with no benefit to bird health in most climates. A well-ventilated large coop with deep dry litter is warmer by biology than a poorly ventilated one with a heat lamp.
If you smell ammonia when you open the door, if litter feels damp in the morning, or if you see condensation on the walls overnight, the ventilation is inadequate for your flock size - full stop. Add a vent opening before adding anything else.