Pick a coop design based on your single biggest constraint and everything else falls into place faster. Tight backyard? Start with the footprint. Mobility issues or a bad back? Walk-in height changes everything. Neighbors close by? Aesthetics and sound management become non-negotiable. This guide organizes coop ideas around those five real goals, explains the structural reason each approach works, and gives you the numbers to size it correctly before a single board is cut.
How to size any coop before you commit to a design
Every design decision downstream depends on getting the math right first. Extension.org's multi-university poultry team puts the minimum at 3-4 square feet per standard hen indoors, with 10 square feet per bird in the attached run. Bantams need less: roughly 0.75-1 square foot inside. Overstocking is the single most common beginner mistake, and it drives feather-pecking, disease spread, and ammonia buildup faster than any other factor.
A practical worked example: four standard hens need at least 12-16 square feet of enclosed coop space and 40 square feet of run. That's a footprint of roughly 4 x 4 ft inside and a run around 5 x 8 ft. Modest, but workable on a small suburban lot if the run gets natural light and the coop sits on level, well-drained ground.
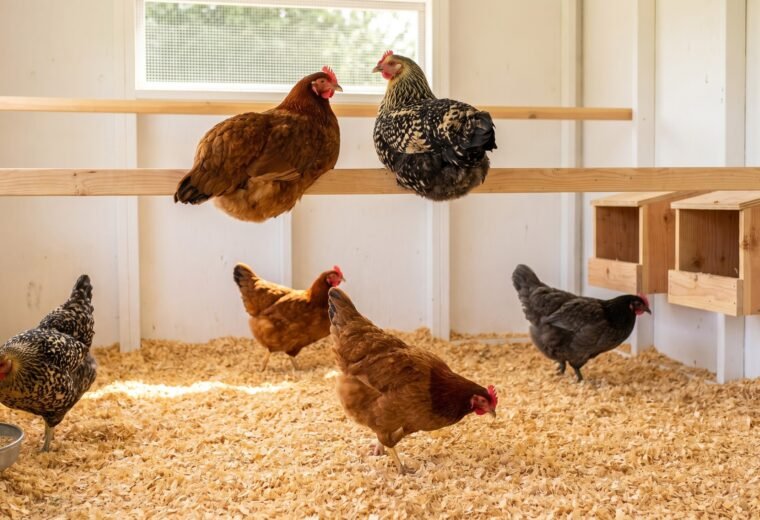
Roost space uses a different formula. Penn State Extension recommends 6 linear inches per bird, with roost bars placed 18-24 inches off the floor. A flat 2x4 turned wide-side-up (the 3.5-inch face) lets hens cover their toes in cold weather. Nest boxes land at a minimum of 12x12 inches; two boxes for your first four hens, then one more for every four birds you add after that.
Nail these numbers down before you look at any design concept. A beautiful coop that's undersized is just an expensive mistake. Our coop size guide runs the full calculation method for any flock size, including bantam mixes.
| Flock size (standard hens) | Min. indoor sq ft | Min. run sq ft | Roost linear inches | Nest boxes needed |
|---|---|---|---|---|
| 3 hens | 9-12 sq ft | 30 sq ft | 18 in | 2 |
| 4 hens | 12-16 sq ft | 40 sq ft | 24 in | 2 |
| 8 hens | 24-32 sq ft | 80 sq ft | 48 in (4 ft) | 3 |
| 12 hens | 36-48 sq ft | 120 sq ft | 72 in (6 ft) | 4 |
| 20 hens | 60-80 sq ft | 200 sq ft | 120 in (10 ft) | 6 |
Sources: Extension.org space allowances; Penn State Extension roost and nest box guidelines.
Small-space coop ideas: when the yard sets the limits
Urban and suburban keepers often work with 6 x 8 ft or smaller footprints. Three design moves make small coops work without sacrificing bird welfare.
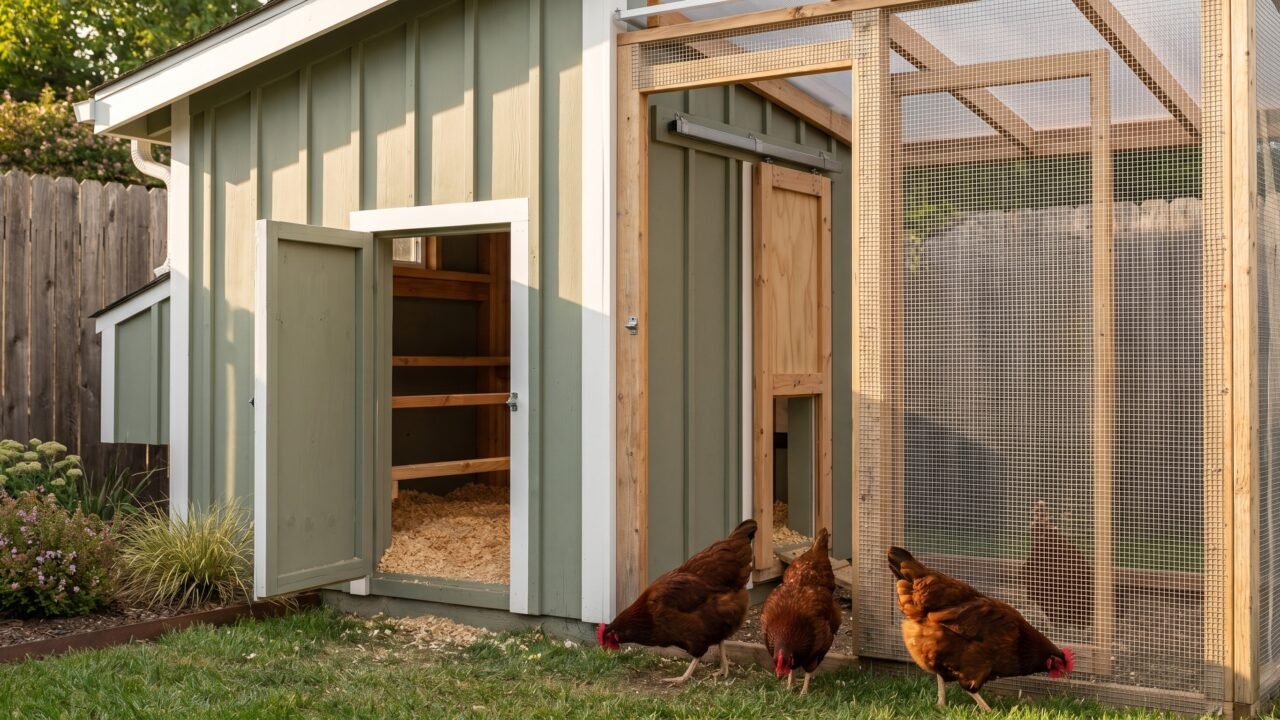
Vertical layering. Stack the roost above the nest boxes and keep nest boxes accessible from outside via a hinged egg door. This lets the birds use every cubic foot of the interior without competing for floor space. A lean-to style shed with a steep roof pitch creates head height under the peak where roost bars can sit higher, keeping the footprint compact.
Integrated covered run. A small sleeping house paired with an attached hardware-cloth run under one continuous roof line keeps the whole structure tight. The run becomes usable in light rain, which matters in damp climates. Size the sleeping compartment for the flock and let the run do the behavioral work.
A-frame or ark design. The triangular cross-section of an A-frame coop concentrates materials into a small footprint and doubles as a shade structure in summer. They work best for two to four standard birds or a bantam flock of five or six. The tradeoff: cleaning access is often awkward, so plan a large rear door or a fully removable floor panel from the start. Mobility is a bonus - some A-frames roll or drag to fresh ground.
Whatever the format, small coops demand better ventilation engineering, not less of it. A tiny enclosed space fills with moisture and ammonia overnight. Put screened vents high on two opposing walls and make sure at least one can be closed in driving rain without sealing the coop completely. You can read more about the ventilation math in our chicken coop ventilation guide.
Walk-in coop ideas: why standing room changes everything
A walk-in coop is the one design choice that has the most impact on how much you enjoy keeping chickens over the long run. When you can walk inside upright, daily chores take half the time, health checks are thorough instead of rushed, and a sick bird is easy to catch rather than a ten-minute ordeal.
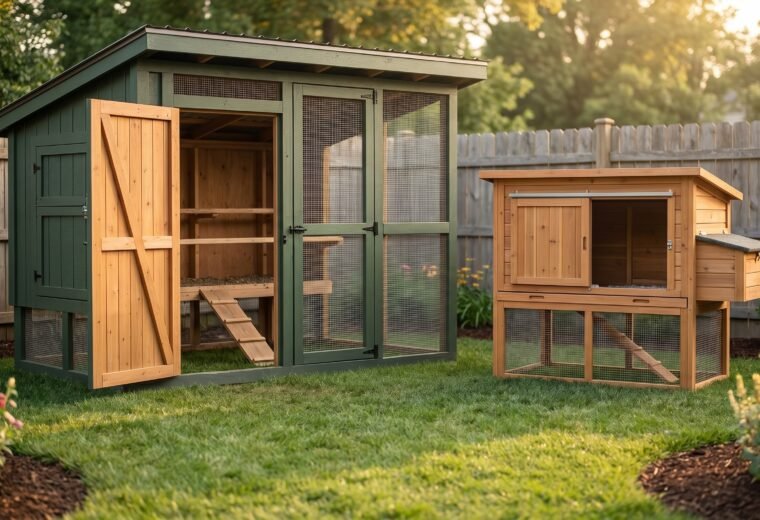
Walk-in designs fall into two categories: a purpose-built shed-style building (8 x 10 ft or larger for most backyard flocks), and a full-height attached run framed in 2x4 lumber with hardware cloth walls and a roofed corridor. The second option costs less and works well in mild climates where birds spend most of their waking hours outside.
Key features that make walk-in coops function better in practice:
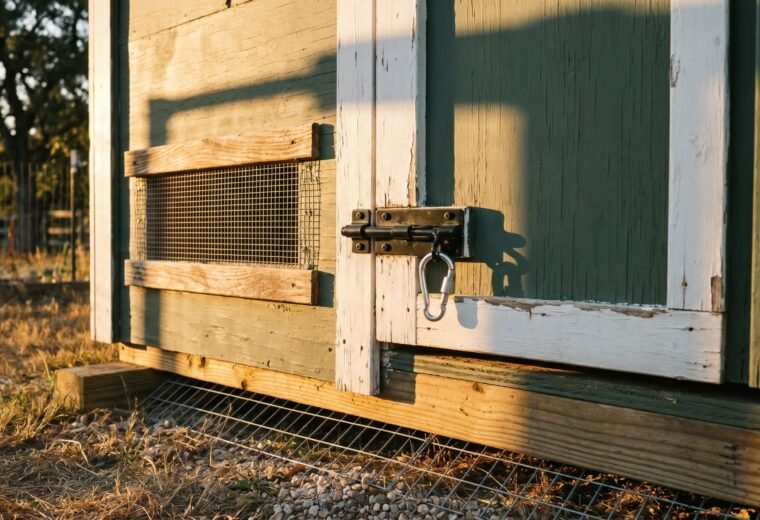
- A solid human door on the exterior that swings outward (birds crowd a sliding door)
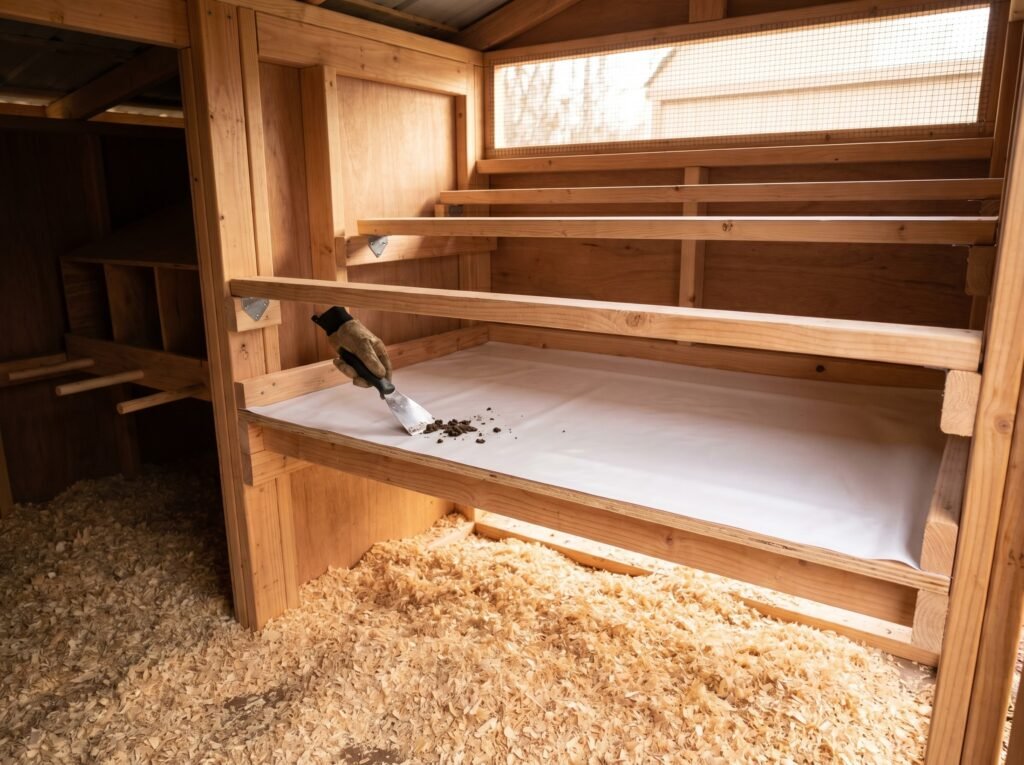
- Poop boards mounted directly below the roost bars so droppings don't land in the bedding - scrape daily with a plastic paint scraper into a bucket
- Windows on the south or east wall for morning light (hens wake with the sunrise and benefit from early-hour UV)
- A separate pop door - sized roughly 10 x 12 in minimum - that connects to the run so the human door never has to open just to let birds in or out
- Roost bars far enough from the wall (at least 12 in) so birds can turn around without hitting the siding
For flocks of eight or more standard hens, a walk-in format is almost always worth the extra material cost. Our comparison of walk-in versus compact coops breaks down the tradeoffs in more detail by flock size and keeper mobility.
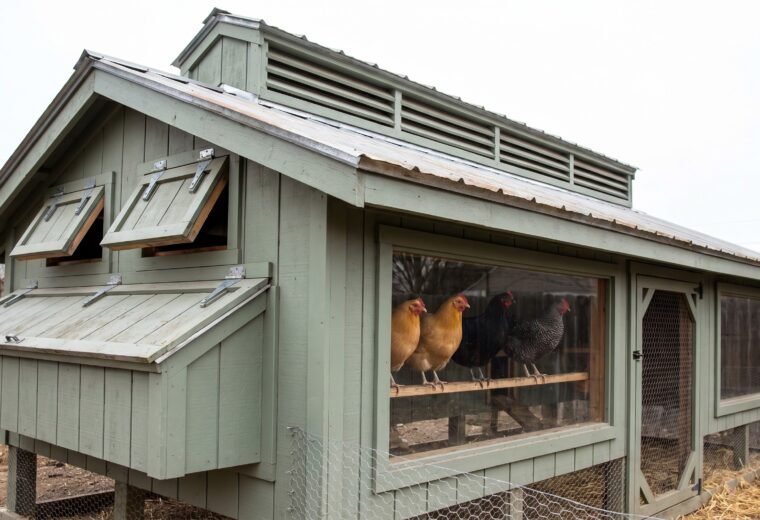
Attractive coop ideas: designs neighbors won't hate
Aesthetics matter more than people admit when getting started. A coop that looks like an eyesore creates friction with neighbors, raises HOA scrutiny, and quietly shapes whether you keep chickens two years from now or give up when it gets complicated.
The most effective design move is matching the coop's exterior to the house. Same paint color, same trim style, same roof pitch if possible. This one decision makes even a simple plywood box read as intentional rather than improvised. Extension.org's housing design guidance notes that "painting and properly maintaining the exterior" directly improves appearance and that "landscaping can screen your poultry coop from neighbors as well as help muffle the sounds your flock produces." Both points are practical as much as aesthetic.
Specific design approaches that work visually:
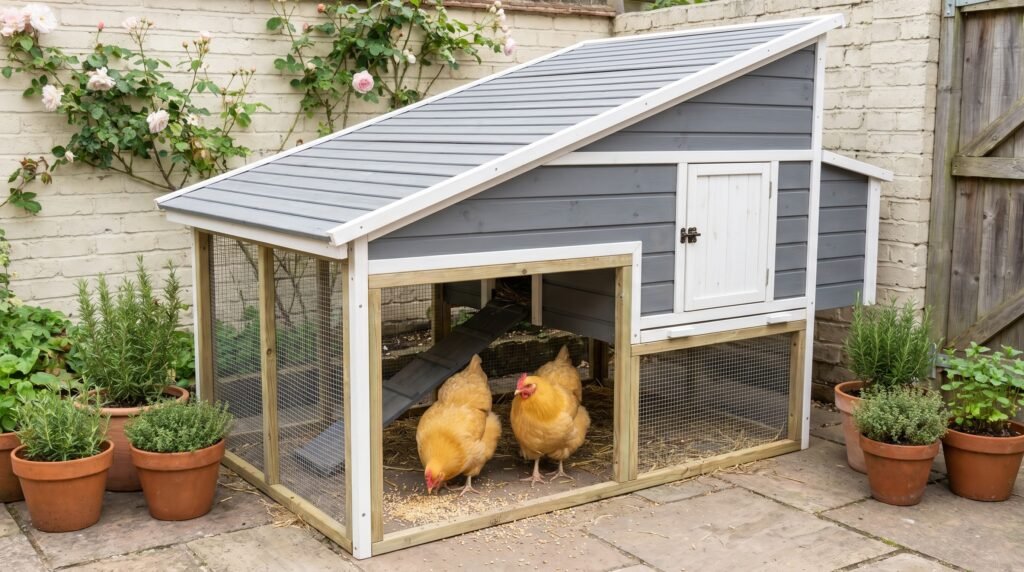
- Cottage style. A box coop with a gambrel (barn) roof, window boxes, and painted shutters photographs well and reads as a garden feature rather than livestock infrastructure. The gambrel roof also creates useful interior loft space for ventilation or storage.
- Converted garden shed. An 8 x 10 ft garden shed with windows added and hardware cloth stapled to the existing ventilation openings is one of the most economical ways to get a large, attractive coop fast. The structure reads as normal outbuilding.
- Board-and-batten siding. Vertical siding with a contrasting batten strip is forgiving of amateur carpentry, weather-resistant, and looks deliberately designed rather than patched together.
- Native shrubs along the fence line. Planting three to five feet of dense low-growing shrubs between the run and the property line softens the structure visually and provides a windbreak.
If you're in an HOA or city with setback rules, check local ordinances before you build anything. Our article on keeping chickens legally in your area covers the most common local rules.
Predator-tough coop ideas: the design details that actually stop night losses
Predators are the most common reason new chicken keepers lose birds in the first year. Raccoons, foxes, weasels, and dogs all probe the same structural weak points. Every effective predator-proof design addresses four areas: the walls and mesh, the floor, the perimeter, and the closure.
Mesh selection. Standard chicken wire keeps birds in but stops nothing larger than a sparrow from getting through. Galvanized welded hardware cloth with 1/2-inch openings is the right choice for most of the run. For least weasels and mink, which can squeeze through a 1-inch gap, use 1/4-inch mesh specifically on the bottom band of the run walls - the lowest 18-24 inches - while the 1/2-inch cloth covers the remainder above that. This is not a second layer on top of the first: the 1/4-inch replaces the 1/2-inch in that lower zone. Cover all coop vents with hardware cloth as well, not flimsy insect screen.
The floor question. Oregon State University's extension guidance recommends a concrete slab or solid wood floor as the first choice for both predator security and cleaning ease. Concrete is permanent and easiest to hose out. If the coop sits on bare dirt, a hardware cloth skirt along the inside perimeter (12 in wide, laid flat on the ground and covered with bedding) prevents digging from inside the structure.
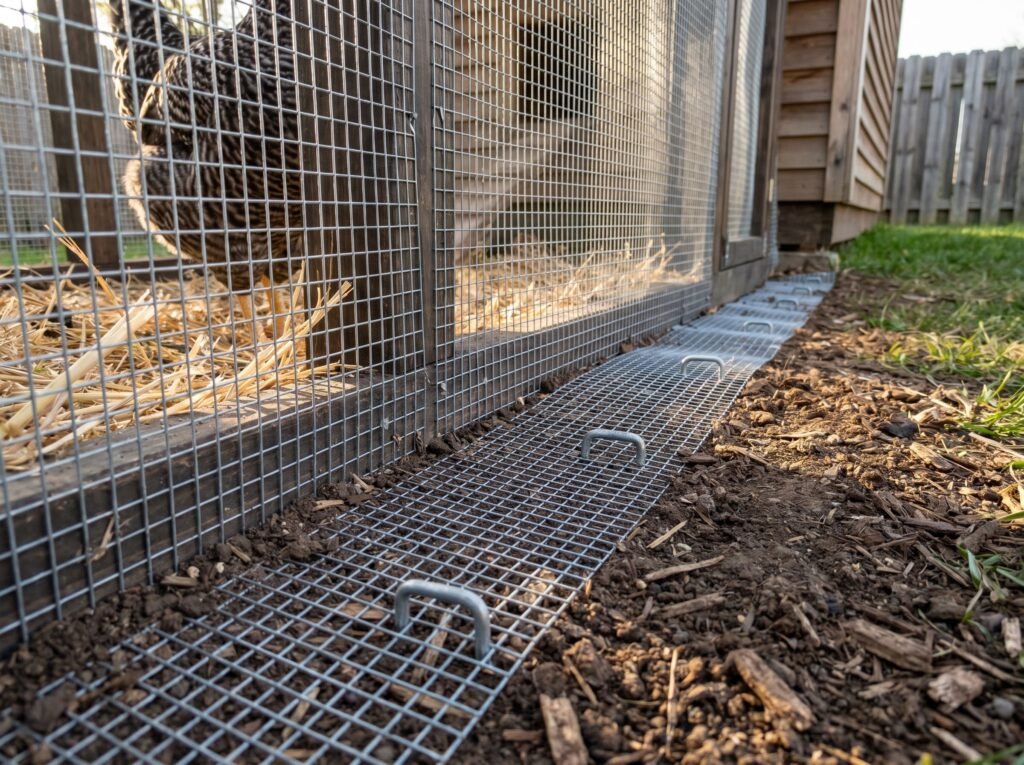
The buried apron. For the exterior run, Extension.org's housing guidance is specific: "bury the wire along the fence border at least 12 inches deep and toe the fence outward about 6 inches." An alternative when digging isn't practical is a surface apron - a 12-18 in strip of hardware cloth laid flat on the ground and pinned with landscape staples, extending outward from the base of the run. Foxes and raccoons learn the hard way that digging straight down doesn't work when the mesh is in the way horizontally.
Automatic closure. Predators work after dark. A manually closed pop door left open at dusk is how most night losses happen. A timer-based or light-sensing automatic door closer removes that variable entirely. See our guide to automatic coop doors for options at different price points.
Aerial cover. Hawks and owls are federally protected under the Migratory Bird Treaty Act, so lethal control is off the table. A covered run - either solid roofing panels on part of the run or hardware cloth stretched across the full top - is the reliable solution. Extension.org suggests some keepers use twine strung in a grid 3-4 feet above the pen with decent results, though a covered roof works more reliably.
For a deeper look at which predator is responsible for a specific type of loss and how to respond without breaking the law, our predator-proof coop guide covers the full range of threats.
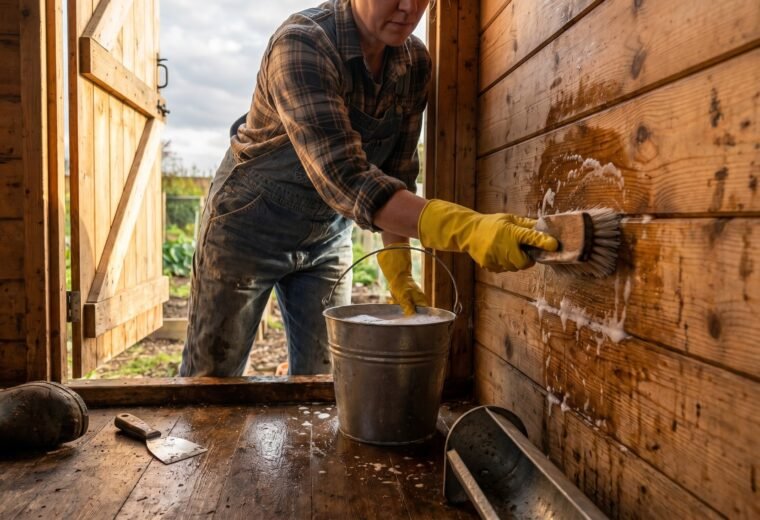
Easy-clean coop ideas: design for the chore you'll do 365 days a year
Cleaning is the most frequent maintenance task in poultry keeping. A coop designed for easy cleaning takes 10 minutes; one designed without thought takes an hour and smells worse before you're done. Ventilation inadequacy announces itself as damp litter and ammonia smell. Extension.org puts it plainly: "If the floor becomes damp or a buildup of ammonia occurs, the ventilation is not adequate." Bad litter management is the root cause of respiratory problems, frostbite risk in winter, and fly pressure in summer.
These design features cut cleaning time significantly:
- Droppings boards under the roost. Chickens deposit most of their daily waste at night while roosting. A removable board (plywood covered with vinyl or linoleum) slides out, scrapes clean in under two minutes, and keeps the main litter layer dry far longer between full cleanouts.
- Sloped or removable floor panels. A coop floor that slopes slightly toward a cleanout door lets you push soiled bedding out in one direction without shoveling against gravity. Modular floor panels that lift out entirely let you replace a badly soiled section without a full rebuild.
- Deep litter depth. Four to six inches of pine shavings (never cedar - the aromatic oils irritate the respiratory tract) gives you room for the deep-litter method, where you turn the bedding weekly and let the carbon layer below manage moisture. When it smells or packs down, that's time for a full cleanout, not a calendar date.
- Large cleanout doors. A full-width cleanout door at the back of the coop - tall enough to walk a shovel through - makes full cleanouts dramatically faster. The smaller the only access point, the harder the job.
- Raised coop on legs. Lifting the sleeping box 18-24 in off the ground on legs or a frame creates storage underneath for tools and creates airflow beneath the floor that keeps the base dry. It also lets you rake out spilled feed and debris from below the run without bending into the structure.
Penn State Extension recommends keeping at least 3 inches of clean pine shavings in nest boxes and cleaning out "any wet or compacted litter" as it appears, rather than on a fixed schedule. The nose test - if you smell ammonia inside at head height, act that day - is more reliable than any weekly routine.
For a full walk-through of cleanout technique, timing, and the deep-litter method with pros and cons, our coop cleaning guide covers the full process.
Ventilation: the one thing every design must get right
Warm, moist air rises. Vents placed high on the walls (near or at the roofline) let that moisture-laden air escape; fresh, cool air enters lower down. Extension.org's insulation guidance notes that "chickens can withstand quite low temperatures as long as they are dry and out of the wind/draft," which reframes the whole question. Warmth isn't the goal. Dryness and draft control are.
A commonly used sizing rule, cited by Virginia Cooperative Extension and UConn Extension, is roughly 1 square foot of open vent area per 10 square feet of coop floor space as a baseline - so a 60 sq ft coop needs about 6 sq ft of venting, not one vent per bird. Position vents above roost height so moving air doesn't hit roosting birds directly. Cross-ventilation on opposing walls moves air in summer without creating a wind tunnel at roost level. In cold climates, closeable hardware-cloth-covered vents on the north and west walls let you dial back airflow on bitter nights without sealing the coop shut.
Heat lamps are a documented fire risk in enclosed wooden structures and rarely necessary for healthy standard breeds. A dry, well-ventilated coop with sufficient birds sharing body heat handles most winters in the continental US without supplemental heat. See our ventilation design guide for specific vent placement diagrams.