September through November is the window that decides how comfortable your birds are for the next four months. Done well, autumn prep means dry bedding, unfrozen water, and a flock that coasts through January without a drop in health. Skipped entirely, it can mean frostbitten combs, ammonia buildup, and a parasite explosion that started during molt when you were not looking. This checklist covers every area worth touching before temperatures lock in: molt nutrition, coop weatherproofing and ventilation, your water-freeze plan, the supplemental light decision, and a parasite audit. Work through the five sections in any order; the lighting and water hardware decisions are the only ones that may require a separate trip for supplies.
1. Molt support: feeding feathers back onto birds

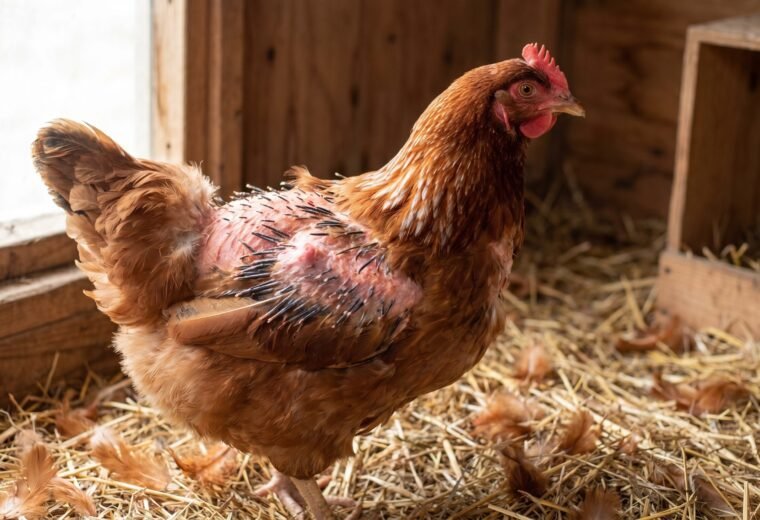
Most flocks hit their annual molt in September or October. It is the most protein-intensive event in a hen's year, because feathers are built almost entirely from keratin - a structural protein. A flock of 14 birds that is halfway through a hard molt needs noticeably more protein per bird than the same flock at peak lay in June.
The practical adjustment is straightforward. Switch from a standard 16% layer ration to an 18-20% flock raiser or grower crumble during the molt weeks, then return to a 16-18% layer ration once the new feathers are fully in. Ohio State University Extension's winter poultry factsheet (ANR-66) puts the winter protein floor for mature laying hens at 14-17% crude protein, which is the maintenance floor; during active molt you want to be at the top of that range or a step above it. Pull back on scratch grains and low-nutrient treats during molt - those calories crowd out protein without advancing feather regrowth.
Penn State Extension data puts the typical molt at 10-12 weeks from first feather drop to full regrowth. A hen that drops her feathers fast (bare back, bald neck in under two weeks) is usually a better long-term layer than one who trickles feathers slowly over months. Either way, the nutrition window is the same. Keep protein up until you cannot see pin feathers breaking through the skin any longer.
Cold and molt overlap badly. A bird with half her feathers missing cannot regulate her body temperature well, so draft-free housing matters more during molt than at any other time of year. Our complete molting guide walks through the full cycle timing and what the bird is actually doing physiologically.
One more point worth making plainly: do not add supplemental light while birds are actively molting if you want a natural rest cycle. Light suppresses molt. If you plan to run supplemental lighting through winter (see Section 4), start it only after the molt has finished and new feathers are set.
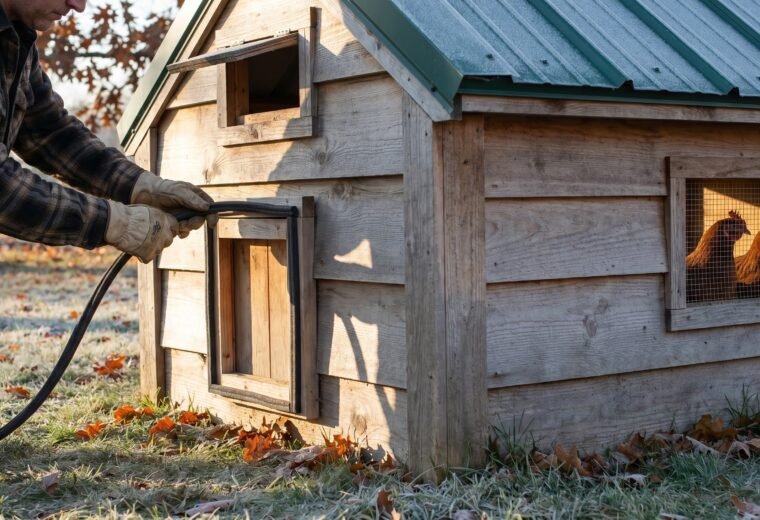
2. Coop weatherproofing and ventilation: the two things that have to happen together
Sealing a coop against drafts and keeping it ventilated sound like opposites. They are not - but getting the balance wrong is the single most common winter coop mistake, and it is responsible for frostbite, respiratory illness, and ammonia burns more often than actual cold temperatures are.
The rule from extension poultry housing research is unambiguous: chickens can withstand quite low temperatures as long as they are dry and out of the wind. What kills birds in winter is wet air, not cold air. Chicken droppings release moisture and ammonia continuously, and warm air holds far more moisture than cold air. Without airflow to carry that moisture out, it condenses on every surface - including wattles and combs - and creates the conditions for frostbite even when the thermometer reads only 25F.
The fix is to seal the walls against horizontal drafts at bird level while leaving high vents open. Ridge vents, gable vents, or hinged vent panels near the roofline allow warm, moist, ammonia-laden air to escape by convection. Cold incoming air drops from above and warms before it reaches the birds. A practical test: stand inside the coop with the pop door closed. You should feel no wind across your ankles. If the windows fog or the walls show condensation by morning, the vents are not open enough.
Go through this weatherproofing checklist before temperatures drop into the 30s:
- Walk the perimeter and plug any gaps at bird level with hardware cloth or spray foam. Gaps also invite predators, so this step pays double.
- Check the roofline vents - clear any debris and confirm the hinges or sliding panels still move freely. These vents stay open in all but the most extreme blizzard conditions.
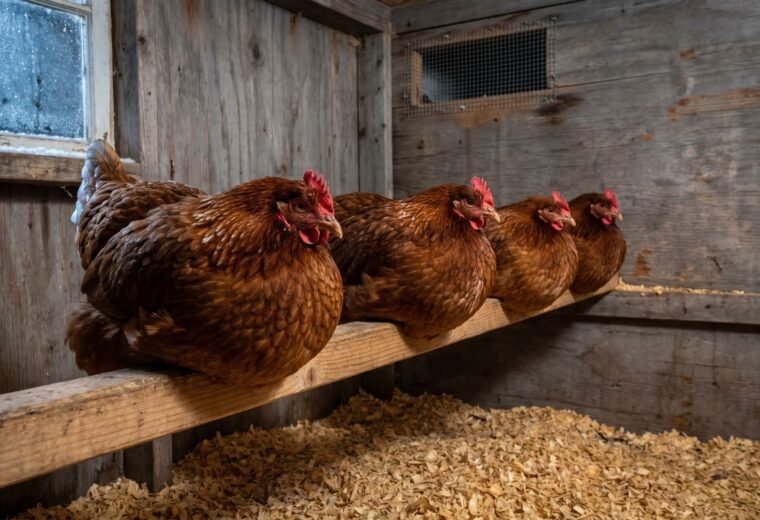
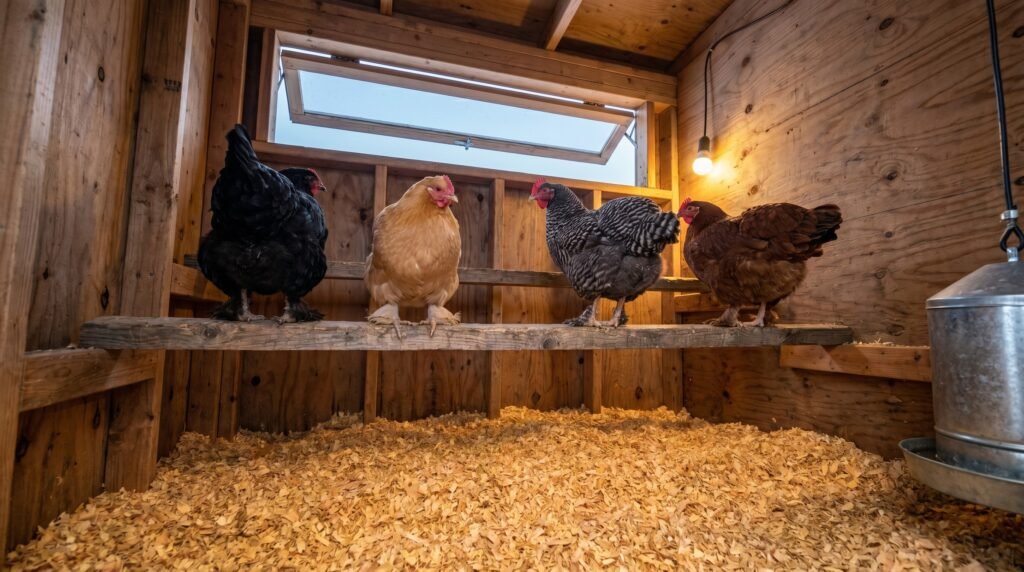
- Check the roost bars. Wood is the right material; metal holds cold and causes foot frostbite on contact. Each bird needs 9-12 inches of bar length, and bars should be flat 2x4s set wide-side-up so feet tuck under body feathers rather than curling around a round perch in the cold.
- Add bedding to 4-6 inches if you are not already running deep litter. Pine shavings work well; straw is a reasonable alternative. Hold off on the full cleanout until spring - that accumulated litter generates a small amount of compost heat and insulates the floor.
- Inspect nest boxes for gaps under eaves or around the back wall. Hens that sit overnight in drafty nest boxes instead of roosting are at higher frostbite risk.
Coop design that addresses both weatherproofing and airflow in detail - including hardware cloth sizing and pop door sealing - is covered in our winterizing guide.
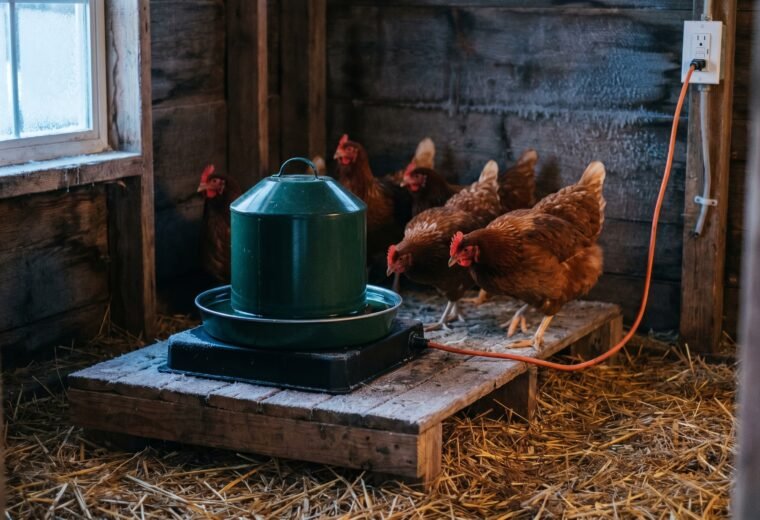
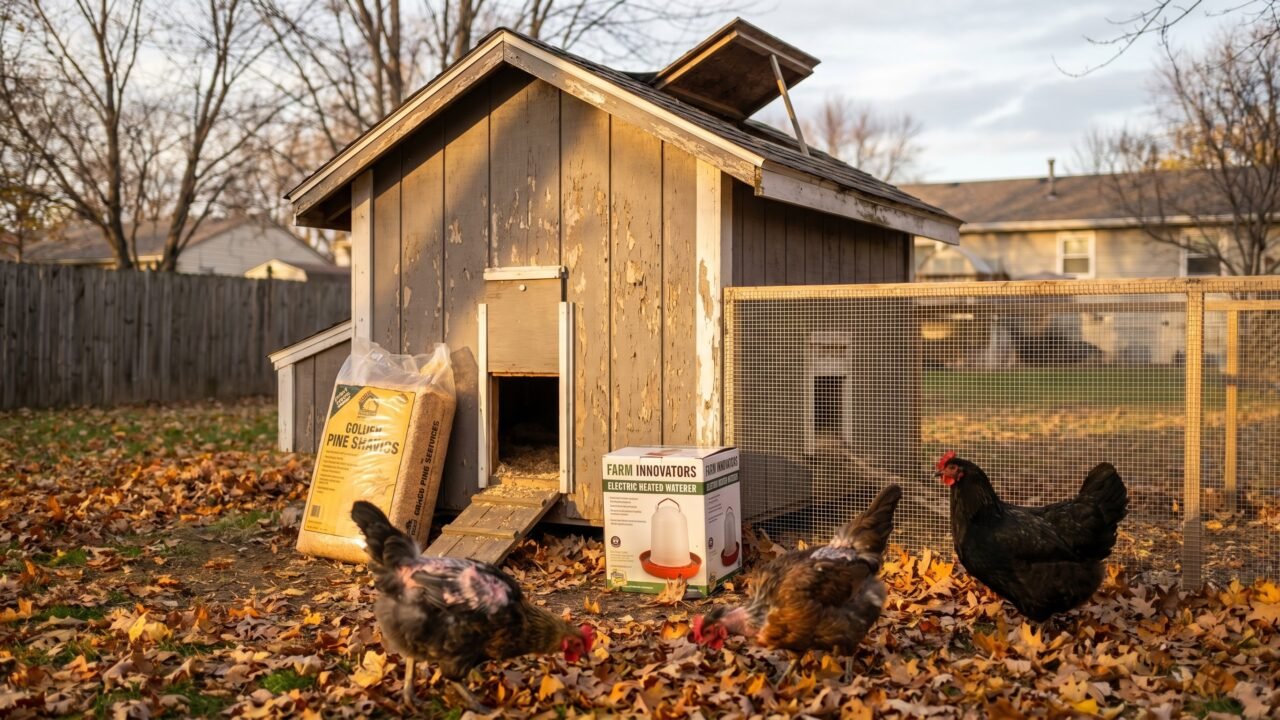
3. Water: solving the freeze problem before it arrives
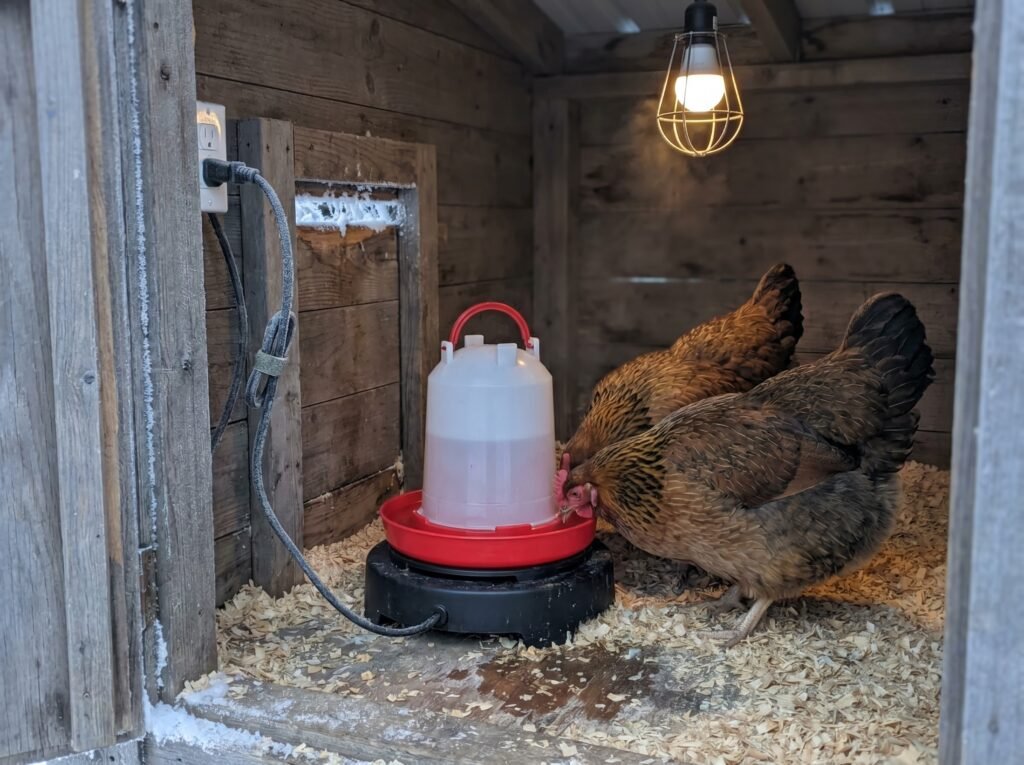
Frozen water is the biggest daily time sink in winter chicken keeping, and it is more serious than inconvenient. Laying hens that go without water for more than a few hours will drop production, and in hard freezes an unheated open waterer can freeze solid overnight. Extension sources are consistent on this: select drinkers carefully and use drinker warmers to prevent drinking water from freezing.
You have three practical options. The table below compares them so you can match your situation:
| Option | Upfront cost | Ongoing work | Works at | Best for |
|---|---|---|---|---|
| Electric heated base or stand | $25-60 | Daily top-off; weekly clean | Down to about 0F with typical heated base | Coops with access to an outlet |
| Heated waterer (all-in-one) | $40-90 | Weekly clean; cord management | Rated to 0F or lower depending on unit | Convenience; fewer pieces |
| Manual rotation (two waterers) | $15-30 for a second waterer | Swap twice daily in hard freezes; haul warm water | Only reliable above ~20F; labor intensive below that | No electricity available; mild-winter climates |
Whichever system you use, place the waterer on a flat surface where spilled water runs away from the bedding, not under it. Wet litter is the enemy of a dry, healthy winter coop. Extension guidance recommends checking water at least twice daily in cold weather and more often on the coldest days. Our frozen water solutions article has full product guidance and placement tips if you are choosing hardware for the first time.
One thing worth flagging: extension.org notes that hens eat up to 25% more feed in cold weather, because metabolizing extra calories keeps body temperature up. Keep feeders full and check them daily. A hen that cannot find feed at dawn will search for calories elsewhere.
4. The supplemental light decision
This one deserves its own section because the answer depends on what you actually want from your flock, and a lot of keepers apply light reflexively without thinking through the tradeoff.
Chickens need roughly 14-16 hours of light per day to hold consistent laying. Once natural daylight drops below about 14 hours - usually by late September at mid-latitudes - production slows or stops, and hens may enter molt. Penn State Extension is direct: provide 14-16 hours of light per day for maximum year-round production, and never decrease the lighting period on birds in production or they will stop laying. Ohio State University Extension puts the stimulating range at 12-14 hours, which overlaps at 14 hours - the point both sources agree is the floor. Think of 14 hours as the minimum you need to maintain production, and 16 hours as the ceiling for maximum output.
Adding a simple timer that switches on a low-wattage LED bulb before sunrise extends the day. The light intensity required is modest - about half a footcandle, which is dim by human standards but sufficient for hens. If you can read a newspaper comfortably inside the coop, the light is bright enough. Set the timer to add light in the early morning rather than at night. Extending toward dawn keeps the birds on a stable end-of-day cue, and abrupt darkness mid-evening can cause confusion and pile-ups on the roost.
The tradeoff to weigh honestly: artificial light prevents or interrupts the natural molt-and-rest cycle. Hens that lay straight through winter without a molt are drawing on reproductive resources continuously. Many experienced keepers choose to let their oldest hens rest naturally through one winter and add light only for their younger birds. Others run light year-round and accept shorter overall productive life. Neither choice is wrong - it depends on flock size, egg demand, and your goals.
A deeper look at this decision, including what happens physiologically when a hen's light cycle changes, is in our article on winter chicken care decisions and in the dedicated supplemental light guide.
5. Parasite audit: fall is the highest-risk window for mites
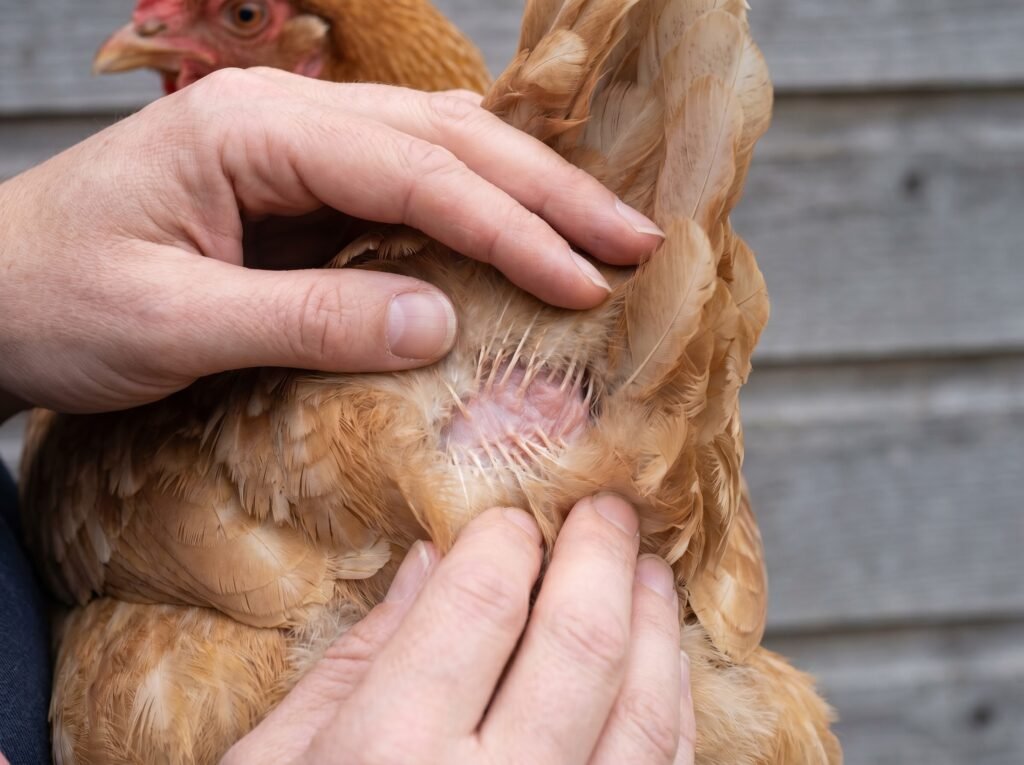
Here is something that surprises new keepers: the most common external poultry parasite actually peaks in fall and winter, not summer. Northern fowl mites prefer cool weather and live on the birds full-time, feeding around the clock. A mild infestation in August can become a serious one by October if the molt has thinned a hen's feather cover and she is scratching more than usual.
There are two parasites to check for, and they require different treatment approaches:
- Northern fowl mites - live on the bird, visible as tiny moving specks around the vent, under wings, and at the base of tail feathers. Heavier infestations leave dark, crusty debris at the vent. Because they live on the host, treatment goes on the bird. Re-treat every four to seven days to break the lifecycle (extension.org guidance).
- Red mites (chicken mites) - live in the coop, not on the birds. They hide in cracks around roost ends, nest box corners, and wall joints during the day and feed on birds at night. A bird that seems restless at night or shows unexplained anemia in winter may have red mites even if a daytime examination finds nothing on the feathers. Treat the coop environment, paying close attention to every crack and crevice and the underside of roost bars. Re-treat every four to seven days because the 7-14 day egg-to-adult cycle means survivors rebatch quickly.
Permethrin-based poultry dusts and sprays are labeled for both mite types; follow the product label for dilution, withdrawal time, and personal protection. Food-grade diatomaceous earth is sometimes used as a dust in the coop and in dust baths; it has some mechanical efficacy on soft-bodied insects, though extension sources acknowledge the evidence is weaker than for synthetic options. Whichever product you use, treat both the birds and the coop during an active red mite infestation - treating one without the other leaves the cycle running. See our complete mite identification and treatment guide for step-by-step application instructions.
Do a lice check at the same time. Lice live on the bird and show up as yellowish flat insects, roughly 2-3 mm long (about the size of a sesame seed), clustered near the skin at the vent and under the wings. The timeline from egg to adult for lice is about three weeks, so repeated treatments spaced accordingly are necessary to fully clear an infestation.
The molt itself makes this inspection harder and more important at the same time. Feathers that have dropped leave gaps in the coat, and regrowth pin feathers attract mites. Check every bird individually, not just a quick scan of a few.
One-page fall flock checklist
Print this or bookmark it for your walk-through. Check each box before your first hard frost.
| Area | Task | Done? |
|---|---|---|
| Molt and feed | Switch to 18-20% protein feed for molting birds | [ ] |
| Pull back on scratch grains and low-protein treats | [ ] | |
| Confirm feeder is always full (hens eat up to 25% more in cold) | [ ] | |
| Return to 16-18% layer feed once new feathers are set | [ ] | |
| Coop weatherproofing | Plug wall gaps at bird level; screen with hardware cloth | [ ] |
| Confirm roofline vents are clear and functional | [ ] | |
| Check roost bars - wood, flat 2x4, 9-12 in per bird | [ ] | |
| Add bedding to 4-6 inches; skip the full cleanout until spring | [ ] | |
| Morning test: no condensation on walls; no draft at ankle height | [ ] | |
| Water | Install heated base, heated waterer, or set up two-waterer rotation | [ ] |
| Position waterer away from bedding to prevent wet litter | [ ] | |
| Check water twice daily on cold days; haul warm water if no electric | [ ] | |
| Supplemental light | Decide: run light through winter or allow natural rest/molt | [ ] |
| If lighting: set timer for early-morning extension to reach 14-16 h total | [ ] | |
| If lighting: wait until molt is fully complete before starting | [ ] | |
| Parasite check | Examine every bird: vent, underwing, tail base for mites and lice | [ ] |
| Check roost ends, nest box corners, wall cracks for red mites at dusk | [ ] | |
| If mites found: treat birds AND coop; re-treat every 4-7 days | [ ] | |
| If lice found: treat on-bird; re-treat at 3-week intervals | [ ] |