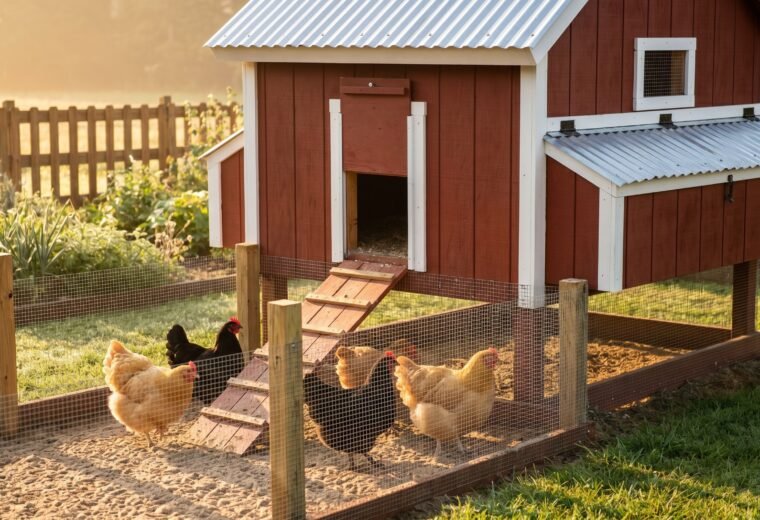
Free materials, a weekend of work, and a finished coop for under $150 at retail - often $80-120 once you scrounge a few parts: that is the appeal of building with pallets, and it is a realistic goal for a small flock of four to six standard hens. Before you drag pallets home from the loading dock, though, one safety check can make the difference between a healthy coop and a toxic one. Here is how to source correctly, build soundly, and close the gaps that predators exploit.
Reading the stamp: HT, MB, and what to skip entirely
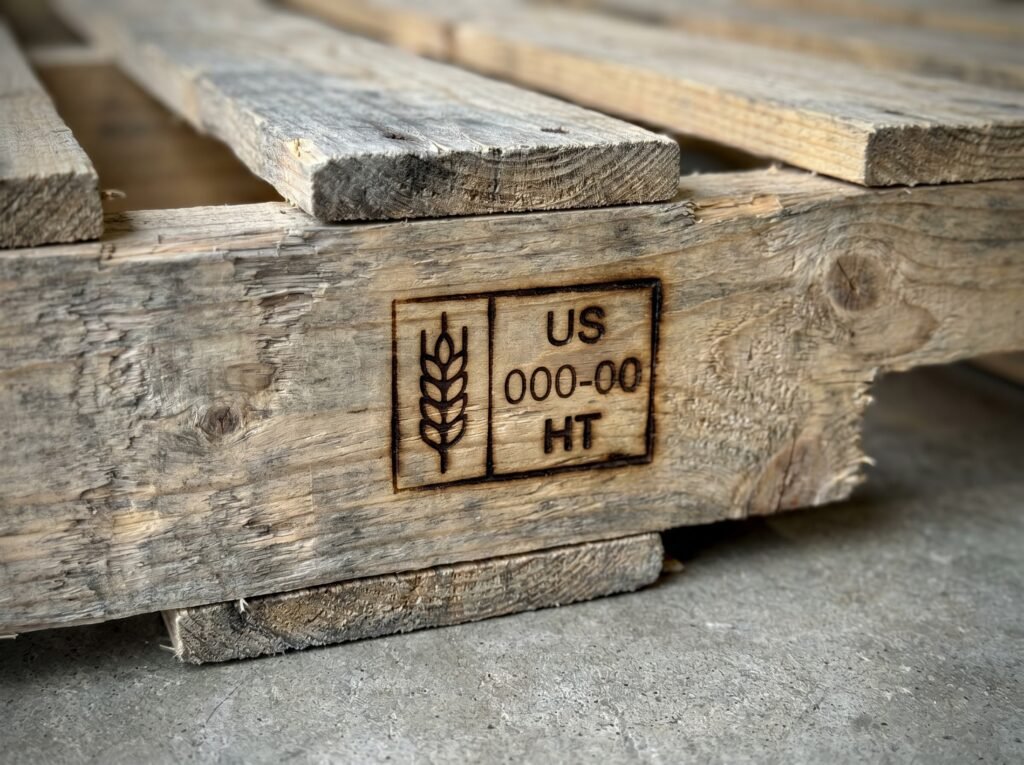
Every pallet traded across international borders carries an IPPC stamp (a small wheat-stalk logo burned or stenciled into the stringer), followed by a two-letter treatment code. That code is the first thing to check before loading a pallet into your truck.
HT (heat-treated) means the wood was brought to a core temperature of 56°C for a minimum of 30 minutes in a controlled kiln. No chemical agent is involved. An HT pallet is chemically identical to untreated kiln-dried lumber; it is safe for garden beds, furniture, and chicken coops.
MB (methyl bromide) is the code to avoid. Methyl bromide is a broad-spectrum pesticide fumigant classified as a Class I ozone-depleting substance under the Montreal Protocol. The EPA phased out its production for most uses on December 31, 2004, but older pallets stamped MB still circulate in the supply chain. Chemical residue can persist in the wood fibers, and the substance has been linked to human health problems and ozone depletion. For your chickens' sake, and your own, pass on any pallet marked MB.
What about unmarked pallets? Skip those too. Without a stamp you cannot confirm treatment history, and that uncertainty is not worth the risk when safe pallets are easy to find.
A third mark you may see is KD (kiln-dried), which indicates the wood was dried to reduce moisture content but may or may not have also received ISPM-15 treatment. KD-only pallets are generally safe for structural use, but they lack the pest-clearance certification of an HT stamp. When in doubt, look for HT.
One practical note: domestic pallets moving only within the US are not required to carry an IPPC stamp. Those are legal to use, but you cannot verify their treatment history from the wood alone. Sourcing from businesses that handle imported goods (nursery centers, hardware stores, farm supply retailers) gives you the best chance of finding clearly stamped HT stock.
Where to find HT pallets (and what to pay)
The classic answer is "ask local businesses," and it still works. Garden centers, tile and flooring showrooms, equipment rental shops, and farm co-ops receive palletized shipments regularly. Walk in, explain what you are building, and ask whether they set pallets aside for pickup. Most are happy to offload them for free rather than pay disposal fees.
Beyond that, online classifieds (search "free pallets" on your local marketplace) surface dozens of listings in any mid-size metro on any given week. Local classified sites and neighborhood marketplace apps are reliable starting points. Construction supply yards sometimes charge $2-5 per pallet but guarantee cleaner, drier stock that has not sat outside in the rain.
When you pick up pallets in person, bring these four criteria:
- IPPC stamp visible with HT code (not MB, not blank)
- No chemical smell, heavy stains, or oily residue
- No visible mold (blackened boards or musty smell are disqualifiers)
- Boards straight and solid, with no more than minor splitting at nail holes
The standard North American GMA pallet measures 48 x 40 inches, which gives you a useful wall panel right off the stack. Grab ten to twelve for a basic 4-6 hen coop: four for walls, two for the floor frame, two for roof framing, and extras for repairs and fill pieces.
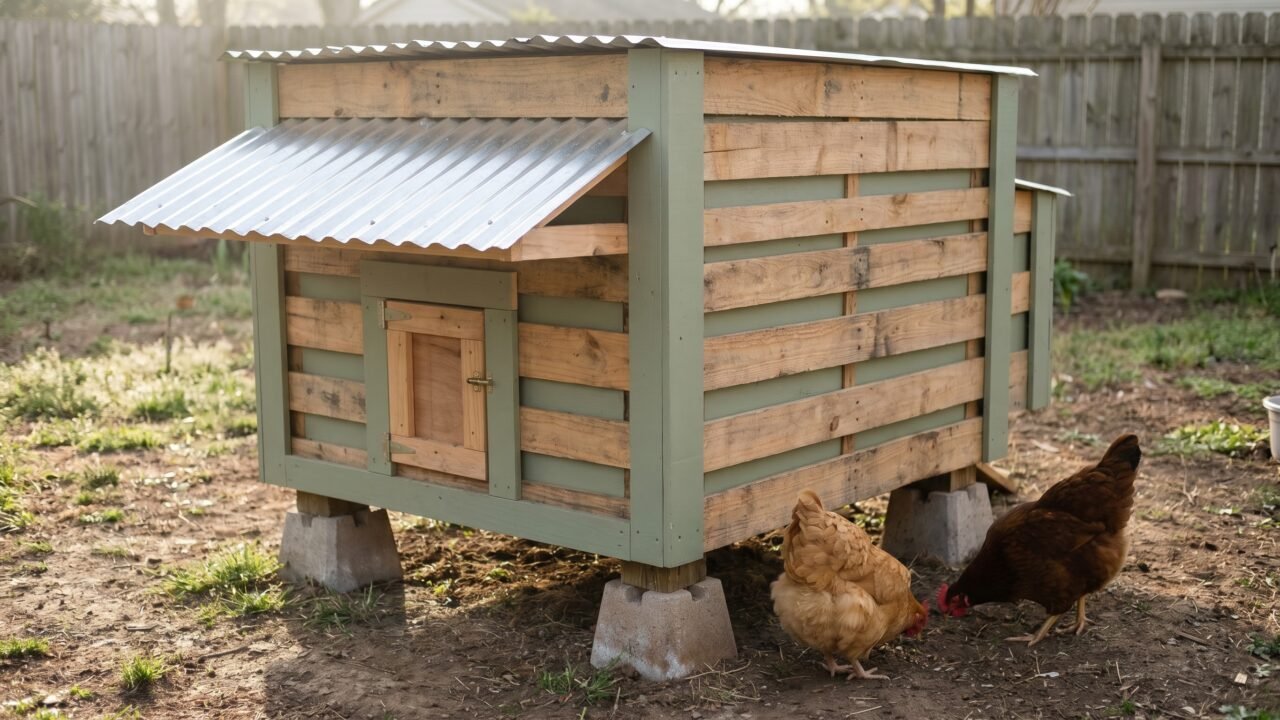
A simple pallet coop build: the basic approach
A pallet coop does not require a formal plan, but it does require that you think through space before you nail anything. Full coop-building guidance covers framing, roofing, and ventilation in depth; this section focuses on the pallet-specific workflow.
UF/IFAS Extension puts the indoor minimum at 3 square feet per standard bird, with 8-10 square feet per bird in the run. For four hens you need at least 12 square feet of interior floor space (roughly the footprint of three GMA pallets laid flat). Six hens need 18 square feet minimum. Build to the minimum and your birds will be crowded within a season; aim for 4 square feet per bird to give yourself a comfortable margin.
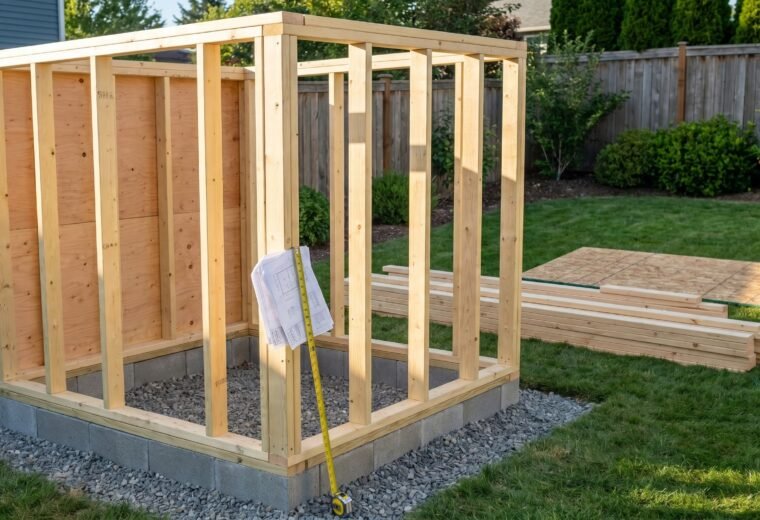
The four-wall frame
Stand four pallets on edge to form a rectangle and screw them together at the corners with 3-inch exterior-grade screws. A standard configuration uses two pallets end-to-end on each long side and one pallet on each short end. With GMA pallets (48 x 40 inches), two pallets end-to-end give you an 8-foot long wall; each short wall is one 40-inch (roughly 3.3-foot) pallet wide. That yields an interior of approximately 8 x 3.3 feet, around 26 square feet - comfortably housing six standard hens at 4 square feet each. Drive screws from the outside so the interior stays flush. Add a diagonal cross-brace of 2x4 on each wall panel if the pallets flex; pallet stringers are load-bearing vertically but can rack sideways without bracing.
Floor
Elevate the coop at least 8-12 inches off the ground on concrete blocks or pressure-treated 4x4 skids. Elevation keeps the pallet floor dry (wet pallet boards rot quickly), prevents rodents from nesting underneath, and denies digging predators a foothold directly below the sleeping area. Lay two pallets flat across the skids as the floor deck and fill any gaps between boards with scrap lumber screwed flush.
Roof
A shed roof, sloped in one direction, is the simplest option with pallets. Lay two pallets flat across the top of the walls, prop the front edge 6-8 inches higher than the back edge with a 2x4 ledger, and cover the whole surface with corrugated metal roofing or asphalt shingles over 15-lb roofing felt. Extend the roof 4-6 inches past the front wall to shed rain away from the door. Metal roofing on top of pallets is fast, cheap, and durable; a 10-foot sheet runs $15-25 at most building supply stores.
Door and access panel
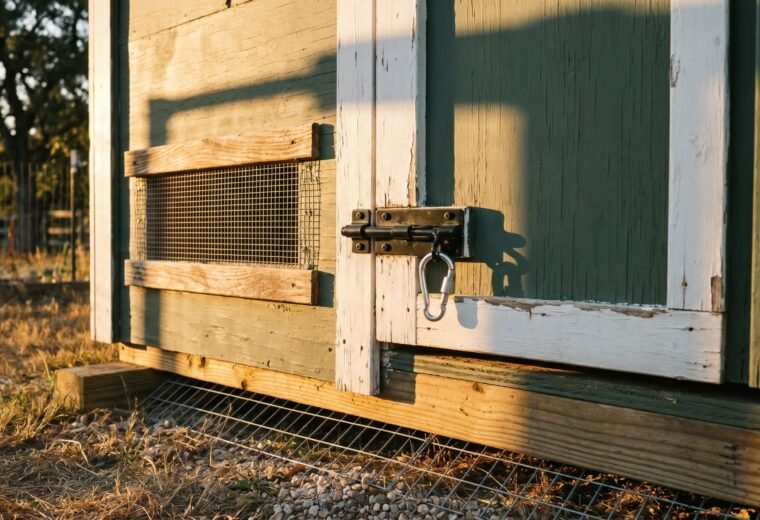
Cut a pop-hole (chicken door) roughly 10 x 12 inches in one wall panel using a reciprocating saw. Hang a slide-latch door (even a piece of scrap plywood on a metal hinge works) that closes securely at night. Add a larger human-access door (a full pallet section on hinges, or a framed plywood panel) on the opposite end for cleaning and egg collection.
Ventilation: the gap that matters most
Pallet gaps are not your ventilation plan. Gaps between boards let in rain, drafts, and predator paws; they need to be sealed (more on that below). Intentional ventilation goes high on the walls, near the roofline, where warm moisture-laden air naturally rises and exits. eXtension's poultry housing guidance is clear on why this matters: the ventilation system's function is "to maintain adequate oxygen levels while removing carbon dioxide, moisture, dust, and odors." Ammonia from manure builds fastest when moisture cannot escape; a single wet winter without airflow can make a small coop dangerously foul.
A widely used rule of thumb among backyard poultry keepers is roughly 1 square foot of vent opening per bird, placed high. Cut two vent openings (one on each gable end or near the roofline on each long wall) and cover each with 1/2-inch hardware cloth stapled and screwed securely. For a four-hen coop, two 12 x 24-inch vents (each 2 sq ft, 4 sq ft total) are more than sufficient; for six hens, add a third vent or go wider to approach 6 sq ft of total opening. In cold climates, add a hinged flap so you can partially close the vents on the coldest nights without eliminating airflow entirely.
The ventilation guide on this site walks through the cold-weather balance between draft prevention and air exchange if you are building in a northern climate.
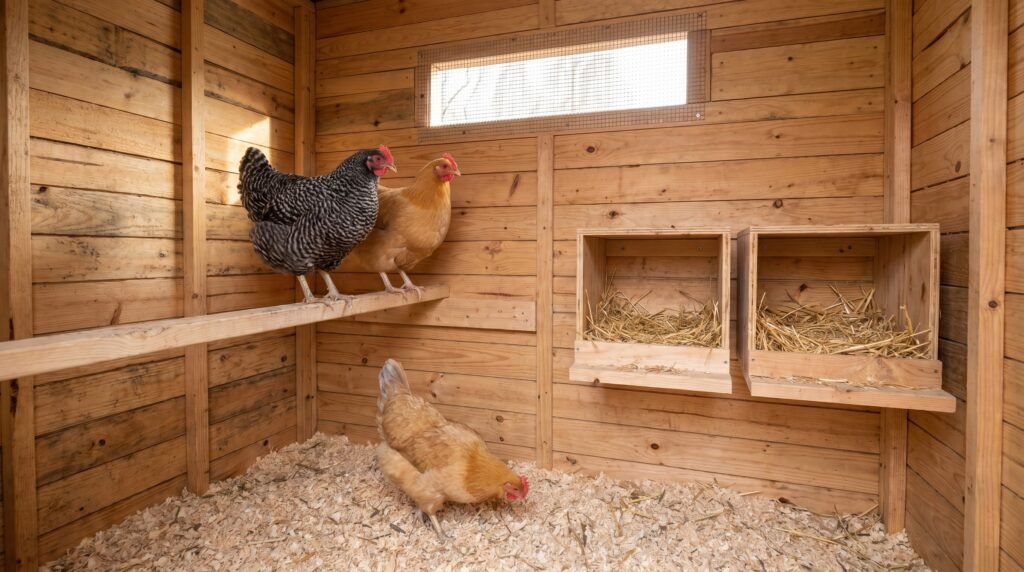
Roost and nest boxes
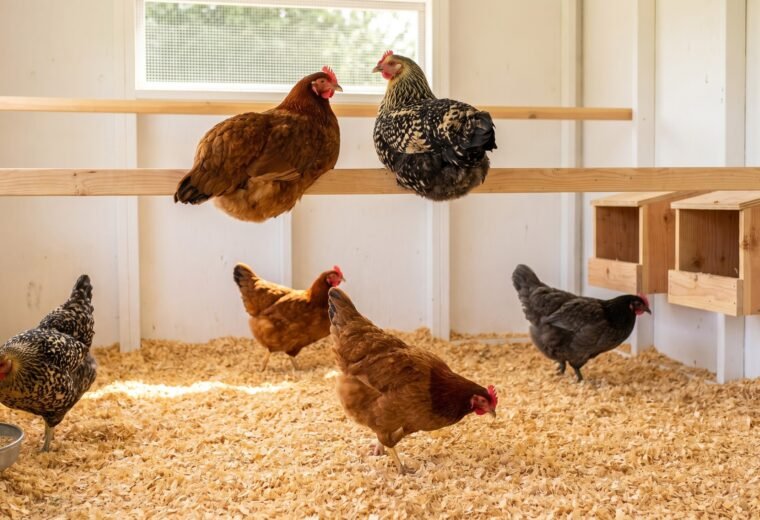
Chickens sleep on roosts, not on the floor. A flat 2x4 installed wide-side up makes the best roost bar; the broad surface lets birds cover their feet with their body feathers on cold nights. Mount it 18-24 inches off the floor and higher than the nest boxes so birds are not tempted to sleep in the boxes. Allow 8-10 inches of roost length per bird; for six birds, one 5-foot bar covers the flock.
Nest boxes per UF/IFAS guidance should be 12 x 12 x 12 inches, about two feet above the floor, with one nest box for every five hens. In practice, many builders find one box per four hens keeps lines short and discourages egg eating, but the cited minimum is one per five. For a six-bird flock, two nest boxes are sufficient. Build them from pallet scraps: rip boards to 12-inch widths, nail into a box shape, and hang the assembly on the inside wall with L-brackets. Line the floor of each box with 2-3 inches of pine shavings.
The pallet coop cost breakdown
Here is a realistic materials list for a 4-6 hen pallet coop, assuming ten to twelve pallets sourced for free.
| Item | Quantity | Estimated cost | Notes |
|---|---|---|---|
| HT pallets (sourced free) | 10-12 | $0 | Confirm HT stamp; have extras for fill and repairs |
| 3-inch exterior screws (5 lb box) | 1 box | $18-22 | Deck or structural screws, not drywall screws |
| Corrugated metal roofing (2 sheets, 10 ft) | 2 | $30-50 | Or asphalt shingles + roofing felt (~$25) |
| 1/2-inch hardware cloth (25 ft roll, 36 in wide) | 1 roll | $40-55 | Covers vents, pop-hole, and gaps; galvanized 19-gauge minimum |
| Heavy-duty hinges + slide bolt latches | 4-6 sets | $15-20 | Two-stage latches on the main door (raccoons open simple latches) |
| Concrete blocks (coop risers) | 4-6 | $10-15 | Or pressure-treated 4x4 skids |
| Scrap 2x4 lumber (framing, bracing) | ~50 linear ft | $15-25 | Often sourced free from construction sites |
| Roofing felt (15 lb, 1 roll) | 1 roll | $15-18 | Underlayment for metal roof |
| Total | $143-205 | Most builders land between $80-120 with salvaged lumber and scrounged hardware |
That range assumes you pay retail for everything you cannot scrounge. In practice, most pallet builders pull roofing felt from a neighbor's leftover roll, source scrap 2x4s from a construction site, and find hardware cloth on sale - dropping the total well below the retail ceiling, often to $80-120. The single largest unavoidable cost is the hardware cloth. Do not scrimp on it; that is where predator protection lives.
Predator-proofing the gaps: where pallet coops fail
Pallet construction creates gaps - between boards, at corner joints, around the pop-hole - and those gaps are where a pallet coop loses the battle with predators. Raccoons can reach through a 2-inch gap and pull a bird through. Weasels and minks can squeeze through openings as small as 1 inch. A pretty coop that leaks at the seams at night is just a trap.
Close every gap systematically before the birds move in. Work through the coop in daylight with a flashlight held inside; every pinhole of light from the outside is a potential entry point at night.
Gap-sealing method by location
- Board gaps on walls: rip thin scrap boards (1/4-inch plywood or pallet slats) and nail them over the interior face of each gap. Exterior caulk (paintable latex) handles gaps under 1/2 inch.
- Corner joints: cut and screw a vertical 2x4 into each interior corner, flush with both walls. This closes the joint and adds structural rigidity simultaneously.
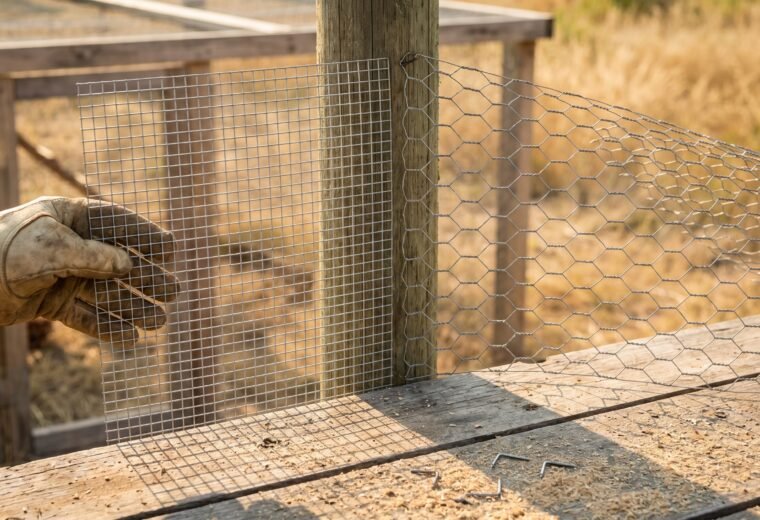
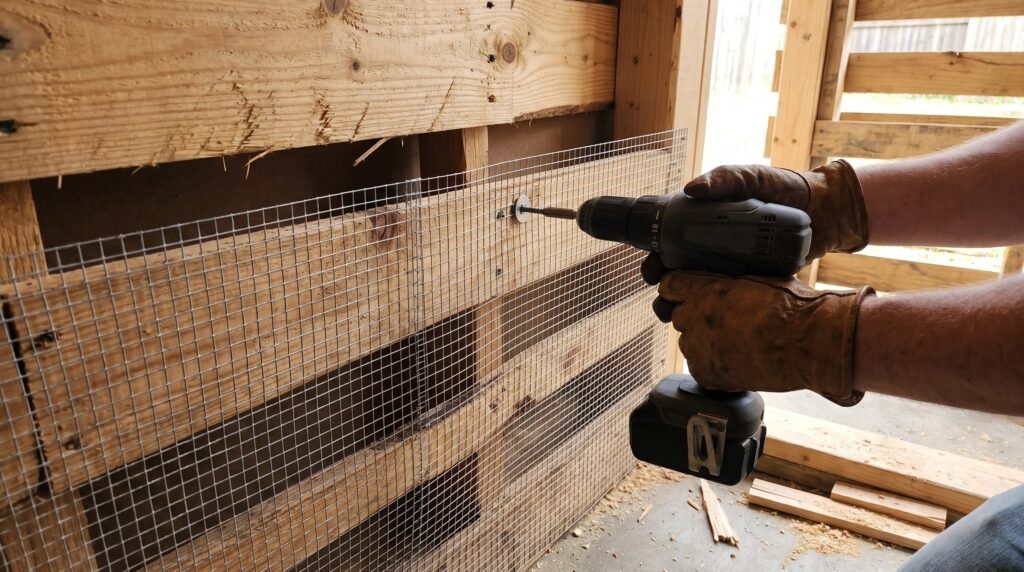
- Vents and pop-hole: cover every opening with 19-gauge (or heavier) galvanized 1/2-inch hardware cloth, secured with screws and washers, not just staples. Raccoons pull staples. Weasels push through 1-inch chicken wire.
- Roof-to-wall junction: nail a 1x4 fascia board along the top perimeter and fill any daylight with expanding foam sealant, then cover the foam with a strip of hardware cloth.
The floor gap is the one most builders miss. If the coop sits on blocks with an open-bottom floor frame, predators will try to dig in underneath. Lay a hardware cloth apron on the ground around the perimeter: a 12-18 inch skirt of 1/2-inch galvanized mesh, pinned flat to the soil with landscape staples, extending outward from the coop base. UF/IFAS Extension recommends burying the apron or bending it in an L-shape at 12-18 inches to stop digging predators. Grass grows through it within a season and it becomes invisible.
For the full picture on mesh selection and why 1/2-inch hardware cloth matters more than chicken wire, the hardware cloth vs. chicken wire comparison covers the gauge and mesh-size specifics that determine what gets stopped and what does not. And the broader predator-proofing guide addresses locks, lighting, and multi-predator strategies beyond what a build guide can cover in one section.
Honest pros and cons of pallet wood for coops
Pallet wood is genuinely useful material, but it has real limitations. This table reflects what the HenAcre team has observed across builds reviewed and documented, without exaggeration in either direction.
| Factor | Pallet coop | Standard lumber coop | Verdict |
|---|---|---|---|
| Material cost | Near-zero (pallets free) | $150-400+ in lumber alone | Pallet wins clearly |
| Build time | Slower (gaps, bracing, sealing) | Faster with dimensional lumber | Standard lumber faster |
| Weather resistance | Poor unsealed; moderate with paint + overhang | Good with proper construction | Standard lumber better long-term |
| Longevity | 5-8 years with upkeep (community-reported range) | 10-20+ years | Standard lumber wins on lifespan |
| Predator resistance (gaps) | Requires extra work to seal | Easier to build tight from the start | Standard lumber easier to secure |
| Tool skill required | Low - basic saw and drill | Moderate - measuring, cuts, framing | Pallet easier for beginners |
| Aesthetics | Rustic; variable by pallet quality | Cleaner finish | Subjective; rustic look is popular |
| Repairability | Easy - individual boards replaced cheaply | Easy with matching lumber | Roughly equal |
Pallet wood tends to rot faster than dimensional lumber because it is often mixed species (some boards are pine, some are oak, some are poplar) and individual boards within the same pallet age at different rates. A coat of exterior paint or penetrating wood sealer on every exposed surface extends coop life significantly. Pay special attention to end grain (the cut ends of boards), which absorbs moisture the fastest.
For a first flock, a small pallet coop is an excellent starting point. It lets you learn what you actually want in a coop before committing to a more expensive permanent structure. Many keepers build a pallet coop for the first two years, then upgrade when they know their flock size and preferred layout.
Final checks before the birds move in
Run through this list on the evening before your flock arrives, after the coop has been up for at least a week so any wood treatment or caulk has cured fully.
- Walk the coop interior with a flashlight at dusk: no light visible through walls, floor, or roof
- All hardware cloth secured with screws and washers, not only staples
- Pop-hole door latches closed and tested (try to open it with your hand using the force a raccoon would apply)
- Roost bar installed at 18-24 inches, 2x4 wide-side up, higher than the nest boxes
- Two nest boxes lined with 2-3 inches of pine shavings (never cedar; the aromatic oils irritate respiratory tracts)
- Ventilation open high on the walls, covered with 1/2-inch hardware cloth
- Ground apron pinned flat around the perimeter
- No sharp nail tips or protruding staples inside the bird space; run your palm along every interior surface
The full coop resource hub covers everything from flooring to insulation if you want to keep expanding and improving the setup over time.